Puede parecer algo trivial si eres un observador astronómico experimentado y conoces el cielo mejor que tu casa pero para el recién llegado es una pregunta básica que todos nos hemos hecho alguna vez ¿Cómo encontrar el norte?
La respuesta más obvia es ¡Pues con una brújula! Pero ¿Y si no llevamos una brújula encima? o ¿Y si la brújula funciona mal? En algunas ocasiones una brújula puede funcionar mal debido a que nos encontremos cerca de un yacimiento de hierro o magnetita, por ejemplo. Además, una brújula solo nos indica la situación del norte magnético, no geográfico. Esto sucede también con las brújulas que incorporan nuestros teléfonos móviles.
En observación astronómica, sobre todo nos interesa conocer el norte geográfico si estamos usando una montura ecuatorial y estamos en el hemisferio norte (los habitantes del hemisferio austral necesitan localizar el sur geográfico). Por eso a continuación te daremos algunos trucos para encontrar el norte geográfico sin la ayuda de una brújula.
Para usar correctamente un telescopio con montura ecuatorial es necesario orientarlo al norte.
Cómo encontrar el norte con las estrellas
Para encontrar el norte de noche podemos guiarnos por las estrellas si el cielo está despejado. La forma más fácil es buscar la estrella polar (Polaris). Esta estrella está muy cerca del polo norte celeste (PNC) aunque no se encuentra exactamente en él (está a unos 0,7 grados de distancia).
Para localizar Polaris la forma más sencilla es guiarnos por la Osa Mayor, quizá la constelación más reconocible del cielo por su forma de cazo. Si trazamos una línea recta desde las estrelas Dubhe y Merak que son las que están más alejadas «del mango del cazo» y seguimos 5 veces la distancia que separa a éstas llegaremos a una estrella a simple vista más o menos solitaria que forma parte de la constelación de la Osa Menor (también con forma de cazo pero más pequeño). Esa estrella es Polaris.
Al contrario de lo que mucha gente piensa, la estrella polar no es la más brillante del cielo ni mucho menos.
En ciertas épocas del año, como por ejemplo en invierno, es posible que nos cueste encontrar la Osa Mayor porque esté muy baja en el cielo. En ese caso podemos ayudarnos de la constelación de Casiopea que tiene forma de letra «M» o «W». Ayudándonos de las tres estrellas centrales si seguimos la dirección de la intersección imaginaria de éstas en la parte cóncava también llegaremos a Polaris.
Si no vemos el norte porque hay nubes pero seguimos viendo otras zonas del cielo con estrellas todavía es posible orientarnos si conocemos las constelaciones y sabemos la hora a la que nos encontramos. Otra opción es guiarnos por el brillo de la Luna que siempre se encontrará cerca de la línea de la eclíptica y que siempre va de este a oeste pasando por el sur en su culminación si nos encontramos en el hemisferio norte.
Además, teniendo en cuenta que en cuarto creciente tiene forma de «D», sus cuernos apuntan al Este mientras que en fase de cuarto menguante, con forma de «C», los cuernos apuntan al Oeste.
En Invierno también podremos encontrar el sur ayudándonos por la constelación de Orión. Si trazamos una línea recta entre las estrellas Betelgeuse y Rigel y extendemos su distancia hacia el horizonte encontraremos el sur geográfico.
Una línea recta imaginaria desde Betelgeuse a Rigel nos lleva al Sur.
Cómo encontrar el norte sin brújula de día
De día ya no vemos las estrellas, o mejor dicho, solo vemos una, nuestro Sol. Él nos puede ayudar a orientarnos ya que a medio día se encontrará culminando hacia el sur (recordad que siempre hablamos en relación a observadores del hemisferio norte).
El Sol sale aproximadamente por el este y se oculta por el oeste, más o menos. Decimos más o menos porque depende de la época del año (en verano la eclíptica diurna está más alta) y también depende de la latitud a la que nos encontremos. Teniendo en cuenta estos datos también podemos orientarnos más o menos hacia en norte tomando el Sol como referencia.
Si disponemos de bastante tiempo podemos estudiar el avance de las sombras proyectadas por el Sol para marcar una línea en su recorrido que nos indicarán el sentido Este-Oeste. Una vez trazada la línea sabemos que la perpendicular es Norte-Sur.
Otro truco si nos encontramos en la naturaleza es observar hacia dónde crece el musgo. En estructuras verticales como árboles éste suele crecer hacia el norte en zonas húmedas.
Encontrar el norte con un reloj y el Sol
Esto es bastante curioso pero muy práctico. El método es más o menos preciso dependiendo de la época del año y nuestra latitud. Si disponemos de un reloj de agujas y apuntamos la manecilla de las horas hacia el Sol el punto intermedio entre la manecilla de las horas y la posición de las 12 en la esfera indica el sur, por lo tanto el lado contrario de esa bisectriz indica el norte. Recordad usar la hora solar para este método, en España sería 1 hora menos en invierno y 2 en verano.
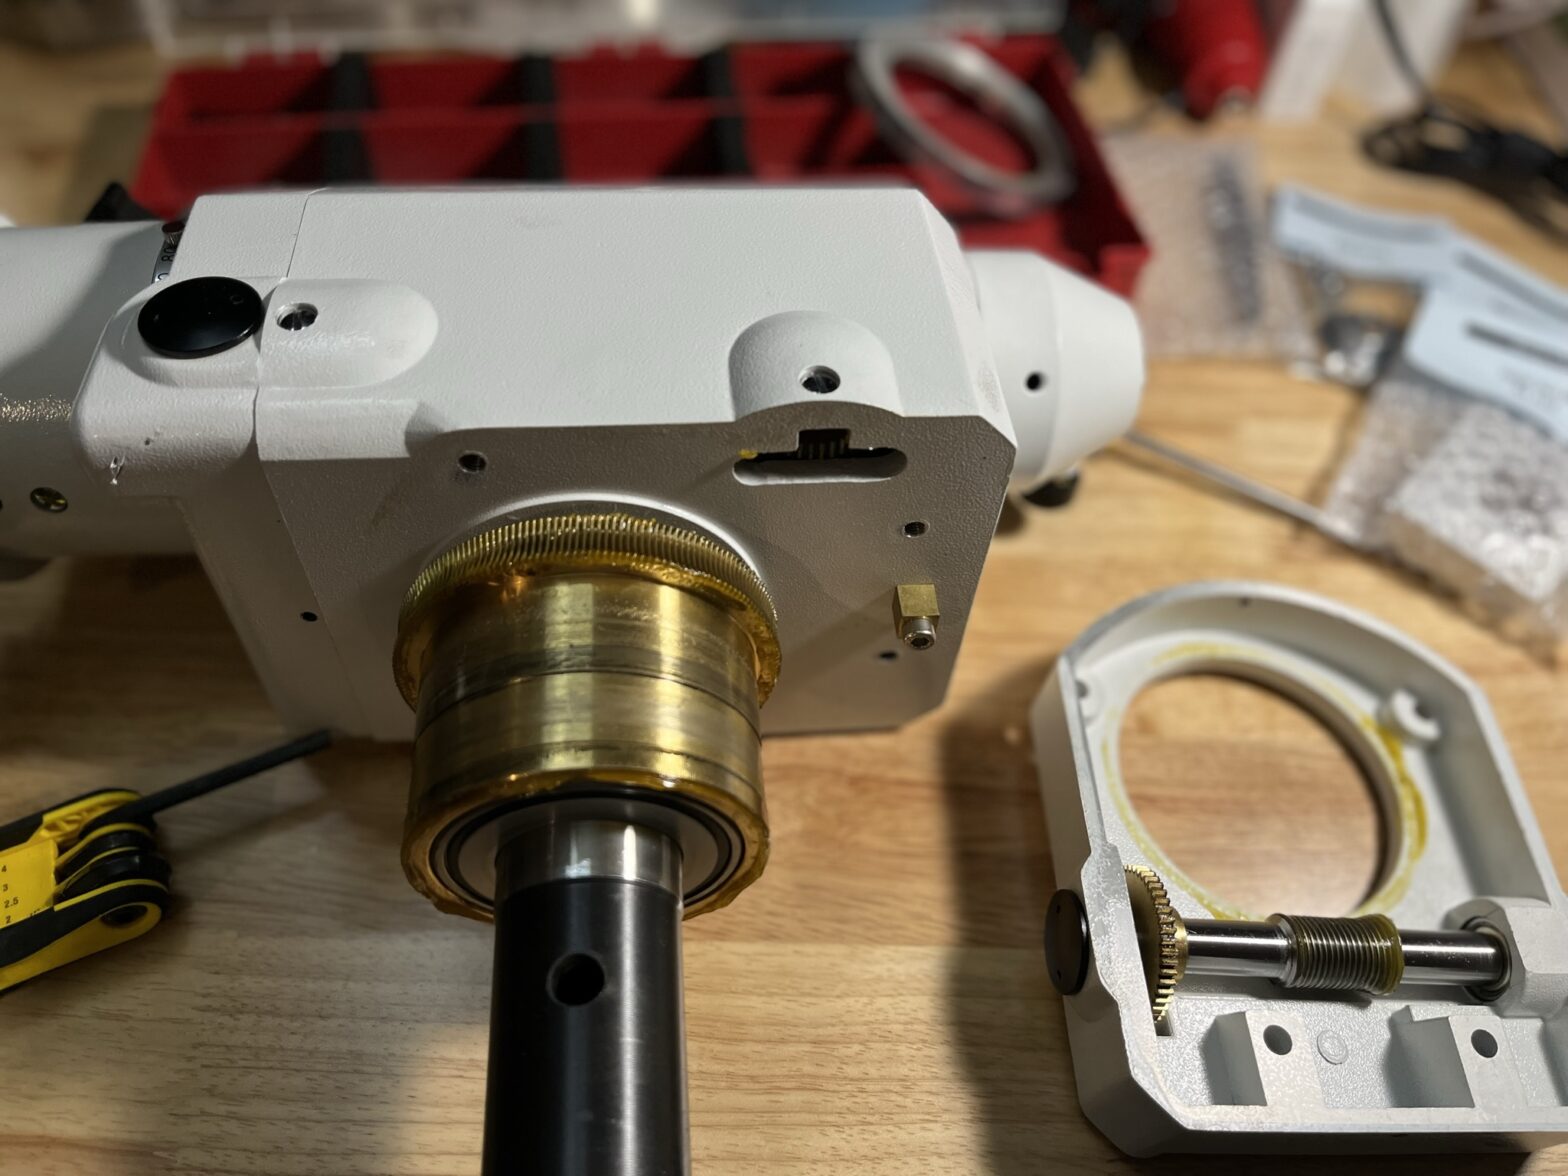
And so I’ve decided now to open up the mount and begin the process. I really helps a lot watching a few YouTube videos and reading Rowan Astronomy‘s instructions thoroughly.
There are a few minor steps that would easily make me damage my mount. Below are a few photos attached from the very first steps of taking the mount apart.
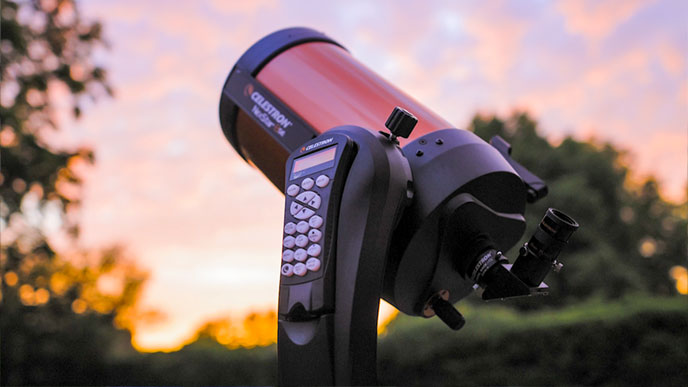
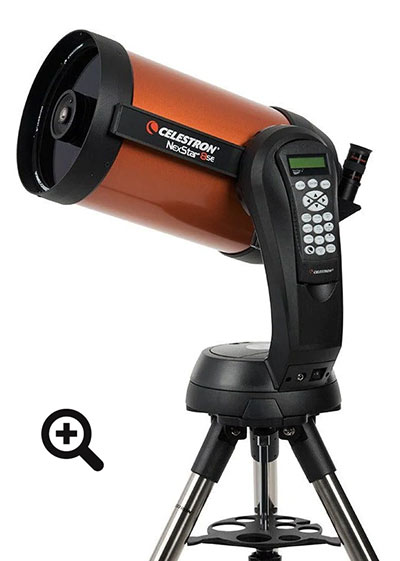
The Celestron NexStar 8SE computerized telescope is one of the best-selling telescope packages of all time. It features a large aperture optical telescope and a computerized GoTo mount.
The NexStar series of SCTs have been around for over a decade, and I was finally able to experience this beginner-friendly telescope for myself.
I was impressed with the completeness of this package, from the 1.25″ 25mm eyepiece and diagonal, to the red dot finder mounted to the 8-inch OTA.
Celestron NexStar 8SE Video Review.
This is a primarily visual telescope, meant for enjoying views of the moon, planets, and the brighter nebulae and galaxies through the eyepiece.
But what about astrophotography? The design of the tracking telescope mount (fork-mounted Alt-Az) wasn’t designed for it, but is it a complete waste of time?
In this post, I’ll show my results using Celestron’s NexYZ smartphone adapter. If you’re in the market for a grab-and-go telescope (that excels in views of the moon and planets), I think you will enjoy my review of the Celestron NexStar 8SE.
Celestron NexStar 8SE Review
Is this the all-in-one telescope package that does it all? Not quite, but that’s okay. It gets the important parts right. The telescope OTA (optical tube assembly) is top-notch, while the mount is just enough to get you by.
I asked the AstroBackyard community on Facebook how they felt, and almost all of them had amazing things to say about this telescope. From seeing their first-ever view of the planet Saturn to surprisingly impressive astrophotography, the NexStar 8SE is a widely appreciated piece of kit.
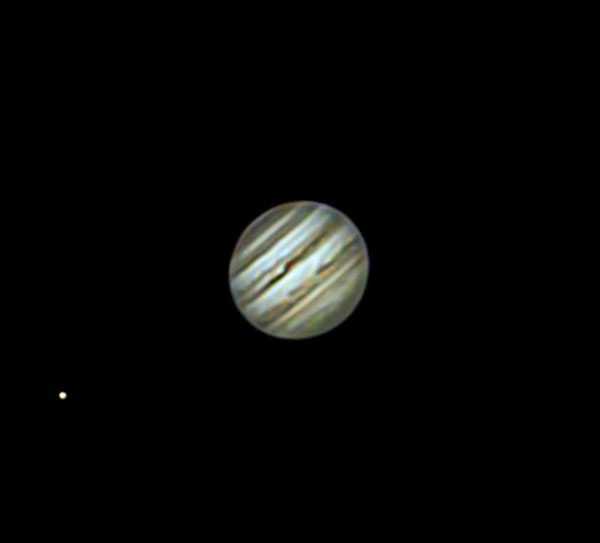
Here is a spectacular photo of the planet Jupiter, captured by Christian Ralph using his Celestron NexStar 8SE telescope.
The planet Jupiter captured using the Celestron NexStar 8SE (Christian Ralph).
There are a few quirks of course (the red dot finder scope is rudimentary, and the single-arm fork mount is a little wobbly), but overall everyone seemed to agree that it was a smart purchase and they got a lot of use out of it. Some people even mentioned that had sold the scope, and wished that they had kept it.
As an astrophotographer, the first thing I noticed was the Alt-Az fork mount, and that’s not what you want if your primary interest is long-exposure astrophotography. (An equatorial telescope mount is best).
But, people have taken impressive images with this telescope, it just requires a different approach. If you’re into photographing planets the Celestron NexStar 8SE will work out just fine. This 8″ SCT was meant for crisp views of solar system objects, and that is where it excels.
If you look at the specifications for this telescope, it highlights some pretty impressive potential for a variety of visual observations. I can see why beginners are drawn to this package as their first serious scope.
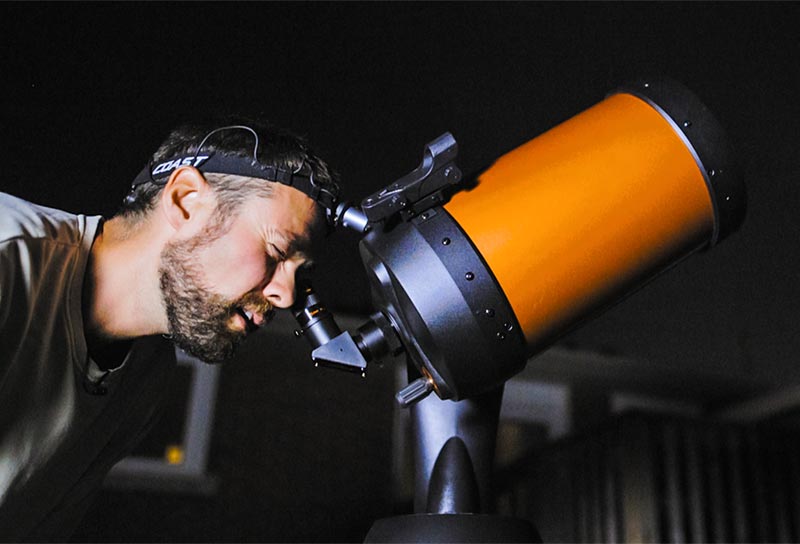
The NexStar 8SE is great for spur-of-the-moment observing sessions of the moon or planets.
NexStar 8SE Telescope Specifications
Aperture: 203 mm (8″)
Telescope Focal Length: 2032 mm
Focal Ratio: F/10
Camera/Eyepiece Connection: 1.25″ Nosepiece
Diagonal Included: Yes
Tripod Weight: 10 lbs
Tube Weight: 12.5 lbs
Computerized: Yes
Drive Type: DC Servo motors
Optical Design: Schmidt-Cassegrain
Secondary Obstruction: 35mm
Tube Diameter: 226mm
Tube Length: 432mm
Included Items
8-inch Schmidt-Cassegrain OTA
NexStar SE Mount: Motorized Alt-Azimuth/ GoTo
Tripod with Adjustable Steel Legs
Red Dot Finderscope
Accessory Tray
NexStar+ Hand Controller
1.25-inch Star Diagonal
1.25-inch, 25 mm Eyepiece
Mini-USB Port
Celestron Starry Night Software
2 Year Warranty
First Impressions
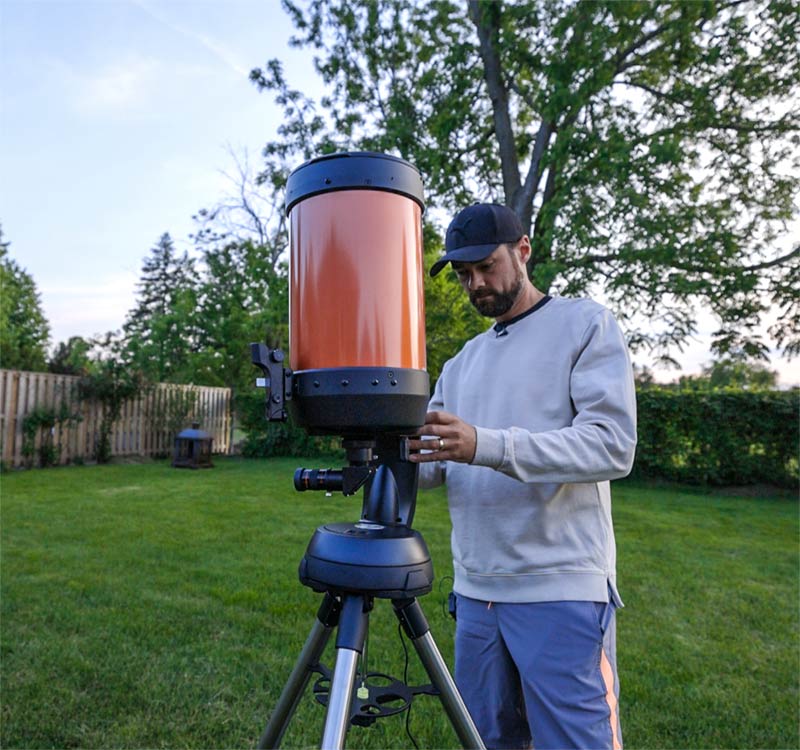
Setting up the Celestron NexStar 8SE for the first time was a quick and painless experience. Once assembled, the entire kit is light enough to be carried around the yard if necessary.
I used an AC adapter to plug the mount into household power in the backyard, but this mount can also be powered via 8 x AA batteries for complete mobility.
Although the red dot finderscope is simple and inexpensive, it is surprisingly effective at confirming the pointing direction of this high magnification telescope.
Tripod
Right out of the gate, I noticed a few things. The tripod I would call “medium-duty”, it’s similar to the one that comes in the newest Sky-Watcher Star Adventurer GTI package. It seems stable enough for a mount and scope of this size, and it keeps weight down for travel.
The trade-off of a heavier more stable tripod probably isn’t worth the extra weight. The mount head connects securely using 3 threaded bolts. It has a nice design and it feels secure.
Single Arm Fork Mount
The mount head unit and fork arm have a plastic outer casing, reminding you that this is a budget-friendly GoTo telescope package. The Celestron NexStar remote seats neatly inside of the arm, which is a clever space-saving design.
Users of this Celestron NexStar 8SE mentioned that a dual-arm fork design (like the one on the CPC series telescopes) would help the OTA feel a lot more secure. The motorized mount head is where the cost savings come into play. It feels a little “toy-ish”, but the 8″ NexStar OTA reminds us that this is a serious telescope.
Schmidt-Cassegrain Telescope
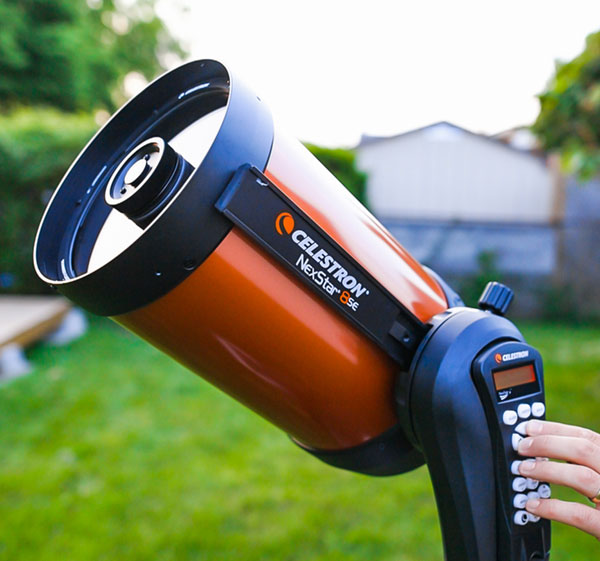
It’s an 8-inch Schmidt Cassegrain telescope with a focal length of 2032mm at F/10. The orange tube Celestron SCT has been in production since 1970, and for good reason. It packs plenty of light-gathering power into a compact, practical size.
The optics on this telescope deliver crisp, high-contrast views, thanks in part to Celestron’s Starbright XLT optical coatings.
This telescope collects light at an f-ratio of F10, which is much “slower” than a typical reflector or refractor telescope. This means that the fainter nebulae and galaxies will be tough to observe, especially if you’re observing the night sky from a light-polluted city.
The 8″ SCT optical tube assembly mounted to the single-arm fork mount.
NexStar Hand Controller
The Celestron NexStar 8SE includes a NexStar hand controller, with over 40,000 objects in its database. The hand controller fits neatly inside the arm of the fork mount, and can also be extended for use while at the eyepiece. This is a clever design and works well in the field.
25mm Plossl Eyepiece
A 1.25″ 25mm Plossl eyepiece was included with the telescope. This is a useful magnification for a variety of objects in the night sky from planets, to bright galaxies.
It is important to use an eyepiece that does not have a high magnification when aligning the telescope. You may want to purchase an even wider eyepiece (such as a 32mm Plossl) for this purpose.
The higher the magnification of the eyepiece, the more “searching” you will have to do to align the telescope mount to a bright star.
Portability
Even with the large aperture SCT telescope, the entire kit weighs just 24 lbs in total. The mount, telescope, and tripod can break down into individual parts for easier transport.
This telescope is much easier to bring with you to a dark sky site than an equivalent aperture Dobsonian telescope.
The fully-assembled setup can easily be lifted up and moved across the yard, or brought back into your house or garage.
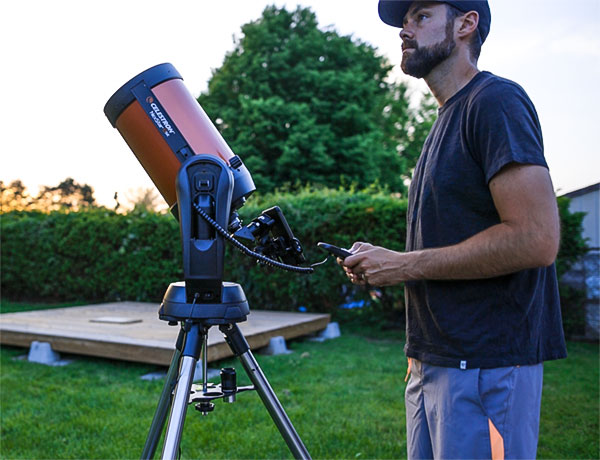
GoTo Computerized Mount
One of the biggest draws to this telescope, aside from the compact, travel-friendly design, is its computerized GoTo functionality. You can choose an object you would like to view on the hand controller, and the telescope will point right to it.
Of course, to do this, the telescope needs to be where it is on earth for accurate pointing. Luckily, this is a dead-simple process called “SkyAlign“.
The SkyAlign feature is used on several Celestron mounts including the NexStar GT, NexStar SLT, NexStar SE, NexStar Evolution, SkyProdigy, Astro Fi WiFi, and CPC telescopes.
To align the mount you need to point to (and center) three bright stars in the night sky.
You don’t have to know the location or name of a single star in the sky for it to work. You simply choose your location from the database, I chose Toronto (close enough), and point the scope at three bright stars. Any 3 bright stars.
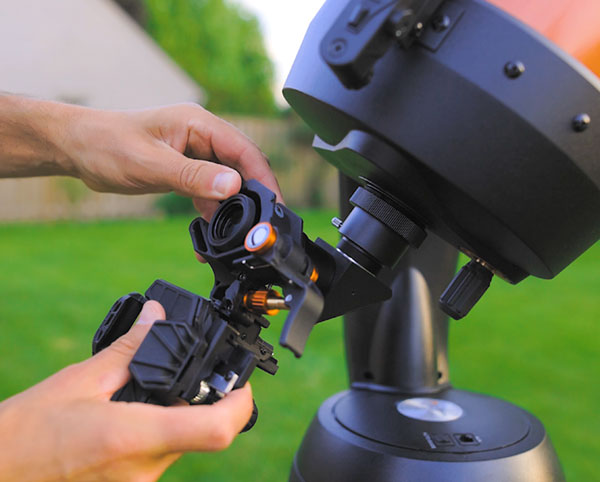
To help you point directly at them, you can use the included red dot finder. Keep both eyes open, and move the scope until the red dot is directly on the star. When you look in the eyepiece, it should be right there, or very close.
Then center the star, and confirm these 3 positions. Once that is done, your telescope knows exactly where to point.
On my first night out with the Celestron NexStar 8SE, I chose to observe the Ring Nebula in the cancellation Lyra. Sure enough, with the simple SkyAlign routine performed beforehand, the telescope slowed right to it, first try.
Now that is a positive first experience. Bravo Celestron.
Recommended Accessories
To really enjoy using this high magnification telescope, do yourself a favor and pick up a nice wide-field eyepiece. As I mentioned. the NexStar 8SE package includes a 1.25″ 25mm Plossl, which is a decent start.
A wider eyepiece will make the star alignment process a little easier and makes for a brighter view. I tested an old Celestron 32mm Plossl eyepiece on the 8SE, and it provided a slightly wider, brighter view through the telescope.
A wider (lower magnification) eyepiece will make the SkyAlgin process easier because the alignment star will be easier to locate in a larger area of sky. If you are looking for a suggestion, I recommend the Tele Vue 32mm Plossl Eyepiece.
If it’s planets you’re after, get a decent high magnification eyepiece too, something in the 10mm or lower range. Keep in mind that the view through a high magnification eyepiece under 10mm will be much dimmer.
The Celestron Luminos 10mm eyepiece is great for viewing planets up-close.
Celestron NexYZ Smartphone Adapter
Yes, you can do astrophotography with the Celestron NexStar 8SE! The simplest way to get started is to use your existing smartphone, and hold it up to the eyepiece of the telescope.
Using this method (eyepiece projection astrophotography), you can capture impressive images of the Moon, Jupiter, Saturn, and even Mars. Keeping the phone still enough for a photo, and lining the camera lens up with the center of the eyepiece is the tricky part.
Thankfully, the Celestron NexYZ smartphone adapter can help with these tasks, thanks to a clever 3-axis design. The adapter clamps on to the objective of the eyepiece (both 1.25″ and 2″ eyepieces), and securely holds your phone in place.
The Celestron NeXYZ Smartphone Adapter.
You can use the 3-axis adjustment knobs to center your smartphone’s camera lens in the eyepiece. Using the “pro” or “manual” mode of your camera, you can fine-tune the camera settings to take an amazing photo of the Moon’s surface or Saturn’s rings.
Smartphone astrophotography with the Celestron NexYZ adapter is best for pictures of the moon and bright planets. Deep-sky astrophotography (of galaxies and nebulae) will require additional hardware such as the Celestron NexStar SE & Evolution Wedge and the proper adapter and t-ring for your DSLR.
Related Post:How to Attach a Camera to Your Telescope
Best Objects to See in the NexStar 8SE
The Celestron NexStar 8SE is best used for high-magnification views of the Moon and planets. Using the included 25mm Plossl eyepiece, the views of Saturn and Jupiter are incredible.
The SkyAlign feature allows you to get up and running quickly, so you can start observing sooner. Here are some examples of objects you can enjoy seeing through the Celestron NexStar 8SE, even from your backyard:
The Moon
Saturn
Mars
Jupiter
Venus
Ring Nebula
Dumbbell Nebula
Pleiades
Andromeda Galaxy
M13 Globular Cluster
Final Thoughts
I have a soft spot for equipment that makes the astronomy experience welcoming and approachable. Too many beginners have had a frustrating experience on their first night under the stars, and many of them do not return to the hobby.
The NexStar 8SE can deliver you your first view of the planet Jupiter, or the Andromeda Galaxy. Getting to this point is straightforward and rewarding, and does not require existing comprehension of the night sky.
The single-arm fork-mount design isn’t perfect, and it sacrifices stability for a compact, portable design. In a nutshell, the telescope and optics are fantastic, the mount is not.
When slewing the telescope at slower speeds (4 or below), I noticed that the response is “laggy”, meaning that the telescope does not move for a second or two after pressing the arrow button.
Be advised that touching the telescope or eyepiece while viewing an object will result in a shaky image, so keep those hands off while observing. This is something you will need to get used to.
The NeXYZ smartphone adapter is a great little design, probably the best one on the market. But capturing anything other than the moon or planets will be challenging.
Others have done it, but unless you’re willing to put the time in using a phone for deep-sky, stick to solar system objects.
You can fasten a DSLR camera or planetary camera to the telescope for much better images, but to accurately track objects you will need to invest in a wedge to orient the telescope towards the celestial pole.
The NexStar SkyAlign system is dead simple to perform, and you can skip over the polar alignment process and get straight to observing. The telescope can find and follow an object in the night sky for you.
Saturn stayed in the center of the eyepiece for almost 20 minutes at over 2000mm focal length – try to do that with a manual dob.
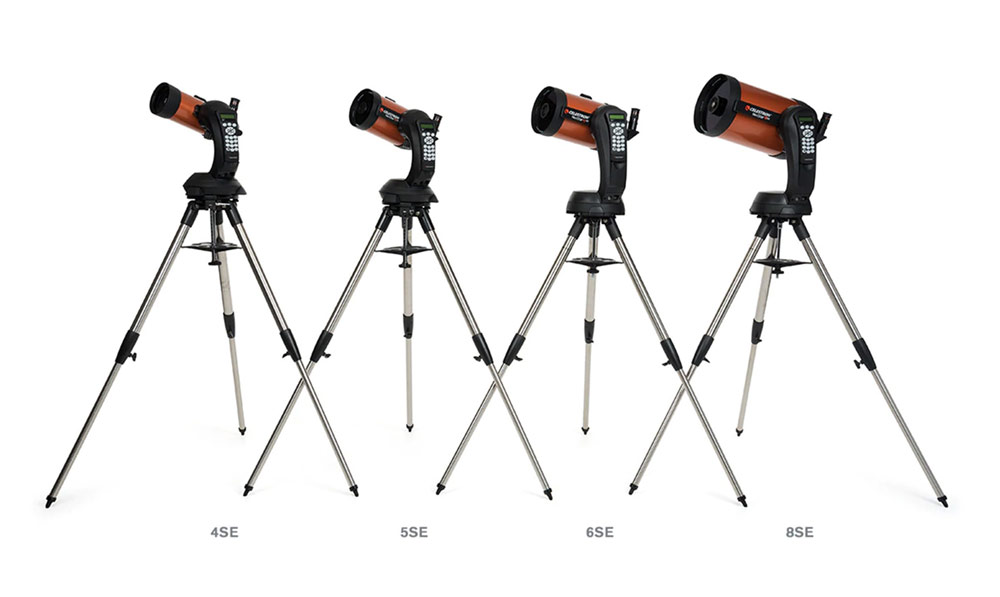
The 8″ telescope has enough aperture to deliver amazing views of the moon, planets, and brighter nebulae and galaxies. If the price of the 8SE is too steep for you, you have options. This telescope comes in 4, 5, and 6-inch versions.
The NexStar series of computerized Schmidt-Cassegrain Telescopes.
Overall the Celestron NexStar 8SE is a remarkable product, and I highly recommend it to anyone looking for a practical, travel-friendly, visual scope that allows you to get your feet wet in astrophotography.
Until next time, clear skies!
I was loaned this telescope from OPT for testing purposes, and was under no obligation to provide a positive review, nor was I compensated in any way for this article (or video).
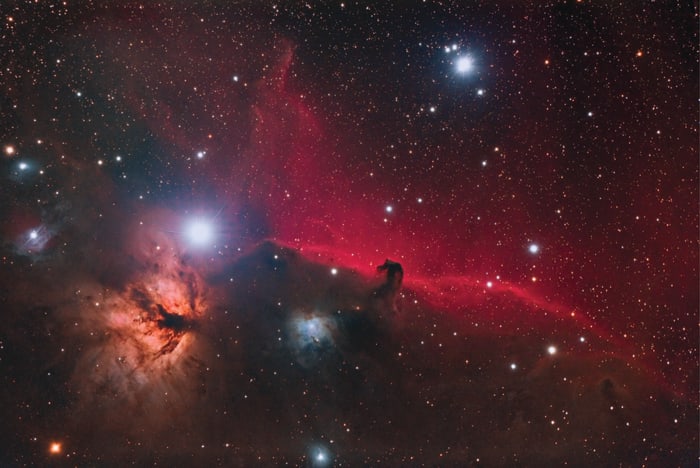
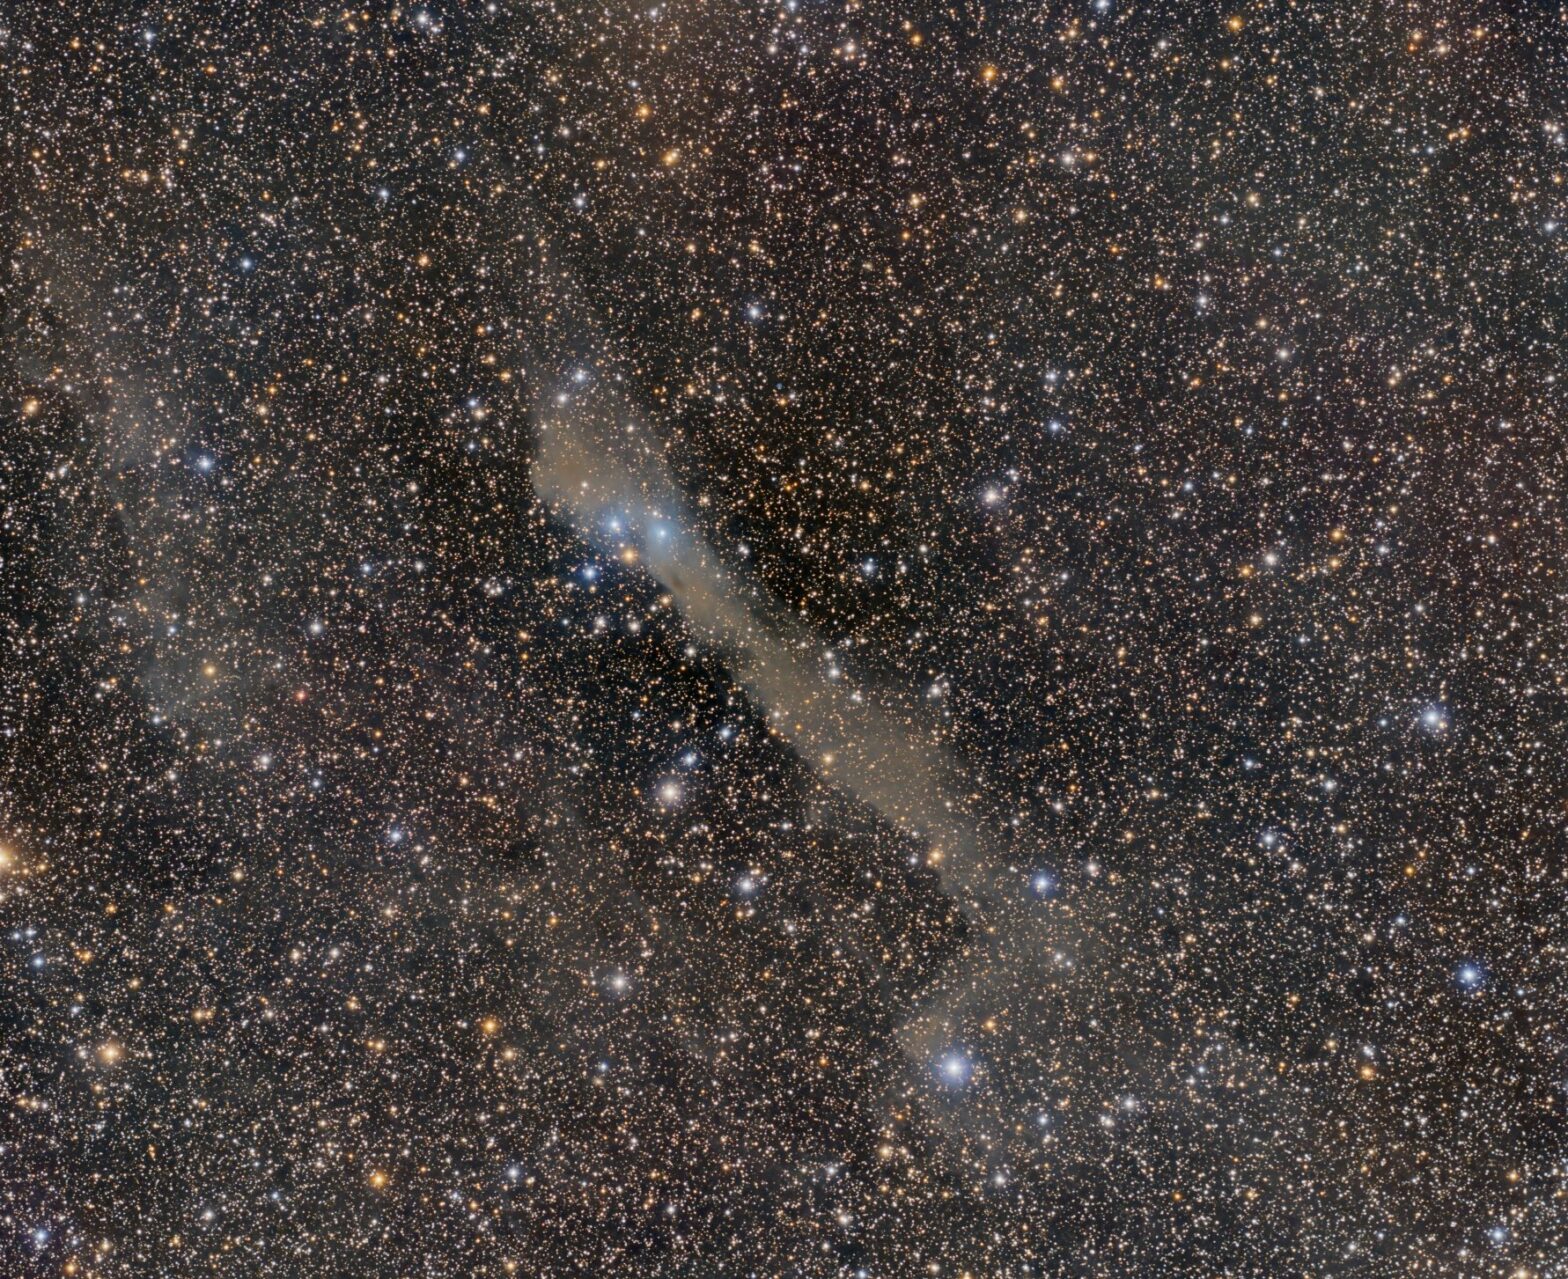
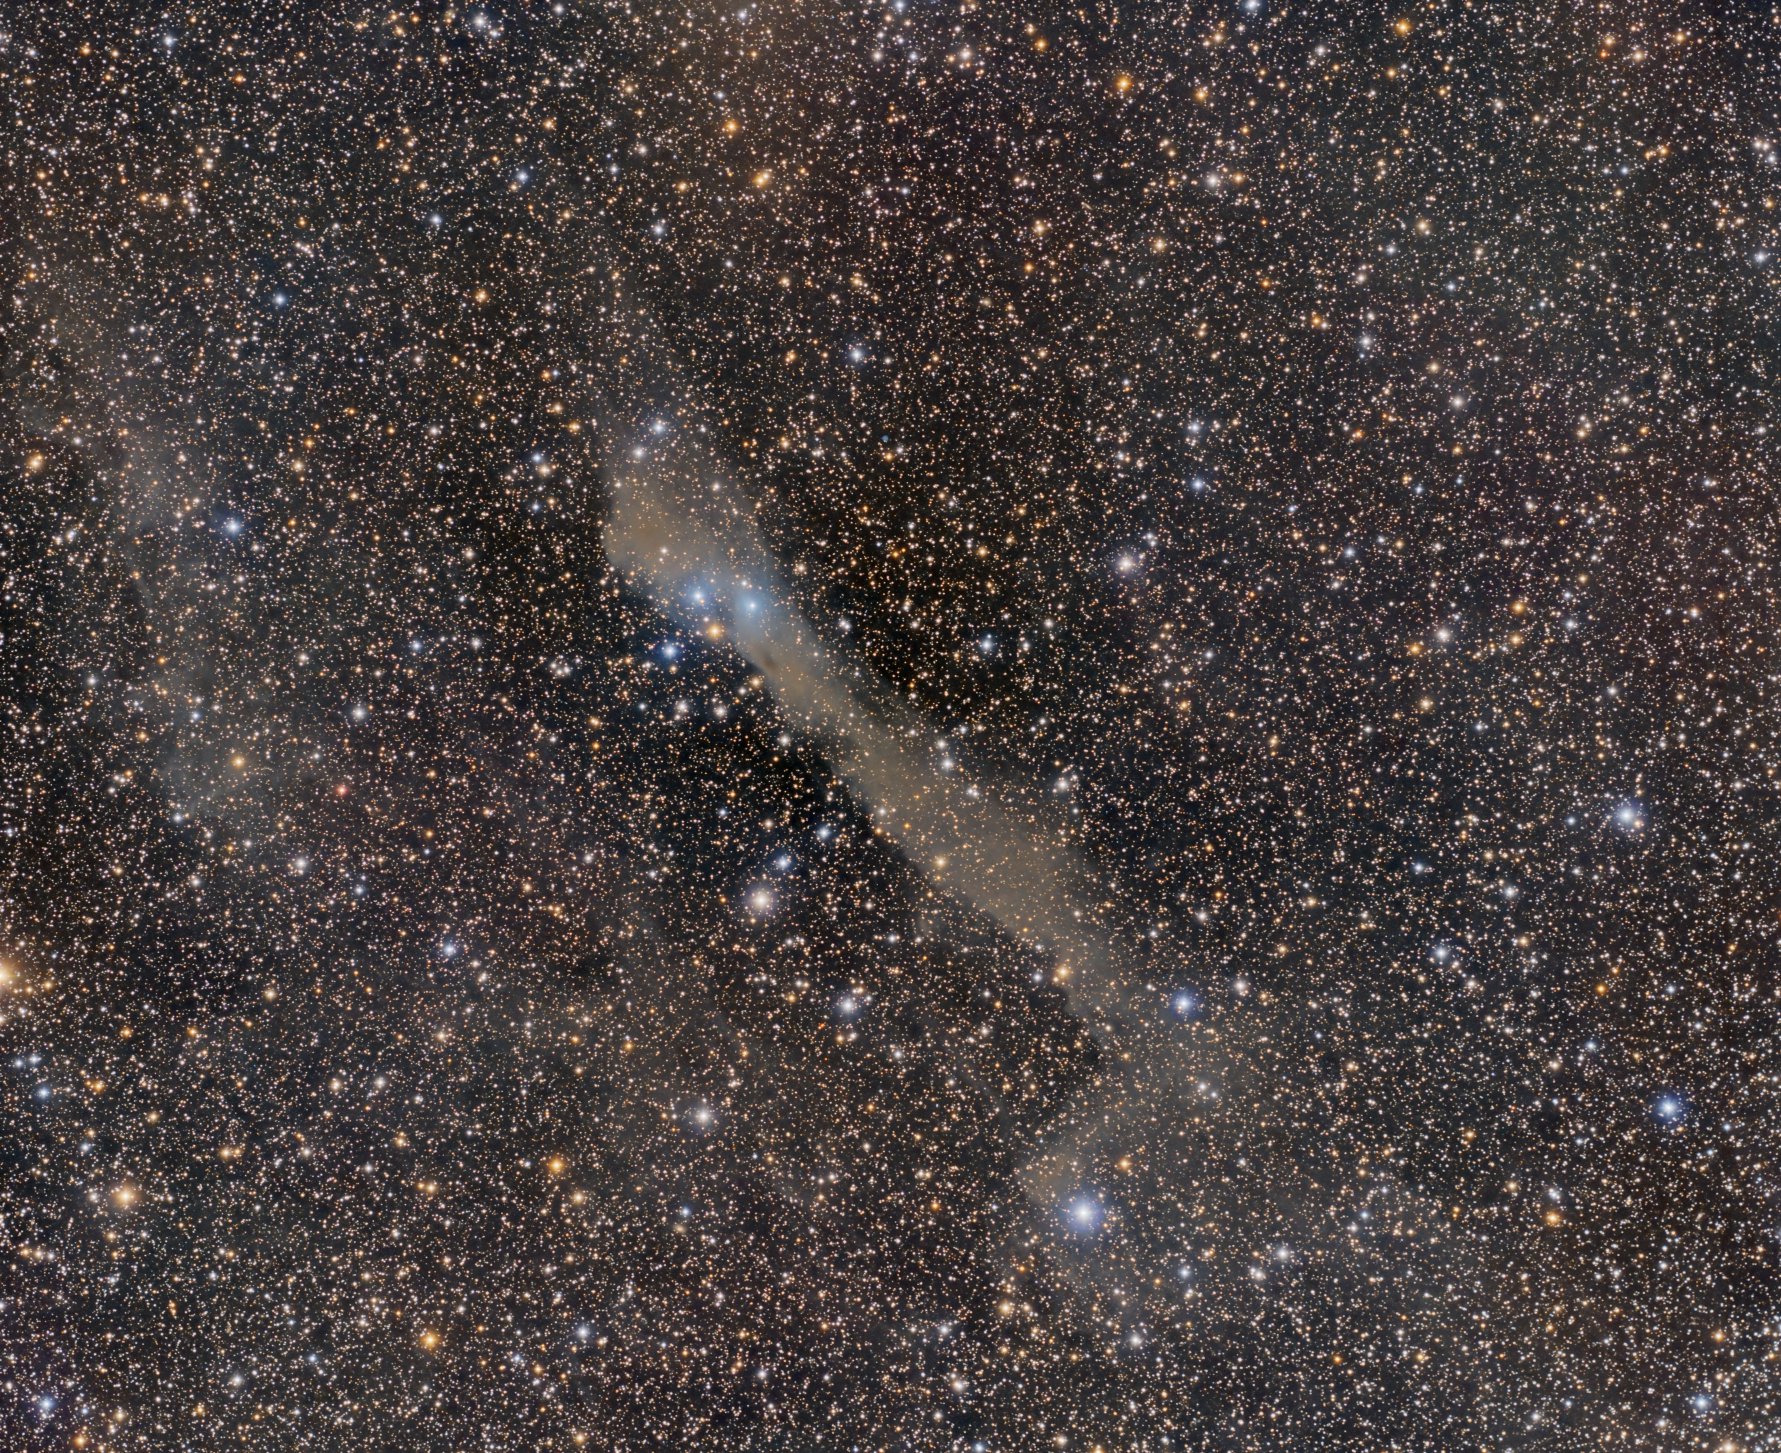
It’s been a while since I last visited this object, a dust cloud on the Andromeda / Cassiopeia border (http://andrewluck.me.uk/?p=1058 & http://andrewluck.me.uk/?p=948). This is the first time with a monochrome camera and RGB filters; previous attempts have been with the KAF8300 equipped QHY9C OSC camera.
The field with the G3-16200 is much larger and provides a better context for the object. Better data, and much improved processing skills have revealed a lot more of the surrounding faint clouds.
This is about 12 hours of RGB data acquired in 10 minute subframes. I’m not a fan of LRGB imaging and very rarely use luminance, preferring instead to spend longer capturing the colour data at bin 1×1. Processing is exclusively Pixinsight.
ORLANDO, Fla. – Orlando Science Center is welcoming a new astrophotography exhibit called “Capturing the Cosmos.”
This exhibit, on display Oct. 29 through Jan. 29, 2023, will feature a selection of cosmic images by Derek Demeter, a renowned astrophotographer and director of the Emil Buehler Planetarium at Seminole State College.
[TRENDING: News 6 anchor Matt Austin fires back at trolls in defense of his daughters | Brevard County Sheriff’s Office K-9 gives birth to litter of 10 puppies | Become a News 6 Insider]
Visitors will be able to see these images in “Fusion: A STEAM Gallery” at Orlando Science Center.
Photos of scenic nightscapes, celestial bodies within space, colorful nebulae and expansive galaxies uniquely shot from Florida will all be featured in this exhibit.
According to a news release from Orlando Science Center, Demeter has been passionate about stargazing since he was a child and his interest in astrophotography stemmed from his college photography courses where he used the school’s telescope to capture a photo of the Orion Nebulae.
“Demeter wants this show to capture the audience’s imagination and unlock a passion for the night sky. He hopes it inspires an appreciation and respect for our night sky and encourages people to preserve our dark spaces for generations to come,” according to the release.
“Capturing the Cosmos” is included with admission, which costs $24 for adults and $18 for kids ages 2 to 11.
For more information or to pre-purchase general admission tickets, click here.
Get today’s headlines in minutes with Your Florida Daily:
Copyright 2022 by WKMG ClickOrlando – All rights reserved.
TNI Bureau: Ladakh is ready to get the first Dark Sky Reserve of the country months after plans were announced to launch a unique initiative. Radha Krishna Mathur, the Lieutenant Governor of Ladakh, will virtually inaugurate the facility on October 31.
The initiative by the Ladakh Autonomous Hill Development Council (LAHDC), the Union Territory administration, and the Indian Institute of Astrophysics, Bengaluru aims to lower light pollution in the region for better observations and to boost the local economy by harnessing the power of astronomy.
What is dark sky reserve?
The Dark Sky Reserve is located at Hanle, which is about 300 kilometers away from Ladakh and is part of the Changthang Wildlife Sanctuary. As part of the initiative, 24 astro ambassadors have been selected from a cluster of five villages in and around the Indian Astronomical Observatory (IAO).
Support Independent Journalism? Keep us live.
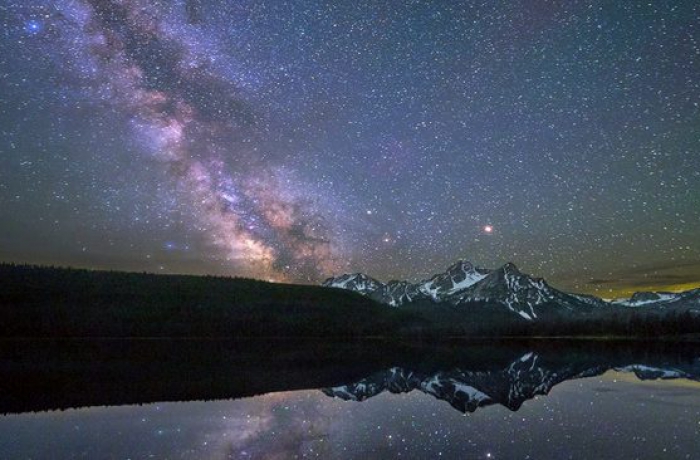
Funded by the LAHDC, the astro ambassadors will be provided with 8-inch Dobsonian telescopes that will be used to look out into the universe and provide a new avenue of income. The ambassadors will cater to tourists visiting Hanle in hopes of catching a glimpse of the Milky Way galaxy, which shines through the night in the region due to its cloudless skies and lower atmospheric disturbance.
The Dark Sky Reserve will be centered in a radius of 22 kilometers around the Indian Astronomical Observatory in Hanle.
A total of 24 astro ambassadors have been selected out of over 70 applications received for the opportunity. They have been trained in handling telescopes and identifying objects, stars and different patterns in the sky. The ambassadors have gone through workshops with IAO and astronomers from IIA Bengaluru.
About 70 per cent of the applications received for the post of astro ambassador came from girls and of the 24 finally selected, just 7 are boys.
With the virtual inauguration on October 31, the ambassadors are also being trained in avoiding light pollution and have been provided with special curtains to lower light pollution. After getting hands-on experience with telescopes, the astro ambassadors are also interested in getting trained in astrophotography.
***CLICK on the Above Image to go to Flickr and see options for up to a 10,000 pixel version***
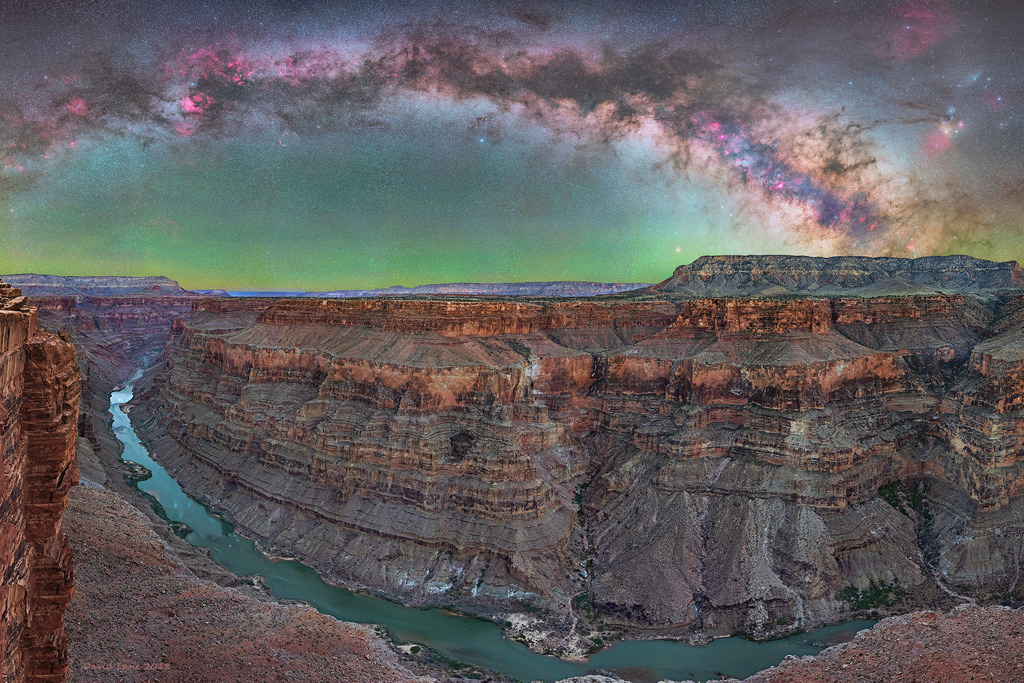
Tuweap also known as Toroweap is at the far western edge of the Grand Canyon National Park. It’s a really rough drive out to the edge. 65 miles off pavement and the last 7-8 miles you need 4×4 to make it.
This is a huge panorama 80 separate images. Stitched on their edges. 40 for the sky and 40 for the ground. Standing on the edge of a 3,000 foot drop 6″ from death in total darkness is a bit unnerving, especially since the ground exposure was about 30 minutes. Hence the detail of a very realistic view of this fabulous viewpoint. If you have 4×4 get out to see this! WAY worth it, its the most unreal part of the Grand Canyon.
Click on the image to go to Flickr and see this image up to 10,000 pixels.
***Warning 80mb image***
If you have the bandwidth click on the big image, zoom in and see what you can see at night, at the bottom of a black canyon.
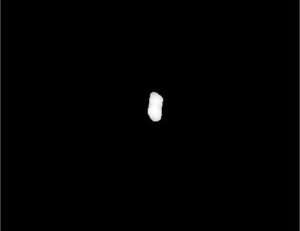
When working with bright objects in images we run the risk to clip signal while processing, or the signal might already be clipped to begin with. For big features that are really bright we can take images at different exposure times and use HDR processing to make sure we have all the information there and a good looking final image. However, sometimes we might not realise this happening or it is just some small features. To me, this happens a lot whenever there ‘happens to be’ a planetary nebula in the FOV. They are not the main target and I might discover them only when working on the images. They are often bright though, so bright they can easily clip, especially if you are using Ha together with RGB. In this situation there is a solution though: it might be clipped in the Ha data, but surely the RGB data has non-clipped signal there! This was the case with an image I’m currently working on and I want to share the way I used the RGB data to fill in the clipped signal in my HaRGB combined image. But this will also be applicable to just RGB data. In many cases you are clipping signal during processing and you can easily make an alternate version of your data specifically targeting the previously clipped area. You can then use the data from the alternate version to fill in the clipped area in your ‘main version’ of your image.
Find the clipped signal
The Readout will tell you the values for the pixels and you can just go with your mousepointer to the object and see if it says 1.0 in any of the channels. In this case you’ll have 1.0 for R of course. We can use Pixelmath to show us clearly where in the image we can find clipped signal. This will most likely also contain some stars. So for this I split the HaRGB image in the seperate color channels and use the following formula: iif(HaRGB_R =>0.999,HaRGB_R,0) And let it return a greyscale image. Now you have clearly visible where the pixels are you might want to target. So why are we using 0.999 as a value instead of 1.0? This has to do with the fact that we start counting at 0 and this is the first value. Therefor we can never reach 1 because we are limited by the amount of values we can store. (compare it to counting to 10 on your 10 fingers, but starting at 0 )
In my case this was the result for the area I’m interested in:
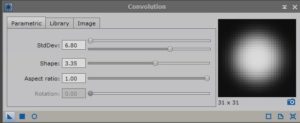
Create clipped signal mask
Now we can use this image to use as a mask to target only the pixels we want. You can use the CloneStamp tool if you have any structure or pixels in there you don’t want to replace. In order to get a good result however, we can’t use the image just like it was returned from PixelMath as it has really sharp edges wich will result in ugly transitions. So to smoothen the edges we use Convolution with some high settings and smoothen the mask.
For me this was the result: Much better!
If you need more control over the blur however, you could also use PixelMath and create multiple masks for different pixel values. You can then combine those masks with different strengths to create your own smooth transition. For instance; create a mask1 for pixel values above 0.9999, mask2 for pixel values above 0.9995, mask3 for pixel values above 0.999, etc. Then combine those masks with different strenghts in PixelMath by simply adding them together with different multiplications like; 1*mask1+0.8*mask2+0.6*mask3 etc.
Replace clipped signal with RGB data
Now we can simply use the mask on the main image and use PixelMath to copy over the non-clipped signal. To do this you need to apply the mask you just created to the main image. Then open PixelMath and simply type in the name of the image that contains the non-clipped signal you want to copy over. Make sure you checked ‘Replace target image’ since masks don’t work when you use Create new image. Now drag the New instance icon (the little triangle in the bottom left corner) over on the main image and you’re done! To tweak the results a bit you can experiment with turning up the signal you copy over a bit by simply using a multiplication in PixelMath. So instead of just using the image name you can put in RGB*1.2 to strengthen the signal a bit.
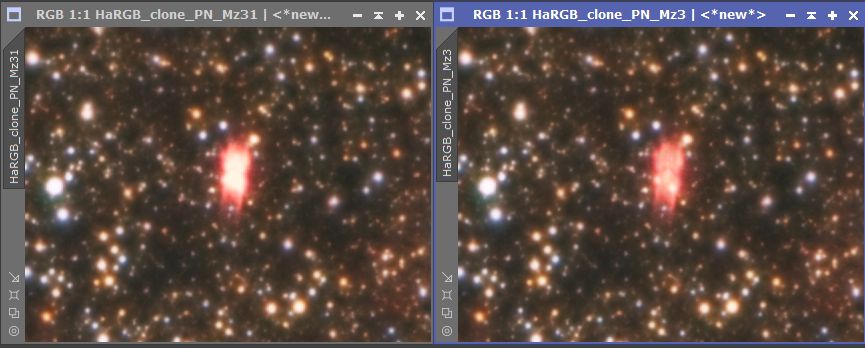
The result
In my case this was the result.
Eventhough it’s just a tiny area of 60 by 90 pixels in an image of 11308×7880 pixels, I do think paying attention to the little details like this is worth it. Especially if it’s in areas of high significance in terms of objects
A special thanks to Niall Saunders who helped me out with this on the PixInsight forums.
La gran tormenta de polvo que amenazaba a la continuidad de la misión Insight de la NASA comienza a dar muestras de debilitamiento con el cambio de estación en el planeta rojo.
Tras un mes de nerviosismo en la agencia espacial por el desarrollo de esta tormenta debido a que en ocasiones suelen ser intensas y muy persistentes parece que poco a poco se va dispersando y los paneles solares de las sonda vuelven a recibir más luz solar.
Recordemos que una gran tormenta global de polvo fue la causante de que en 2018 la misión Opportunity llegase a su fin. Los rovers Curiosity y Perseverance no corrían riesgo ya que obtienen su energía de sus generadores por radioisótopos (MMRTG), pero la sonda Insight si que es dependiente de la energía solar.
Grandes tormentas de polvo que cubren todo el planeta
Algunas tormentas de polvo locales se producen durante cualquier época del año marciano, pero las tormentas más grandes se vuelven más comunes a medida que finaliza el verano en el hemisferio sur, llegando a convertirse en enormes tormentas globales que afectan a todo el planeta. Esto fue lo que sucedió en la pasada oposición de Marte en 2020 en la que una gran tormenta de polvo cubrió la totalidad del planeta privándonos de las mejores imágenes justo cuando estábamos más cerca.
La tormenta de polvo y la localización de las sondas de la NASA. (Crédito de la imagen: NASA/JPL-Caltech/MSSS)
Debido a los desequilibrios de calor producidos en los cambios de estación y a la menor gravedad y densidad de la atmósfera marciana las tormentas de polvo además de globales suelen ser muy duraderas.
Los científicos creen poco probable que veamos otra gran tormenta de polvo este año en Marte así que parece que podremos disfrutar del planeta rojo durante estas semanas próximas a su próxima oposición, el 8 de diciembre. Recordad que es el mejor momento para apuntar nuestros telescopios hacia el planeta rojo e intentar observar sus casquetes polares, valles y planicies.
Imagen de marte durante la pasada oposición en 2020.
Numerosos astrónomos aficionados llevan ya varios días siguiendo la evolución del acercamiento de Marte y habían constatado que la gran tormenta de polvo era notable en sus fotografías planetarias. Esperamos que el tiempo mejore y poder empezar a hacer seguimiento de esta nueva oposición marciana.
Perfectly silent and with zero backlash. Last night I finished calibrating and allowing the mount to carry the full weight of all scopes I’m using and still perfectly silent and smooth. I’m hoping for some great and starry nights ahead of me soon.
The gap in the foreground where the timing belt will come through
R.A. motor in a close up image
R.A. axis opening with the LED-light in the background
Rowan Astronomy Worm Mount
Rowan Astronomy Worm Mount middle and right. The old worm mount case on the left and the lubricant used to re-lubricate the screw
Side by side comparison of worm mount cases
The mount split in DEC and RA halfs
The fascination of star gazing had already started during the very first years of my childhood. I was looking up at the night sky with my grandfather every summer night, studying constellations, the phases of the moon cycle, counting satellite passages and by using his binoculars to discover globular clusters of stars. Equipped with star maps from his home-library I was gradually discovering more and more of this fascinating world we call universe.
Even though years went by, the interest and fascination of cosmos had never left me… I found myself occupied with many other things before astronomy finally became my main hobby in recent years.
I was born in Stockholm, Sweden 1979 and grew for the most part of my childhood years in Greece. Later I’ve studied physics at Lund’s university and was hoping to continue with astronomy. At my free time I was an active amateur astronomer in South Sweden, Lund. At some point I was also appointed as chief of observatory for the Tycho Brahe Astronomy Society in Lund.
Circumstances in life led me to move with my family to California. Today I’m working as a sofrware developer within the aviation industry and weather systems for airports. During my off-time, I spend most of my time with my wife Melissa and our daughters.
My main hobbies are astronomy, astrophotography, game development and I was also a member of several astronomy societies in south Sweden but time was never enough to continue being an active member.
This blog is dedicated to my family (Melissa, Vanita and Lena Grace), our friends and to all of you who share the same fascination towards the beauty of this science and all the mysteries yet to be revealed by our constant discoveries!


 Published in Astronomy Now (Jan 2018)