We recently reported that Nasa’s Orion Spacecraft was fitted with consumer cameras (opens in new tab) to capture photos on the Artemis 1 mission. Since then, Orion has completed several lunar fly-bys, performed a flight test around the moon, has traveled the farthest distance it will travel from the earth – 268,563 miles, and all the while it has been capturing photos of the moon and our blue planet.
As it nears the end of its journey, Orion has just sent back another stunning photo – this time a close-up of the moon’s surface as it prepares for its return home. In the distance, you can see the Earth rising behind it in a crescent moon shape and a small red dot is just a camera artifact (digital, unintentional changes as a result of the inner workings of your camera).
It was captured during a 3-minute, 27-second return powered fly-by burn that will ensure the spacecraft’s splash landing into the Pacific Ocean off the coast of California on December 11.
• Check out the best telescopes for astrophotography (opens in new tab) so you can shoot deep space at home
Mike Sarafin, the Artemis 1 mission manager said, “At present, we are on track to have a fully successful mission with some bonus objectives that we’ve achieved along the way. On entry day, we will realize our priority one objective, which is to demonstrate the vehicle at lunar re-entry conditions, as well as our priority three objectives, which is to retrieve the spacecraft.”
In total, Orion was fitted with 24 cameras, each carefully positioned to capture different views of the spacecraft itself, the earth and moon and what the astronauts might see on a future manned mission.
With the 25.5-day mission almost at an end, Orion will reenter Earth’s atmosphere at a staggering 25,000mph and its heat shield will experience temperatures up to 5,000 degrees Fahrenheit. Just before its re-entry, the crew module and service module will separate. The crew module (which on this mission is unmanned) will hopefully, safely return to earth while the service module will burn up.
Artemis 1’s trajectory is designed so that it lands in an area of the Pacific Ocean free of shipping lanes, land and people. Three silk parachutes 116 feet in diameter will be deployed at 9,500 ft while the spacecraft is traveling at a speed of 130mph to slow the spacecraft down to just 20mph for its splashdown. If re-entry and landing is a success, the next Artemis mission could very well see man on the moon again for the first time since 1972.
These are the best light pollution filters for night photography (opens in new tab) that will help you capture clear photos of the night sky.
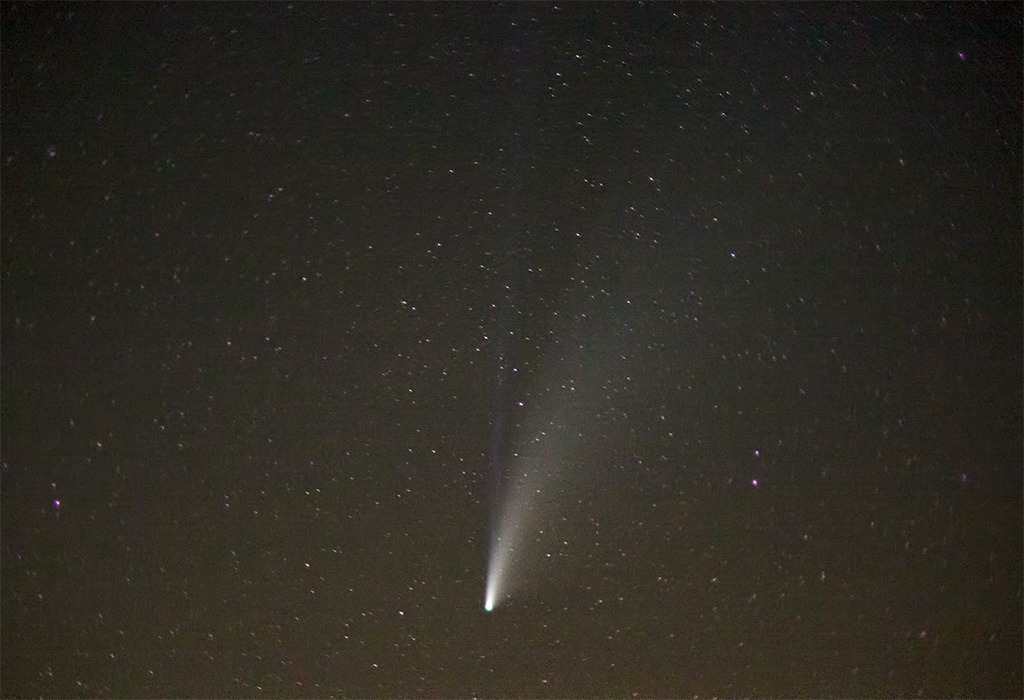
El cometa C/2022 E3 (ZTF) fue descubierto con un telescopio Schmidt de 1,2 m, f/2,4 del Zwicky Transient Facility (un survey astronómico situado en el observatorio de Monte Palomar) el 2 de marzo de 2022 y promete ser el cometa más interesante para observar durante enero de 2023 pudiendo llegar a ser visible a simple vista desde cielos oscuros.
El cometa ZTF ha ido aumentando de brillo durante las últimas semanas y actualmente se encuentra en magnitud 9.2 visible con telescopios si observamos hacia el este antes del amanecer. Se espera que alcance su máximo brillo a finales de enero o principios de febrero (con estimaciones de mag. 6 o incluso las más optimistas apuntan a mag. 5).
El cometa C/2022 E3 (ZTF) fotografiado por Stuart Atkinson @mars_stu el 6 de diciembre con cámara Canon EOS 700D y lente 80-300mm.
¿Tan espectacular como el cometa Neowise?
El cometa Neowise nos deleitó con un gran espectáculo celeste hace 2 años y son muchos los aficionados que se preguntan si el C/2022 E3 (ZTF) será similar. Con los cometas nunca se sabe porque son objetos muy caprichosos y que siempre pueden dar la sorpresa con un repentino outburst o estallido de actividad pero todo apunta a que este cometa no será tan espectacular como Neowise.
Lo más probable es que este cometa llegue a ser visible con binoculares o incluso a ojo desnudo desde cielos muy oscuros libres de contaminación lumínica. Además las colas iónicas y de polvo de este cometa tampoco se prevé que lleguen a ser tan extensas como las de Neowise.
¿Dónde encontrar el cometa C/2022 E3 (ZTF)?
Durante este mes de diciembre el cometa ZTF irá desplazándose por la constelación de Corona Borealis y pasará entre Hercules y Boyero a principios del mes de enero mientras gana altura y podemos empezar a observarlo durante más tiempo en la noche, cada vez más pronto. El 12 de enero el cometa alcanzará su punto más cercano al Sol (a una distancia de 1,11 u.a). A finales de enero llegará a la constelación de Draco y finalmente a la Osa Menor. El 1 de febrero será su mayor acercamiento a la Tierra a una distancia de 42 millones de km. Continuará su viaje celeste a principios de febrero pasando entre la Osa Mayor y la Camelopardalis.
Posición del cometa C/2022 E3 (ZTF) el 22 de enero antes del amanecer.
Las mejores fechas para observar el cometa C/2022 E3 (ZTF) serán entre el 17 y el 29 de enero. A partir de esa fecha el brillo de la Luna, con una fase cada vez más avanzada, molestará en la observación de un objeto tan difuso.
Los cometas se aprecian como pequeñas nebulosas cuando los observamos a través de un telescopio. En ocasiones destaca algo más brillante el núcleo, rodeado de una zona difuminada que corresponde a la coma. En ocasiones, si el cometa está muy cerca o es muy brillante se puede llegar a observar visualmente la cola del cometa.
Un dato curioso de este cometa es que tiene una una órbita cuasi-parabólica y se cree que ya se pasó anteriormente hace unos 47.000 años.
Por el momento tenemos mal tiempo en España durante este mes de diciembre pero esperemos que enero sea más benevolente y nos permita disfrutar del espectáculo de este cometa. ¡Si os animáis a observar o fotografiar este cometa no dejéis de avisarnos en redes sociales para ver vuestras capturas y comentar qué os ha parecido!
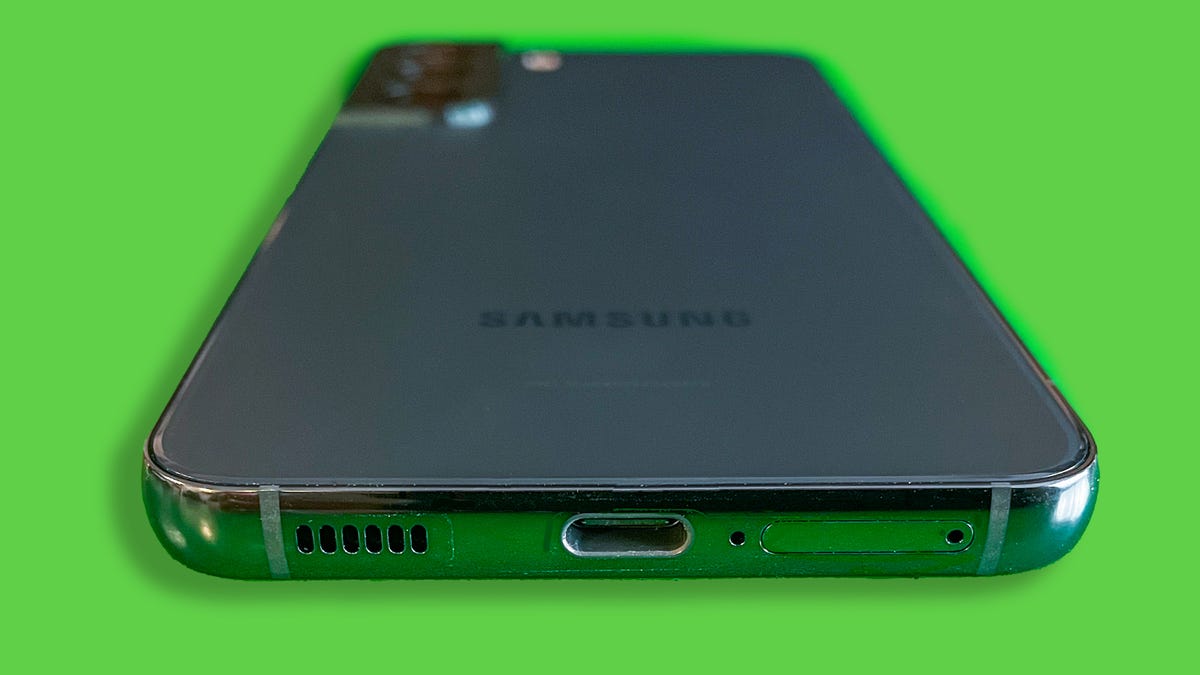
The Galaxy S22 has an upgraded camera that’s better at seeing in the dark, with a fresh design better than its predecessor. These are welcome improvements, but there’s plenty of room for Samsung to further upgrade its main smartphone series. In particular, I’d like to see longer-lasting batteries, more photography features that take advantage of the Galaxy S family’s impressive cameras, and faster charging that doesn’t require an expensive adapter.
Samsung typically releases new Galaxy S devices in the first couple of months of the year, and early rumors suggest it’ll maintain that schedule in 2023. A report from Korean newspaper JoongAng Daily says the Galaxy S23 may arrive in early February.
Samsung leads the smartphone industry, with 21% of the worldwide market in the second quarter of 2022, according to Counterpoint Research. Upgrading core features like the camera and battery could help it maintain that top spot, especially as it faces increased competition from Apple and Google.
Longer battery life for the regular Galaxy S23
The Galaxy S22
Lisa Eadicicco/CNET
Battery life can never be long enough, but the standard-issue Galaxy S device is in particular need of a boost. The 6.1-inch Galaxy S22 generally lived up to Samsung’s claims of all-day battery life, but sometimes just barely. After using it for a month straight, I noticed the battery level dipped roughly to 30% or 40% by 9 p.m., even with the always-on display turned off and the screen’s refresh rate set to standard. That’s enough to get through a work day, but you’ll likely want to pack a charger if you have after-work plans or a long commute home.
The Galaxy S22 has the smallest battery (3,700-mAh capacity) of the three phones in the Galaxy S22 lineup, and it shows. For example, I was pleasantly surprised when the 6.6-inch Galaxy S22 Plus, which has a larger 4,500-mAh capacity, lasted for about a day and a half when I reviewed it in February. I also had the refresh rate set to high, which typically drains battery more quickly. The Galaxy S22 Ultra, which has a 6.8-inch screen and a 5,000-mAh battery, had similar battery life.
It makes sense that the Galaxy S22 line’s smallest phone would also have the smallest battery. But I hope Samsung finds a way to improve battery life on next year’s 6.1-inch Galaxy phone, whether it’s through better power efficiency or a larger physical battery. After all, Apple made upgrades to the iPhone 13 Mini that gave it an extra two to three hours of battery life compared to the iPhone 12 Mini. Battery life is the main complaint I had about the Galaxy S22, and addressing that would make the Galaxy S23 an even more compelling choice for Android fans who prefer smaller phones.
Korean news outlet The Elec indicates that could indeed be the case, as it reports that Samsung aims to increase the Galaxy S23’s battery capacity by about 5%.
More clever camera features
The cameras on the Galaxy S22 (top), Galaxy S22 Plus (middle) and Galaxy S22 Ultra (bottom)
Lisa Eadicicco/CNET
The Galaxy S22’s 50-megapixel camera and the Galaxy S22 Ultra’s 108-megapixel camera capture impressively colorful and detailed photos. I only wish there was more you could do with those cameras when it comes to editing and software features.
The Galaxy S22 lineup has shooting options like panorama, night mode, portrait mode, slow motion, super slow motion and Director’s View, which lets you record video using two different lenses simultaneously. Then there’s Single Take, which creates multiple stylized shots with a single press of the shutter button. You can also download the Expert Raw app to get more granular control over photo settings.
But not much has changed between the Galaxy S21 and Galaxy S22 when it comes to camera features and shooting modes. I’d love to see Samsung take a page from Google, which regularly adds nifty camera tricks that feel practical rather than gimmicky. For example, Google introduced a new feature on the Pixel 7 and 7 Pro called Photo Unblur, which sharpens low-quality photos, even ones taken with an older camera. Photo Unblur builds on Face Unblur, a previous Pixel 6 and 6 Pro camera feature I also appreciate. As the name implies, Face Unblur freezes moving subjects that may otherwise look blurry.
Features like these show that Google is not just thinking about camera quality, but also ways to eliminate everyday annoyances with mobile photography. Many of Samsung’s updates, on the other hand, feel aimed at giving content creators more tools for capturing different types of shots and video clips.
While the Galaxy S23 likely won’t launch for another two to three months, Samsung is already making enhancements to the cameras on its current Galaxy phones. It just added a new feature to the Expert Raw app that helps stargazers take better photos of constellations, similar to Google’s Astrophotography feature for Pixel phones. There’s also a new Camera Assistant app that lets you enable or disable certain features, like a faster shutter or automatic lens switching.
Faster charging that doesn’t cost so much
The Galaxy S22 Plus (left) and Ultra (right) both support 45-watt fast charging. But you have to purchase an adapter separately.
Lisa Eadicicco/CNET
The Galaxy S22 lineup supports fast charging of up to 25 watts for the Galaxy S22 and 45 watts for the Galaxy S22 Plus and Ultra. But you have to purchase a separate charger to do so. Samsung charges $50 for the 45-watt charger and $35 for the 25-watt charger, although you can often find them for less through retailers like Amazon and Walmart. In some scenarios, I also didn’t notice much of a difference between the pricier 45-watt charger and Samsung’s less expensive 25-watt charger when powering up the Galaxy S22 Plus, which you can read more about here.
With the Galaxy S23, I’d like to see a more noticeable improvement in charging speeds, as well as more affordable charger options. The OnePlus 10 Pro, for example, offers either 65- or 80-watt fast charging depending on your region, both of which are speedier than what Samsung has to offer on paper. OnePlus also includes a compatible power adapter in the box.
Samsung and Apple stopped including power adapters in their product packaging to cut down on waste, which is an admirable cause. But I at least wish Samsung would let you choose to include a fast-charging compatible adapter as an option for a discounted price when ordering a new phone, similar to the way it lets you select a storage option or add Samsung Care Plus.
If rumors turn out to be accurate, the base Galaxy S23 model might have the same 25-watt charging speed as the Galaxy S22. That’s according to Ice Universe, a Twitter account with a history of publishing details about unreleased Samsung products.
Samsung is already doing a lot right with the Galaxy S22, particularly when it comes to software support and display quality. But as year-over-year smartphone upgrades have become more incremental than revolutionary, focusing on core elements like the camera and battery are as important as ever.
La lluvia de estrellas de las Gemínidas se presenta este 2022 con la incertidumbre de la situación meteorológica inestable sobre la Península Ibérica que está dejando importantes lluvias y muchas nubes durante los últimos días y que no tiene vistas de cambiar a corto plazo. Además la Luna se encontrará en fase de cuarto menguante durante el máximo y su brillo dificultará la observación de meteoros.
Las Gemínidas son una de las lluvias de meteoros más importantes del año, con tasas de actividad de hasta 120 meteoros por hora. Estas estrellas fugaces son los restos de partículas que deja el asteroide Faetón a su paso y que penetran a gran velocidad en la atmósfera de nuestro planeta, desintegrándose.
Gemínidas capturadas por Juan Carlos Casado.
El radiante de esta lluvia de estrellas se encuentra en la constelación de Géminis, de la que reciben su nombre. Las Gemínidas nos dan la sensación de partir desde un punto situado en esa constelación, con una velocidad moderada, pero son visibles en cualquier parte del cielo. Si vemos otro meteoro con una trayectoria diferente posiblemente sea un esporádico o pertenezca a otra lluvia de estrellas.
¿Qué días se pueden ver las Gemínidas en 2022?
Las Gemínidas son visibles entre el 4 y el 17 de diciembre mayoritariamente aunque su pico de actividad se produce en las noches del 14 y 15 de diciembre. Para los habitantes de España el radiante comienza a estar por encima del horizonte desde una hora después del anochecer.
Es posible que durante los días siguientes sigamos viendo más meteoros pero si nos fijamos bien tendrán un radiante diferente. Se trata de las Cuadrántidas, otra importante lluvia de estrellas que tiene su actividad principalmente entre el 1 y el 5 de enero.
Salida de observación para ver estrellas fugaces.
Consejos para ver las Gemínidas
Ya hemos hablado en anteriores ocasiones sobre cómo ver las estrellas fugaces. Los consejos son básicamente abrigarse mucho, sobre todo porque en esta época del año las temperaturas son bajo cero cuando cae la noche, alejarse de la contaminación lumínica de las ciudades, llevar algo de comida y bebida, una tumbona o silla cómoda a poder ser reclinable y algunas mantas. No olvidéis indicar a amigos o familiares dónde vais a estar y llevar completamente cargado el teléfono móvil.
No hace falta telescopio para observar estrellas fugaces, se ven mejor a simple vista. Ni siquiera se recomienda usar binoculares aunque podéis aprovechar para observar algunos cúmulos y nebulosas con ellos.
Lo recomendable también es ir acompañado con amigos y familiares, este tipo de observaciones se disfrutan mucho más en compañía pero insistid en que se abriguen mucho u os abandonarán enseguida.
Si tenéis la suerte de dar con una buena noche de actividad meteórica os llevaréis un bonito recuerdo a casa.
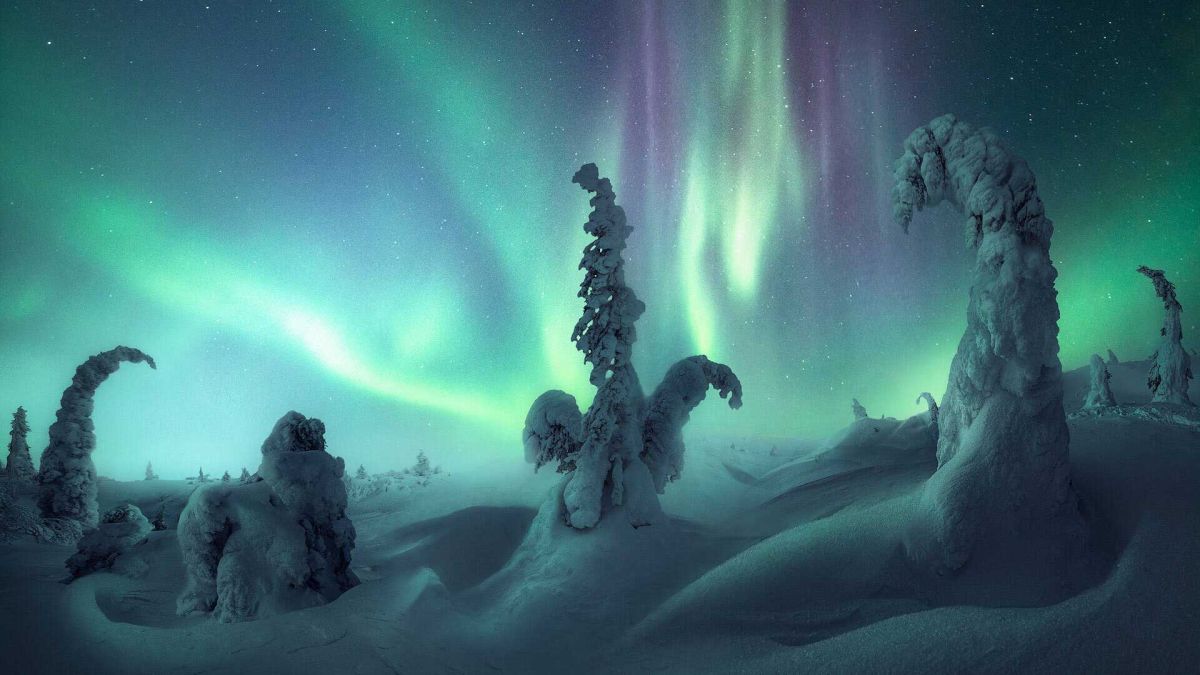
Capture the Atlas (opens in new tab) has just announced its Northern Lights Photographer of the Year winners. The Aurora Borealis has mesmerized people for millennia with its dancing waves of light in green, purple, and blue hues. It can be seen from both the North and South Pole and while incredibly beautiful to watch, it’s actually the result of solar storms that give out huge clouds of electrically charged particles.
• These are the best camera for astrophotography
Seeing the Aurora Borealis is a bucket list dream not just for keen landscape photographers but for a lot of people who are left in awe of its beauty. This year’s entries were taken all over the world from places you’d expect to see it such as Iceland, Norway, New Zealand and Canada, however, some countries are not so well-known spots to watch the stunning spectacle.
Nugget Point Lighthouse Aurora, Nugget Point Lighthouse, New Zealand [14 secs, f/3.5, ISO 6400, 16 images stitched] (Image credit: Douglas Thorne)
Nugget Point Lighthouse is on the eastern side of New Zealand’s South Island. It rests above the famous rocks, which were named by Captain Cook because they looked like pieces of gold. The lighthouse is set on a precipice, where the ocean meets the sky. From here, you can get panoramic views of the southern seas, so it’s a photographer’s dream location.
Under a Northern Sky, Tombstone Mountain Range, Yukon Territory, Canada [Foreground: f/2 1/60 seconds, ISO 3200 Sky: f/2.8, 1 second, ISO 3200] (Image credit: Rachel Jones)
We have all heard stories about the land of the Midnight Sun: in the summer, the sun doesn’t really set, and in the winter, nights are long with no sun, or very little sun at all. But there are also 3-4 days each month when the moon doesn’t set (circumpolar) and 3-4 days each month when it doesn’t rise!
Explosions of the Sky, Taiari Beach, Otago, New Zealand [Sky: Panorama made up of 11 tracked shots. Each shot at ISO1600, f/2.8, 15 secs.
Foreground: 2 row x 3 shot panorama. Each shot at ISO6400, f/6.3, 150 secs] (Image credit: Kavan Chay)
New Zealand is really a special place for astrophotography (opens in new tab). The skies are beautifully dark, and there are so many interesting landscape features to take in. Despite this, I’ve never managed to capture an Aurora shot with an interesting foreground element prior to this moment.
Unfortunately, the Aurora activity is not as consistent compared to other forms of astrophotography, so I had to be patient.
These are the Arctic nights that leave you breathless! I decided to spend that night up in the mountains with one of the most beautiful views of the Lofoten Islands. My goal was to photograph a “double Aurora & Milky Way arc”, to add to my Aurora collection. I had been planning this pano for a couple of years, and finally, all the elements aligned.
This day will probably remain etched in my memory forever. It’s difficult to explain with words since to fully understand it you had to be there. To take this photo, I had to stay focused while contemplating this immense spectacle of nature, trying to stay as calm as possible despite my strong emotions.
The Light Upon Kerlaugar, Suðurland, Iceland [Sky: f/4, ISO 6400, 5 sec Foreground: f/5.6, ISO 1600, 25 sec] (Image credit: Jannes Krause)
I was lucky enough to witness a fantastic KP 8 display on my trip to Iceland back in October. Not only that, but it was also my first time experiencing and photographing the Northern Lights.
Originally my flight back home was scheduled to depart about 12 hours before this intense solar storm, but as soon as I saw the perfect weather and Aurora projections, I knew that I just had to change my plans and extend my trip by an additional day. Things finally came together, and I couldn’t be more pleased with the images I got.
When the Northern Lights go crazy in the night sky, focusing on your composition is worth the utmost effort because there is so much happening so quickly.
Even for a seasoned photographer, it’s very hard to focus on enjoying the Aurora while photographing it.
Bridge to Dreams, Brúarfoss, Iceland [F/2.8 ISO 6400 2.5 sec. Single exposure] (Image credit: Jabi Sanz)
This is one of the most magical experiences I had on my last visit to Iceland.
I would also like to say that it was not easy at all. I took this picture the first day I arrived after a very long trip from Thailand. Of course, my goal was to chase the Green Lady during this trip, but I went to this location with the idea of photographing the sunset and then getting back to the hotel to rest.
Queen of the North, Iceland [Sky: ISO 6400, f/2.8, 5 sec
Foreground: ISO 3200, f/2.8, 60 seconds] (Image credit: Pierpaolo Salvatore)
Seeing the Northern Lights dance above one of the most beautiful mountains in Iceland is a difficult experience to put into words. Imagine the wind in your face, the smell of the sea, and the sound of the waves on the rocks while the Queen of the North dances in the sky.
I love nature in all its forms precisely because it offers moments like this.
Green Balls, Teriberka, Russia [ISO 3000, 14mm, 1.8, 4 sec] (Image credit: Jose D Riquelme)
Last February, I took a trip to explore Northern Russia. The place was very inhospitable, but we had some spectacular encounters with the “Green Lady”.
I took this image in Teriberka at about -30ºC. At these temperatures, you can only leave your tripod in one position because it will freeze, and you won’t be able to get it up or down, and therein laid the challenge of finding the perfect composition.
Check out the best lenses for astrophotography (opens in new tab) and our astrophotography tips (opens in new tab) so you can capture your own stunning shots of the Northern Lights.
Many Roads and trails are regularly closed at specific times of year to protect an area that animals frequent for mating, winter foods, and birthing. Rick Spitzer/Special to the Daily
Perhaps you have noticed that it seems that there are more people recreating in the outdoors than at any time in the past. Parking lots and trailheads are full of cars, and in some situations, cars are parked along the roadways because the lots are full.
There is a backup at times at boat launches because more people are on the rivers. You go into a store to buy some outdoor gear and they are sold out of what you want. Online stores say “back-ordered” on a lot of items. Even astrophotography gear is limited in availability because of an increase in interest.
Why? COVID-19 has had a huge impact on all of this. Since people could not go to places and events that normally involve a lot of people, they took up other interests where they can avoid those COVID-19 issues. Seems like they found out they had been missing out on something great and now want it more.
Crowds are controlled with reservations at many areas like Hanging Lake in Glenwood Canyon. Rick Spitzer/Special to the Daily
There is an increase in the number of people that are enjoying national parks, national forests, Bureau of Land Management lands, and state parks. In addition, lakes, rivers, and 14ers are seeing more and more people. More people are joining outdoor clubs and groups, signing up for blogs, and podcasts. Along with the increase of people, there is an increase in the impact on our public lands. “Getting away from it all” really did not work out in some situations.
A Pogo cartoon, by Walt Kelly, related to human impacts said it best: “We have met the enemy and he is us.” That phrase originated in 1953 with “The Pogo Papers,” and became better known with a poster Kelly was hired to illustrate for the first Earth Day in 1970! As the population increases, the enemy is becoming more and more of a problem.
Support Local Journalism
It seems like those quiet hikes in the backcountry are becoming a thing of the past.
Rick Spitzer/Special to the Daily
Because of that increase in use, we, as users of the great outdoors, need to think more about stewardship. Merriam-Webster defines stewardship as “the conducting, supervising, or managing of something; especially the careful and responsible management of something entrusted to one’s care.” We have been entrusted with caring for public lands. We have to follow laws and regulations as it is incumbent on all of us to carefully manage those key resources in the most effective manner possible.
Native Americans viewed the land as sacred and still do. They view the land like churches for spiritual purposes, that the land itself was a sacred, living, being. Even water is sacred, as it sustains life. It seems that people in today’s world would benefit by considering our land and water in the same way as Native Americans. There are a lot of negative impacts on our resources that are easy to mitigate but, we should not leave it to federal and state land managers. All these problems are easy for individuals to correct and it takes little effort, if any.
Reservations are needed at some areas, like Mt Evans, to reduce the number of cars and people using the area. Rick Spitzer/Special to the Daily
People say put litter in its place. That makes no sense because it becomes litter when it is not disposed of properly. That includes dog waste. All of that “stuff” builds up at trailheads and along the trails. It is an eyesore, and in some cases, can be a danger to wildlife. If you brought it in, take it out, and dispose of it properly.
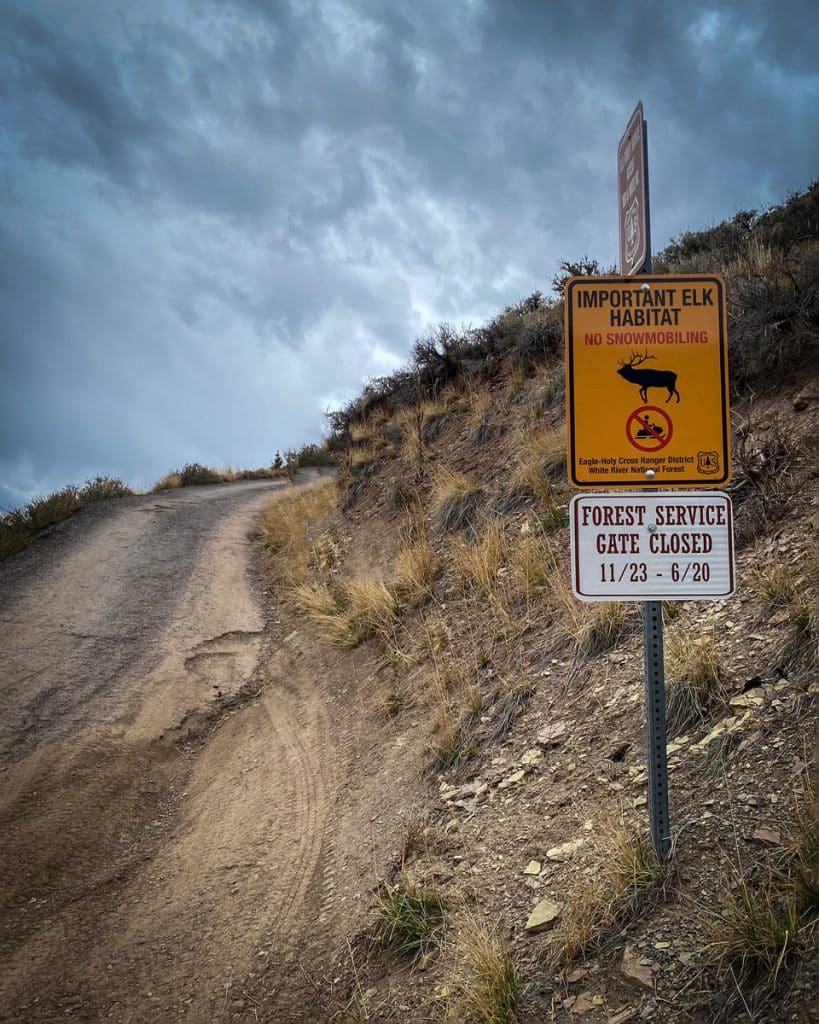
Because of increased trail use, trail closures are becoming more frequent. Trails are closed by wildlife and land managers to protect the land’s wildlife and resources. At certain times of the year, these closures protect animals in birthing grounds or in critical winter habitats. Timed entries being used by many agencies help to spread people out and reduce numbers to a level that the sites can sustain. All these measures help reduce or stop overuse that may have an impact on ecosystems and wildlife as a whole.
Backpackers and campers need to develop a mindset to protect ecosystems and wildlife. Regulations that restrict camping in certain areas are in place to protect the overuse of the land and protect water. A clean camp is something that most search for when they are out in the environment. A number of people have the mantra of “leave it cleaner than you found it!”
Snowmachines in areas can be difficult to control since they do not need roads or trails to operate. Rick Spitzer/Special to the Daily
Hikers, bikers, horses, motorcycles, and ATVs all have a potential impact. Cutting trails and off-trail use that creates “social trails” and “roads” can cause erosion that destroys not only the appearance of the land but may cause runoff that damages land and water resources. Trail bars can help mitigate that erosion, but the best solution is to stay on the established roads and trails. Information about these closures can be found posted at trailheads and launch facilities and on the agency’s website.
Snowmachines are a somewhat different problem. In the winter, trails may not be clearly marked. Any county, city, or town acting by its governing body may regulate the operation of snowmobiles on public lands, waters, and property under its jurisdiction. Closures may be large areas and because of that may be difficult to post. Many of those closures are to protect winter feeding grounds for a variety of animals. Check with the local jurisdictions if you are not sure of the regulations for a specific area.
When we are out enjoying the outdoors, we often encounter wildlife. How close is too close? A few “rules of thumb,” one is literal, that I have used for years. If you encounter wildlife, extend your arm, and if you cannot cover the entire animal with your thumb, you are too close. If the animal is paying attention to you and not feeding, you are too close. If the animal changes its behavior, you are too close. Respect the wildlife to keep it healthy, particularly during winter months and drought conditions.
ATVs should stay on established roads that have been identified for travel. Rick Spitzer/Special to the Daily
Fire danger is another area of concern. Any summer may have a high fire danger. Some areas of the state may have a smaller snowfall from previous years. This means that the lack of ground moisture may cause trees and grasses to dry out more quickly. That results in a higher fire danger. It is important that we all follow the fire regulations established by counties, and federal and state agencies!
Safety is an important consideration. The more people that are out recreating, the more people will get lost or injured. This puts a greater strain on search and rescue organizations. Be safe. Know where you are going, tell people close to you about your plans, and have the right gear with you to keep you safe. Spring can have wild swings in weather from 60º to below freezing in a few hours.
We are not going to reduce population growth or the number of people who travel to many of these outdoor locations. What we can do is reduce our impact by being responsible, following regulations, and seeking out areas where our activity is not harmful to the land and wildlife.
Rick Spitzer is a renowned wildlife photographer and longtime local who lives in Wildridge. The Eagle County Community Wildlife Roundtable is a collaborative partnership with the White River National Forest, Colorado Parks and Wildlife, Bureau of Land Management, local government entities, community members and citizen scientists. The purpose of the Eagle County Community Wildlife Roundtable is to gather a group of diverse stakeholders in the valley to understand and address issues facing wildlife populations.
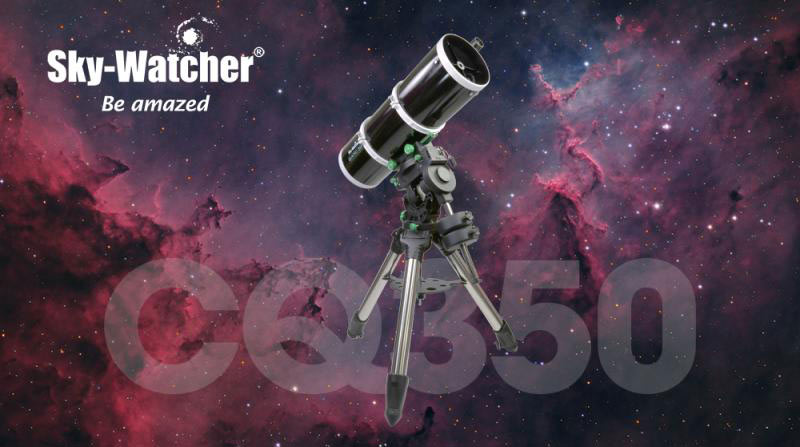
Sky-Watcher acaba de presentar la flamante montura CQ350 Pro que ocupa el hueco existente entre las populares AZ-EQ6 Pro / EQ6-R Pro y las poderosas EQ8-R. Con esta nueva montura Sky-Watcher ofrece una completa gama de monturas para todos los usuarios y necesidades, desde los astrónomos nómadas hasta los afortunados con observatorio propio.
Llevábamos escuchando rumores de esta montura desde 2019 y finalmente esta semana ha sido presentada al público. Todavía no conocemos testimonios ni reviews de esta nueva montura pero si sabemos todas sus características.
Especificaciones de la Sky-Watcher CQ350 Pro
Esta nueva montura tiene una capacidad de carga de 35kg (15Kg de carga útil) por lo que permite mover con soltura grandes tubos así como sus sistemas de guiado y cámaras. Por supuesto es una montura GoTo SynScan con base de datos de más de 42.000 objetos y conexión USB a PC además de puerto de autoguiado.
La mecánica se basa en transmisiones por correas y motores paso a paso híbridos de 0,9º de alta precisión sin caja de engranajes interna que proporcionan una holgura mínima y un error periódico significativamente reducido de manera silenciosa.
En las opciones de conectividad cuenta con puerto SNAP para conectar la montura con la cámara directamente y usar el intervalómetro incorporado.
Incluye dos pesas de 10Kg y placa D/V para acoplar una amplia variedad de tubos ópticos.
La montura es compatible con trípodes y columnas de la EQ-8R y cuenta con un diseño cuidado para gestionar mejor el cableado de energía y datos. Incorpora un hub USB x4 y 3 puertos de salida de alimentación para dispositivos además de 3 puertos AUX de salida y 3 de entrada.
El trípode (opcional) es de acero con patas de 3″ de diámetro y tiene un peso de 15,6kg. Permite configurar la montura para latitudes entre 10º y 70º.
El conector de alimentación es un jack de aviación de 12V (11~16V 3A).
La montura tiene un precio de 3.366,95€ sin trípode y 4.101,95€ con trípode. Por su peso y volumen estamos hablando de una montura pensada para dejar fija en un observatorio y podemos decir que estaríamos ante una «hermana pequeña» de la EQ8-R. Sin duda, una alternativa interesante para aquellos usuarios que piensan en montar su primer observatorio.
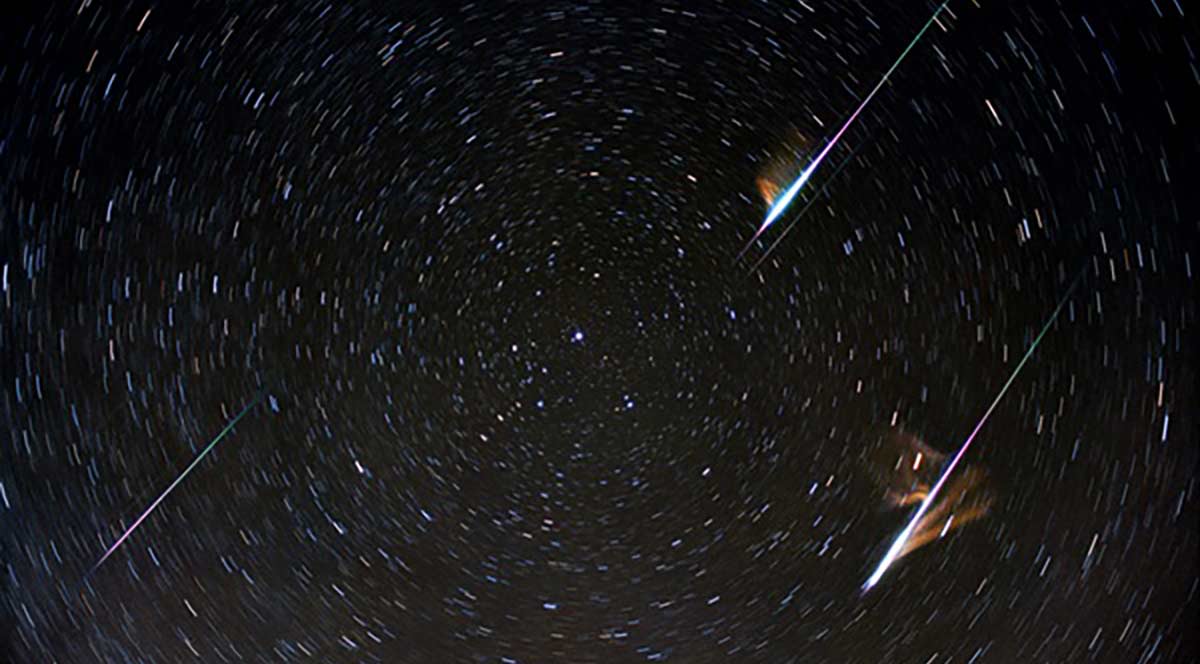
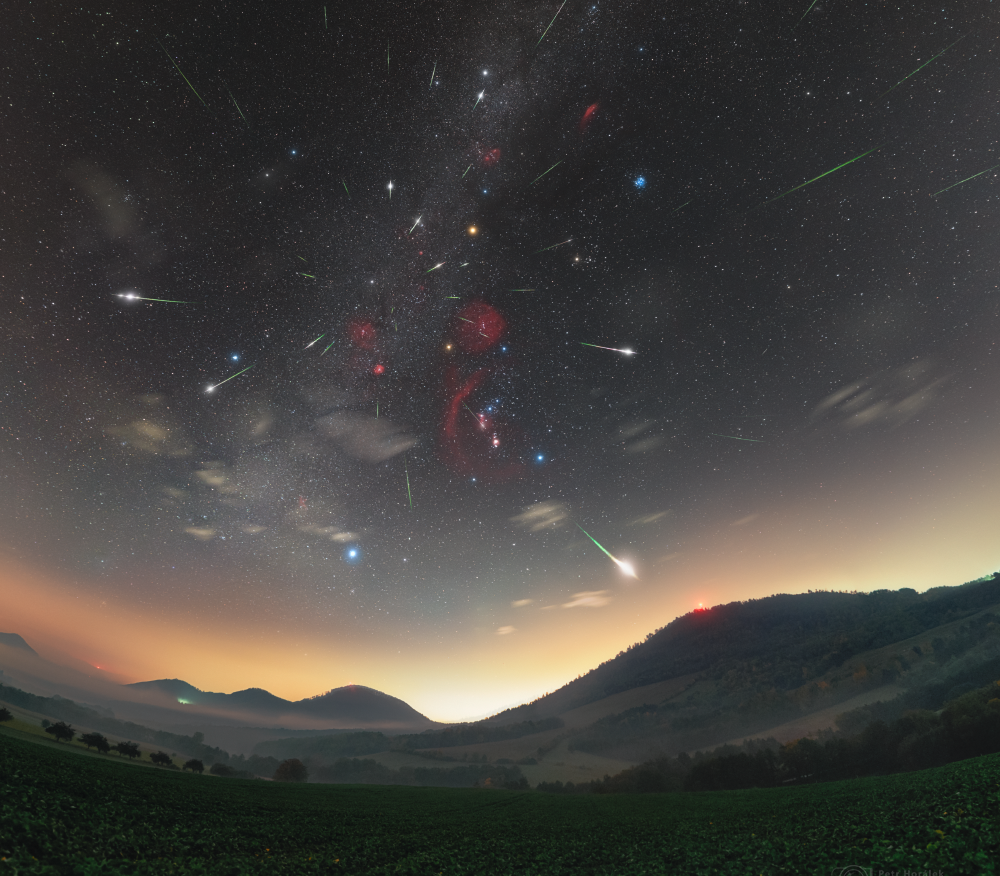
As well as the image’s beauty, NASA honoured the effort that went into it. Petr spent seven years working on it, on and off. “Orionids are remnants of the famous Halley’s Comet, which won’t return until July 2061, but this meteor shower around October 21 is an annual reminder of the comet. It’s not half as visible as the better-known Perseids – only around five meteors per hour appear in the sky at our country’s latitude. And my only window for taking pictures is a few days around the maximum. Everything depends on the weather, and clear skies can be a problem in October,” Petr says, explaining why the image took so long to create.
Waiting for the right moment
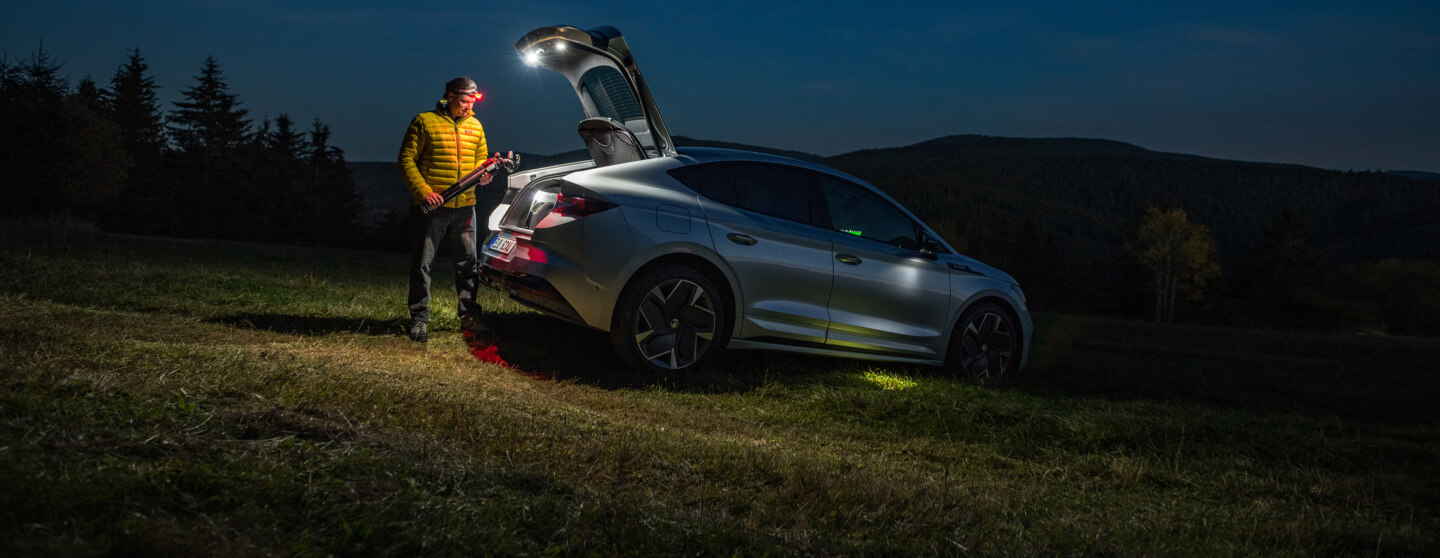
What’s interesting is that the photographs don’t all come from one place. The reason for this is the varying weather situation during those seven years, which made it necessary for Petr to keep moving. “The resulting photograph is a collage of a whole series of time-lapse images of the night sky from several places in Czechia and Slovakia, plus a panoramic image of the landscape, which in this case is the Prešov volcanic hills region. I took the landscape photograph at the time of the Orionid maximum in October of the pandemic year 2020,” Petr lets on. The resulting image shows 47 meteors in total, as well as a clear image of Mars.
This unique image of the Orionid meteor shower took seven years to create and was shot at various locations in Czechia and Slovakia, depending on the weather. When finishing it, Petr Horálek was helped by an all-electric Enyaq iV, and the effort paid off: the image was published by NASA on 28 October 2022, making it Petr’s 35th prestigious Astronomy Picture of the Day. (Click on the image to see it better.)
Panasonic cameras allow you to be creative in ways that many other full-frame camera systems don’t. For example, Panasonic cameras have different ways of emulating the look of movie film. And beyond that, the Panasonic S5 can do cool things like Live Composite to make astrophotography super fun. But if you’re going to do this kind of work, you need wide angle lenses. Thankfully, we’ve reviewed most of them! Here are the best wide angle lenses for the Panasonic S5.
How to Use This Guide to the Best Wide Angle Lenses the Panasonic S5
Here’s what you should know about using this guide to the best wide angle lenses for the Panasonic S5:
This guide contains products we’ve reviewed. Lucky for you folks, we’ve reviewed the vast majority of Panasonic lenses and modern lenses in general. Our Ethical Practices don’t allow us to feature products we haven’t fully reviewed. So when we say these are the best wide angle lenses for the Panasonic S5, we mean it.
This guide is sponsored by Panasonic, who trusts us and understands that we have a set of ethics when it comes to reviewing products. All the product images and sample images in this roundup were shot by Phoblographer staff. There are also links to our full reviews.
These are the best wide angle lenses for the Panasonic S5 if you’re looking for smaller lenses. We think you’ll love the build quality, size, and overall performance.
There are lenses in this list that work well with Panasonic’s autofocus features and many have continued to improve with firmware updates.
When considering the best wide angle lenses for the Panasonic S5, remember this is full-frame, otherwise known as Lumix S. So, unlike Micro Four Thirds, the focal length is exactly what it is.
Generally speaking, Panasonic lenses work better on Panasonic bodies than they do with others within the L-Mount Alliance. Part of this has to do with the motors being used.
We’ve chosen lenses with weather-resistance. Weather resistance has more use than just shooting in the rain. It helps prevent dust from getting into your lens and camera. That means you don’t need to retouch sensor dust.
These lenses are for full-frame Panasonic cameras, which the Panasonic S5 is! So they’ll also work on Leica and Sigma L-mount cameras too.
With these lenses, you can pretty much do everything with the Leica L-mount. We should know; we own two of them.
Basically, treat these like you’re using a higher-end lens. They give that level of performance for a bargain.
Panasonic 16-35mm f4 Lumix S Pro
Small
Amazingly lightweight for an L mount lens
Sharp optics
Weather sealing
Nice feeling in the hand
Focuses very fast!
In our review, we said:
I really like the colors from the Panasonic 16-35mm f4 PRO. I still think Panasonic has lenses with even better tint though. However, for small documentary-style setups, cityscapes, or landscapes, you’ll be happy. As stated earlier, we really like the look of the images with L Monochrome D enabled.
Buy Now
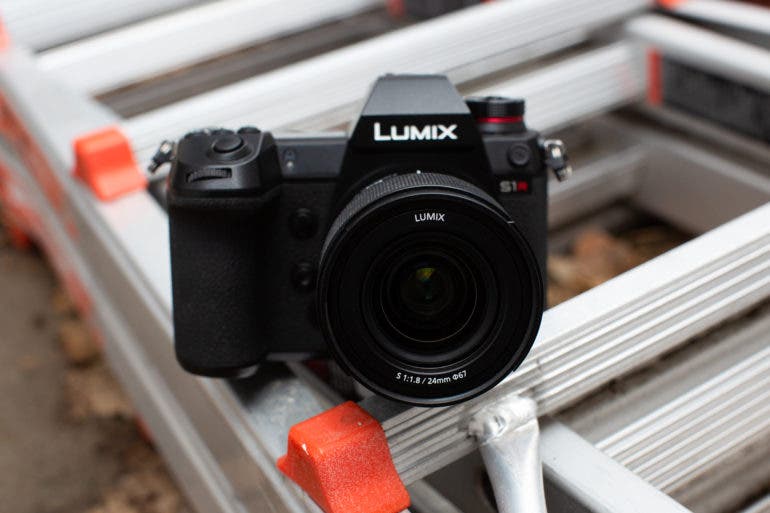
Panasonic 24mm f1.8 Lumix S
Sharp
Beautiful colors
Images require minimal editing when using film simulations
Compact and lightweight
Weather-resistant
Versatile focal length
In our review, we state:
Images are sharp through the center of the frame with softer edges when shooting wide open. At f2.8, the sharpness is extended through most of the frame. And while the 24mm lens offers plenty of detail, it isn’t too sharp for portraits.
Buy Now
Panasonic 35mm f1.8 Lumix S
Nicely sharp, with good bokeh
Minimal distortion
Easy to use
Weather-sealed
Compact and lightweight
Decent autofocus
In our review, we state:
The only two controls are for manually focusing — the AF/MF switch and the focus ring. The Panasonic S5 menu allows you to customize the speed of the control ring, as well as how far the ring turns to move through the range of possible focal distances. In non-linear mode, the ring turns slowly. That, coupled with focus peaking on the S5, made it easy to manually focus with excellent accuracy. The linear mode focuses much faster, but that makes it more difficult to get perfect focus.
Buy Now
The Phoblographer’s variousproduct round-up features are done in-house. Our philosophy is simple: you wouldn’t get a Wagyu beef steak review from a lifelong vegetarian. And you wouldn’t get photography advice from someone who doesn’t touch the product. We only recommend gear that we’ve fully reviewed. If you’re wondering why your favorite product didn’t make the cut, there’s a chance it’s on another list. If we haven’t reviewed it, we won’t recommend it. This method keeps our lists packed with industry-leading knowledge. Some of our stories include affiliate links. If you buy something through one of these links, we may earn an affiliate commission.
This piece is presented in partnership with Panasonic Lumix. We’ve independently and ethically reviewed all the products in this post already without sponsorship. And we worked with them to recommend a few key gems to you.
At launch, owners of the Pixel 7 Pro could place their phone close to a subject and automatically enable a Macro Mode of sorts, allowing you to take super close up shots. The thing is, it’s not really a macro mode, simply because you can’t manually enter it with the click of a button. Thanks to an updated Google Camera app on the device, that has kinda changed.
Inside of Camera app version 8.7.250, the Macro setting has been moved into the dropdown menu when looking at your viewfinder. This is similar to the Astrophotography mode when you’re inside of the dedicated Night Sight mode. In addition to this move, the Auto Macro toggle has been removed from the Composition section of the Settings menu.
This change should allow for greater control of when you want to enable Macro Mode on the 7 Pro, which to us, is a good thing.
The app update also made another change, one that is reported to possibly be a mistake. In the update, the double-tap gesture option for the camera was removed, the one that allowed you to either double tap to zoom in or out, or switch between the front and rear cameras. Whoops, I guess?
Be on the lookout for this change on your Pixel 7 Pro.

 destacará en enero")
 destacará en enero")