Save $400 on the Canon RF 15-35mm f/2.8L IS USM (opens in new tab) lens which takes it down below $2000 this Black Friday.
We’re pleased to share this deal with you because the Canon RF 15-35mm f/2.8L IS USM sits in our best lenses for astrophotography buying guide and it received a near-perfect 4.5/5 stars in our Canon RF 15-35mm review. But why do we think so highly of this lens?
It’s part of Canon’s L-series range, which is known for its outstanding optical clarity. Super sharp from edge to edge and with a constant maximum aperture of f/2.8 this ultra-wide zoom has a very astro-friendly 15-35mm focal length making it perfect for wide-field astrophotography.
The fast aperture of f/2.8 allows the lens to drink in the light from the cosmos and maximizes light input onto any compatible Canon RF mirrorless camera body. This saves pushing the ISO sensitivity too high, which in return results in astrophotographs with less high ISO image noise — ideal for clean, clear images.
While astrophotographers typically use one of the best tripods to photograph from, this lens has five stops of Image Stabilization (IS) to help steady the view, should you want to photograph in low-light handheld. That makes it usable for more than just astro and in fact, makes an ideal lens for weddings or group portraits indoors where light levels are normally limited.
The Nano USM feature built into the lens works with Canon’s Dual-Pixel CMOS AF to produce the best autofocusing speed and ability that Canon has to offer (superior to Canon’s less expensive STM system seen in more affordable lens models).
Better yet, the Canon 15-35mm f/2.8L IS USM has an integrated control ring that can be preset to control myriad camera settings, from aperture to ISO and more. Optically, the lens benefits from low dispersion and aspherical glass elements to keep images clear of chromatic aberration (no color fringing on those stars) and distortion-free.
Weather-resistant it’s not fully waterproof, but that shouldn’t matter too much for the astrophotographers who tend to shoot when it’s clear and dry, anyway. It is also coated with Air-Sphere Coating (ASC) to reduce flare and ghosting when shooting directly into the sun or when subjects are backlit.
Be sure to check out Space.com’s Black Friday deals page, or our guide to the Best lenses for astrophotography, or pair it with one of the Best cameras for photos and videos or Best cameras for astrophotography.
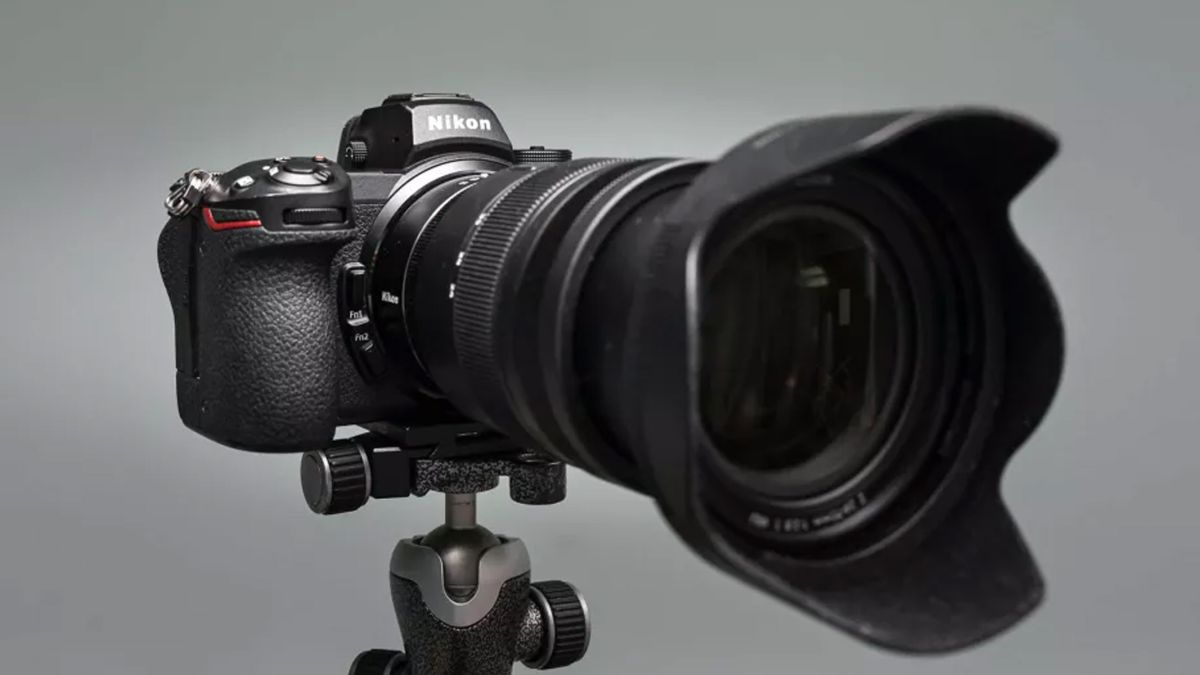
The Nikon Z7 II is the perfect combination of power, speed and precision. It isn’t a specialist in any photography discipline, but it’s very good at everything.
In our Nikon Z7 II review, we awarded it 4.5 out of 5 stars, largely thanks to its excellent full-frame image quality and admirable all-round performance. We are delighted to see that it has been discounted by $400 as part of B&H Photo’s Black Friday deals (opens in new tab). It will stay at this price, while stocks last, until Nov 28 at 11:59 EST.
It boasts a huge 45.7MP resolution, which matches one of the best cameras for astrophotography, the Nikon D850 (which, as it happens, is also on sale with a $900 discount).
In the hand, the Nikon Z7 II feels very much like a miniature Nikon DSLR, this will make anyone switching from DSLR to mirrorless feel instantly at home.
It will suit a range of photographers — photojournalists, wildlife photographers, filmmakers and commercial studio photographers. What we like though, is its adeptness for astrophotography.
When we took it out in the field at night for the first time as part of our hands-on review, we were surprised at how natural-looking the Automatic White Balance is when shooting in low light, something that cameras often struggle with. The colors of the sky look natural as if looking at it with the naked eye.
It also has a fantastic ISO range from 64-25,6000, expandable to 32-102,400, and it does an excellent job at handling image noise, something that really stands out against other models we have tested.
Composing in the dark is a breeze thanks to the fantastic exposure preview, and we think it is one of the best of all the cameras we have ever used in this regard — a dream for astrophotographers. The tilting screen is an obvious benefit for astrophotography too, as it helps you compose your shot without kneeling underneath the camera for a better view.
We also loved the 5-axis, in-body image stabilization — even when not using an exposure delay — our images were surprisingly consistently sharp. This allows for more carefree shooting, worrying less about image blur from camera shake that can occur from manually pressing the shutter.
Paired with one of Nikon’s Z-mount lenses — of which there is a vast catalog — this will be a perfect companion for all of your photography endeavors.
If you don’t need such a high resolution, the visually identical, much less expensive Nikon Z6 II is also discounted by $300 at B&H Photo.
Check out our live Black Friday Deals blog for more savings. It is constantly updated with the best deals as we find them. Or check out our guide to the Best cameras for photos and videos
Google’s flagships have generally excelled at cameras and the Pixel 7 series is no different. While the hardware is capable, the one area where Google trumps most other manufacturers is in terms of camera software. The computational photography you get with the Google Pixel 7 series is what makes it one of the best camera phones out there.
If you’re planning to get the phone for yourself or you already have one, here are some of the best Pixel 7 camera tips and tricks you must use to get the best out of the cameras on the phone. Get ready to stun your friends on Instagram!
Pixel 7 and Pixel 7 Pro: Camera Specifications
Before we get to all the software trickery, let’s take a look at the camera specifications of the Pixel 7 series so that we know what we’re dealing with.
The Pixel 7 has two cameras on the rear — a 50MP primary camera accompanied by a 12MP ultra-wide lens. The Pixel 7 Pro gets the same two lenses that are accompanied by a tertiary zoom lens to justify the Pro moniker. This is a 48MP 5X periscope camera that does a great job of capturing faraway objects.
Finally, the front on both devices houses a 10.8MP front-facing shooter for selfies. Overall, the hardware on the Google Pixel 7 and Pixel 7 Pro is quite competitive but as we all know, Google’s algorithms make the cameras on this phone shine.
Pixel 7 and Pixel 7 Pro Camera Features, Tips, and Tricks
Now that the hardware and specifications are out of the way, let’s get to all the camera features and wizardry that Google is known for.
1. Super-res Zoom
While the Pixel 7 Pro gets a zoom lens, it goes straight to 5X so it’s useful only for faraway objects. The standard Pixel 7, on the other hand, does not have a dedicated zoom lens at all. To address this issue, Google has come with Super-res zoom.
Super-res zoom uses the extra pixels from the 50MP primary camera to crop into the frame and then uses software algorithms to extract details from it. So, for example, if you wish to take a 2X shot, the phone crops into the center of the 50MP image which means you’re still getting a high-res output.
It also works on higher zoom levels past 5X by using the same principle. Google also captures multiple images when you click a shot and combines the details from all of them into one shot to produce a detailed output. This makes up for the lack of a 2X or a 10X dedicated zoom lens on the Pixel 7 and Pixel 7 Pro.
You don’t have to enable Super-res zoom or go to a specific section to toggle it. Just zoom past the standard focal length and it should automatically get triggered.
2. Cinematic Mode
Apple introduced the cinematic mode for video recording with the iPhone 13 series which resembled portrait mode for videos. Well, Google has borrowed the feature along with the same name for the Pixel 7 series of devices. You can now record videos with a blurred background and completely focus on your subject using your Pixel 7 and Pixel 7 Pro. Here’s how.
Step 1: Open the Camera app on your Pixel 7 or Pixel 7 Pro.
Step 2: Swipe to the left twice on the bottom bar. This will take you to Cinematic Mode.
Step 3: Now, tap on the subject you wish to focus on. Then, start recording.
3. Cinematic Pan
Google has drastically improved the video recording capabilities of the Pixel 7 series and this also extends to the Cinematic Pan mode. While Cinematic mode blurs the background of your videos, Cinematic Pan mode lets you pan your camera to shoot smooth, cinematic footage.
The phone records the video at 60fps and then slows it down to 24fps to create that cinematic look. If you wish to record short clips that are pleasing to the eye, here’s how you can use Cinematic Pan Mode.
Step 1: Open the Camera app on your Pixel 7 or Pixel 7 Pro.
Step 2: Swipe to the left once on the bottom bar. You will now be in Video mode.
Step 3: Tap on the stabilization icon. Now, choose Cinematic Pan.
You can use this mode while recording professional footage or if you’re trying to record a video for a product showcase.
4. Active Stabilization
Here’s yet another super-cool mode for all you videographers out there. If you wish to record some sporty action i.e when you’re running, racing, or just enjoying a ride on a jet ski, this is the mode to use. It adds a layer of stabilization to your shots to cut down on the hand movement that you would encounter when you’re active.
Step 1: Open the Camera app on your Pixel 7 or Pixel 7 Pro.
Step 2: Swipe to the left once on the bottom bar. You will now be in Video mode.
Step 3: Tap on the stabilization icon. Now, choose Active.
Next time you want to capture your POV when biking or surfing, you know which mode of stabilization to select!
5. Action Pan
The Pixel 7 series of devices have a Motion mode where you can capture photos that create an effect like you’ve frozen time. You get two different opinions under the Motion tag — one of which is Action Pan.
Action Pan creates a unique effect when capturing moving objects. If you want to capture a car that’s driving past or a train that is zooming past you, Action Pan will create a professional look by blurring the background creatively. It’s fun to use, so feel free to experiment with it by following these steps.
Step 1: Open the Camera app on your Pixel 7 or Pixel 7 Pro.
Step 2: Swipe to the right twice on the bottom bar. You will now be in Motion mode.
Step 3: Select the Action Pan button to switch to the relevant mode.
Step 4: Now, whenever you see a moving subject, hit the shutter button and move your phone slowly in the direction of your subject. The image will be captured with a creative blur.
6. Long Exposure
Just like Action Pan, Long Exposure is yet another Motion mode that gives your photos a creative look. It’s good for capturing light trails in traffic or moving subjects like waterfalls. In short, while Action Pan created a blur effect for the background, Long Exposure keeps the background intact and creates a motion blur effect on the subject.
Here’s how to click some great long exposure shots using your Pixel 7 and Pixel 7 Pro.
Step 1: Open the Camera app on your Pixel 7 or Pixel 7 Pro.
Step 2: Swipe to the right twice on the bottom bar. You will now be in Motion mode.
Step 3: Select the Long Exposure button to switch to the relevant mode.
Step 4: Now, hit the shutter button whenever you see a moving subject. Keep your hands steady till the shot is captured.
Next time you’re at a waterfall or you’re on an overhead bridge with traffic passing below you, use the Long Exposure mode and let us know your experience in the comments below.
7. Astrophotography
While Long Exposure can capture light trails on roads, the Pixel 7 can also capture star trails in the night sky. All you need is a tripod or a surface to rest your Pixel 7 against for a couple of minutes. Once you have that ready, here’s what you need to do.
Step 1: Mount your Pixel 7 or Pixel 7 Pro on a tripod or rest it against a surface where it can stand still for a few minutes. Note that this is an extremely important step without which you won’t be able to use the Astrophotography mode.
Step 2: Open the Camera app on your Pixel 7 or Pixel 7 Pro.
Step 3: Swipe to the right thrice on the bottom bar. You will now be in Night Sight mode.
Step 4: Tap on the settings button in the top-left corner of the screen. Then, set Astrophotography to Auto.
Step 5: If your phone is sitting still, the shutter button will automatically change to one with stars on it. Once this happens, tap on the shutter to start clicking the picture.
Depending on the scenario and the amount of available light, your Pixel 7 will start capturing an image for a set time period. During this period, do not disturb the position of the phone as it will ruin the final output.
Once the timer has finished counting down, the image will be captured. If you allowed the phone to capture for more than 2.5 minutes, you will also be able to see a short timelapse of the movement of heavenly bodies during that tenure.
8. Macro Mode
This one’s limited to the Pixel 7 Pro. The ultra-wide camera on the Pixel 7 Pro has autofocus which means it can also act as a macro camera. Given the 12MP resolution, the macro camera captures some impressive images when you get close to a subject.
Here’s how you can activate the Macro mode if you wish to click close-up images.
Step 1: Open the Camera app on your Pixel 7 Pro.
Step 2: Point the camera close to the subject you wish to capture. You will automatically see a macro toggle appear in the viewfinder.
Step 3: Tap on the macro toggle to switch to the corresponding lens. Now, you will be able to go closer to the subject and capture a macro shot.
9. Speech Enhancement
Here’s yet another feature that improves the video recording capabilities of the Pixel 7 series of phones. A good video is only complete with good audio and this is where the speech enhancement feature comes into play. It amplifies your voice while you’re speaking in a video and simultaneously cuts down the background noise to emphasize the vocals.
If you’re recording videos outdoors in a noisy environment, this is an absolute must. Here’s how to enable Speech Enhancement.
Step 1: Open the Camera app on your Pixel 7 or Pixel 7 Pro.
Step 2: Swipe to the left once on the bottom bar. You will now be in Video mode.
Step 3: Tap on the settings button in the top-left corner of the screen.
Step 4: Set the video resolution to whatever you wish. However, the frame rate must be 30fps only for the feature to work.
Step 5: Now, enable the Speech Enhancement toggle.
You can record a video with and without Speech Enhancement to see the difference yourself.
10. Unblur
This is a bonus feature that’s not necessarily a part of the camera app but is related to the pictures you capture so we decided to throw it into this list. The new Pixel 7 and Pixel 7 Pro have a cool feature called Unblur baked into the Photos app. As the name would suggest, it unblurs and tries to fix blurry images that you may have clicked from the device or even an older picture.
If you have an old picture that is blurry and you want to fix it, or you just snapped a photo and ended up shaking your hand, you can use Unblur with a single tap. Here’s how to make use of the feature.
Step 1: Open the Google Photos app on your Pixel 7 or Pixel 7 Pro. Navigate to the blurry image you wish to unblur.
Step 2: Select the Edit option at the bottom.
Step 3: Swipe to the Tools section. Here, tap on Unblur.
Wait for the process to complete. You can now adjust the slider to vary the intensity of the edit.
Step 4: Once you’re satisfied, hit the Done button to save changes.
Step 5: Finally, select Save copy to save the image.
Get the Best Out of Your Cameras
The Pixel 7 cameras are extremely capable so it’s only fair to use them to their fullest potential to get the best results. You can employ all of these features, tips, and tricks while clicking pictures or recording videos with your Pixel 7 or Pixel 7 Pro to give a new perspective to your shots.
Did you try any of these camera tricks? Share your experience in the comments below.
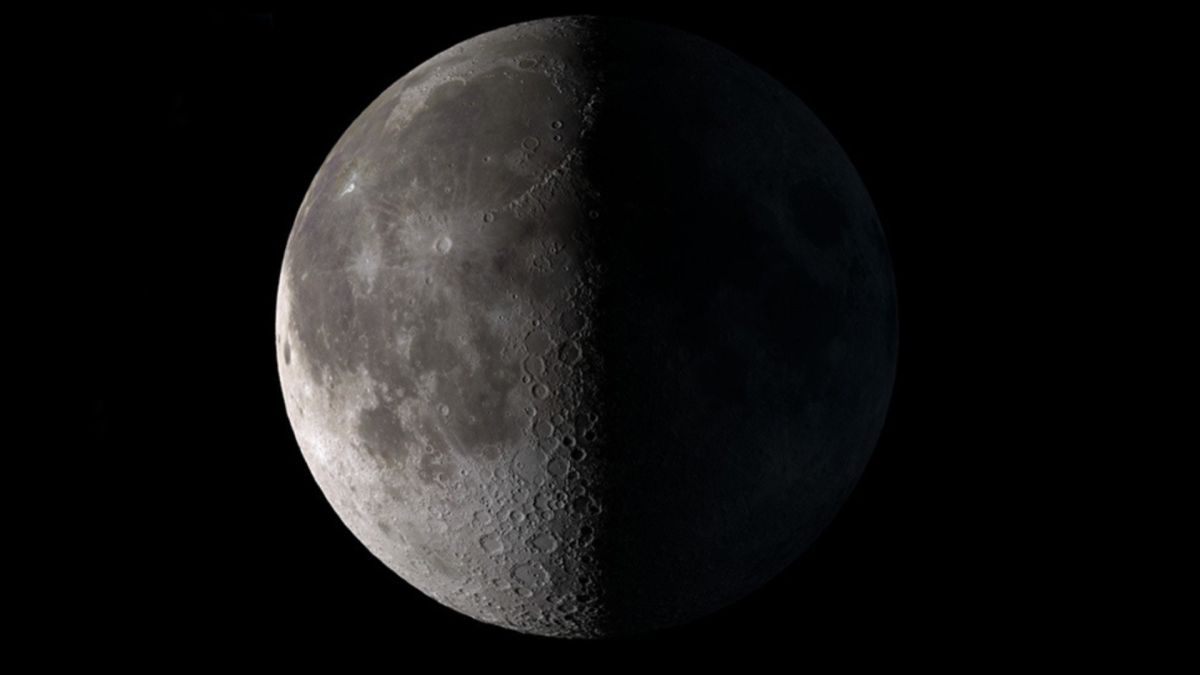
On the evening of Wednesday (Nov. 30), the moon enters its first quarter phase with its face almost exactly half-illuminated. During this lunar phase, the moon rises at midday and sets around midnight.
From New York City, the first quarter moon will become visible at 4:47 p.m. EST (2147 GMT) appearing at 33 degrees above the horizon to the southeast according to In the Sky (opens in new tab). (Remember – your fist at arm’s length equals roughly ten degrees in the sky.)
The first quarter moon will reach its highest point in the sky, 36 degrees above the southern horizon, at around 6:02 p.m. EST (2302 GMT). Following this, the first quarter moon will be observable until 10:32 p.m. EST (0332 GMT) at which point it will drop below 7 degrees over the southwest horizon.
Related: Night sky, November 2022: What you can see tonight [maps]
The first quarter moon falls exactly between the new moon and the full moon in the moon’s 29.5-day cycle, or lunar month. This phase of the moon gets its name because the moon has completed the first quarter of its lunar cycle.
During the new moon, the face of the moon is completely dark, almost invisible in the night sky. In contrast to this, during the full moon, the lunar face that points towards Earth is completely illuminated.
An illustration of the first quarter moon as it will appear in the night sky on Wednesday (Nov. 30). (Image credit: Chris Vaughan)
In the lead-up to the first quarter moon, the illumination of the moon advances across the lunar face and is described as waxing. This will continue until the next full moon, the Cold Moon, which is the last full moon of 2022 and falls on December 7.
Another change that the moon will undergo as it progresses through the first quarter moon towards the full moon is setting later and later each night. As a consequence, it is visible for longer and longer each night, and by the time the Cold Moon arrives, it will be visible for the majority of the night only disappearing at around dawn.
This progression is reversed as the lunar phase moves from the full moon to the next new moon which signals the beginning of the next lunar cycle. The illuminated face of the moon recedes, and the moon is described as waning.
The moon’s phases leading up to and away from the first quarter moon. (Image credit: NASA)
Also reversed is the change in the time at which the moon sets. This will get progressively earlier and earlier becoming visible for less and less of the night leading up to the new moon at which point it will set at midnight.
Exactly between the full moon and the new moon is a phase analogous to the first quarter called the third quarter or final quarter moon, which is the mirror opposite of the first quarter moon. During the final quarter, the moon rises at midnight and sets around midday. During this phase, the moon will be half-illuminated again, and which side of the moon skywatchers see illuminated during both these quarter phases depends on where on Earth they are located.
The next final quarter moon and the last of 2022 occurs on Dec. 16 and the next lunar cycle begins on Dec. 23, the day before Christmas Eve.
If you want to take the best photos of the moon that you can, our how to photograph the moon guide contains a wealth of useful information to raise your lunar photography to the next level. Our best cameras for astrophotography and best lenses for astrophotography can also help you capture the best moon images you can, no matter your skill level.
Editor’s Note: If you snap the moon during its first quarter phase and would like to share it with Space.com’s readers, send your photo(s), comments, and your name and location to [email protected].
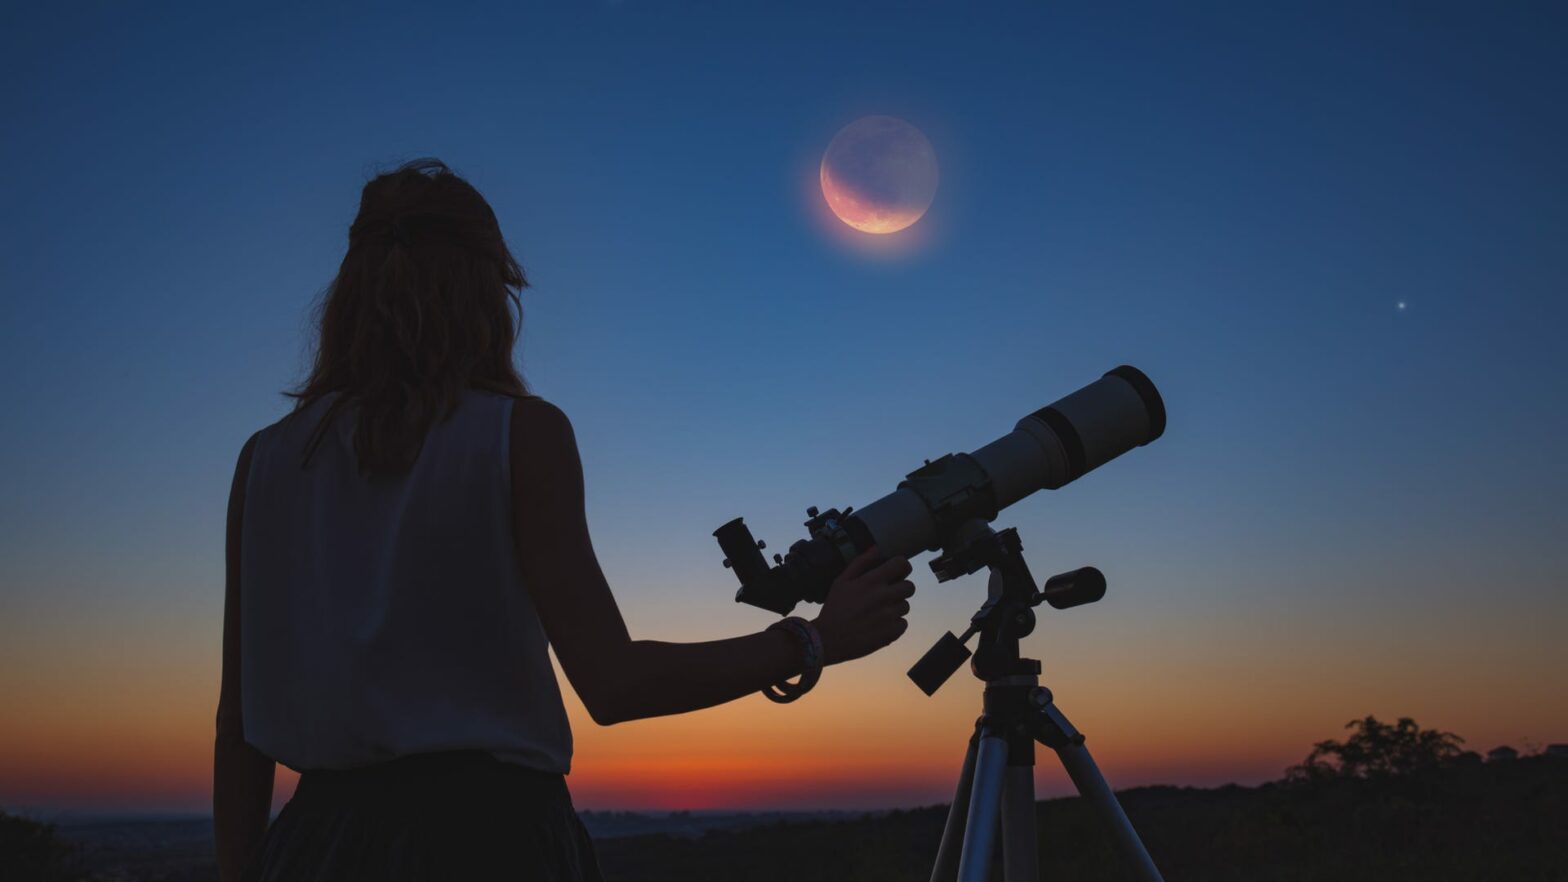
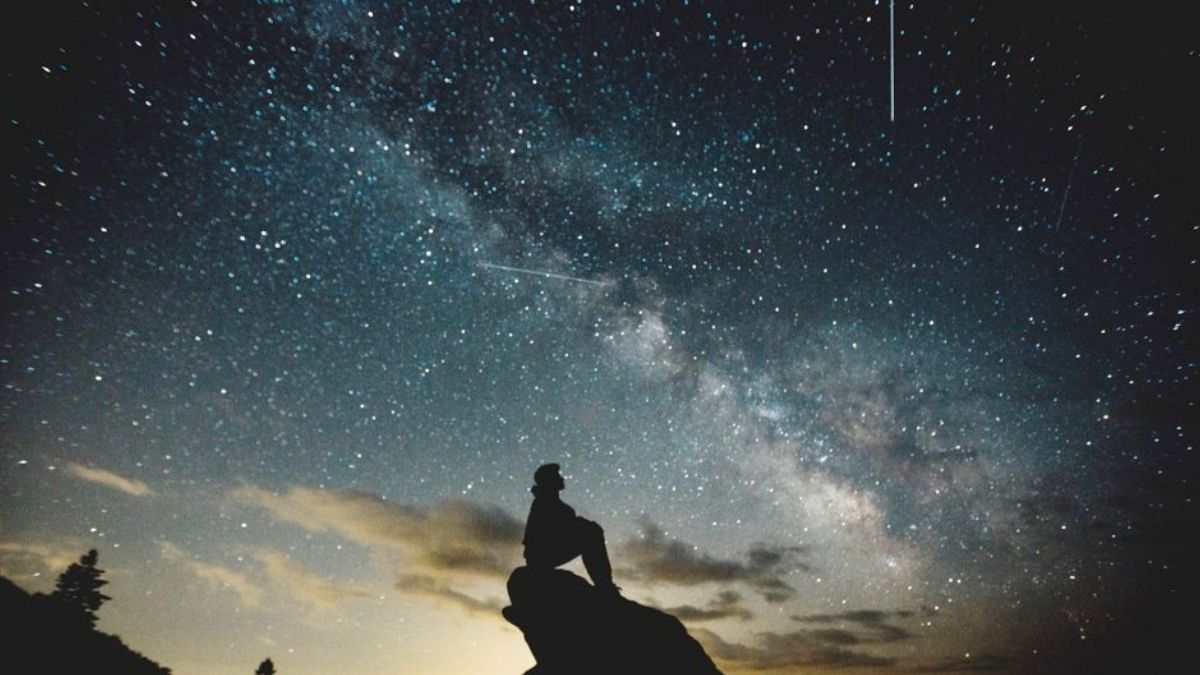
The reading constellation can never go wrong when connecting dots to form shapes under a clear, dark sky. Even if you have the best home telescope, the street lights, noise, and pollution in the cities undoubtedly interfere with our plan.
View stunning constellations like Cygnus, Orion, Cancer, Ursa Major, Ursa Minor, Aries, Lyra, Pegasus, and more by following the list below.
1. Nubra Valley, Jammu Kashmir
One of the farthest northerly villages in India is Turtuk, which is encircled by formidable mountain ranges. As one of the entrances to Siachen Glacier, it is also strategically significant as a location in the Nubra Valley, and you need a permit to enter the valley. Nubra provides a fantastic opportunity to gaze at the crystalline shines in the night sky in addition to the historic monasteries and Bactrian camel rides. This location is friendlier than the surrounding areas due to its 3001 m elevation. Therefore, for the best atmosphere, schedule a road trip from Leh to Nubra Valley (150 km) between April and June and between September and October.
2. Neil Island in Andaman and Nicobar Islands
The ideal location for stargazing is Shaheedweep, also known as Neil, a tiny island surrounded by the Bay of Bengal 40 kilometres northeast of Port Blair. Stunning scenery is created when the azure water blends with the starry, starry night sky after sunset. Since the sky is so clear all year long, it appears as though the stars are only a hand’s length away from this location.
3. Rann of Kutch in Gujarat
The biggest salt marshes on earth, known for their mudflats and marshlands, are also well-known for their clear night sky views. With the naked eye, the six magnitudes of stars are visible from this location. Astrophysicists can capture stunning astrophotography thanks to the desert’s eerie silence. Winter, or the months from October to February, is the ideal time to travel to Rann of Kutch.
4. Mandarmani in West Bengal
West Bengal’s little-known seaside village of Mandarmani is located away from the bustle of the city. This beautiful location offers a clear night sky that is ideal for observing stars.
5. Tarkali, Maharashtra
Tarkarli, a peaceful seaside community in Maharashtra, is about 475 kilometres from Mumbai. The area is well-known for its warm white sand, swaying palms, and calm blue waters. It is also a great location for stargazing excursions because the sky is pollution-free and clear enough to see constellations. Kashid beach is another location in Maharashtra to view the stars.
6. Spiti Valley, Himachal Pradesh
Due to its high elevation, clear skies, and absence of light pollution, the Spiti Valley in Himachal Pradesh is another well-known destination for stargazing in India. the nighttime glittering displays of the Milky Way and stars. At 4270 metres above sea level, Kibber or Kyibar in the Spiti Valley is the highest motorable village in the world and a well-liked location for stargazing.
7. Pangong Tso Lake, Ladakh
A high-altitude lake at 4,225 metres above sea level, Pangong TSO is renowned for its breathtaking views and ever-changing colours. The reflection of starry sky outlines in the Pangong Tso landscape at night transforms it into a mesmerizingly beautiful scene. May through September are the best months to see the Milky Way’s countless stars.
8. Coorg Karnataka
It is a premier hill location amidst the breathtaking Western Ghats mountain range. The clear and tranquil environment of Coorg transforms the night sky into a majestic canopy of starry outlines. To view the breathtaking scenes of the stars peeking from behind the mountain peaks, many adventurers set up camp in Coorg’s woods. The best time to visit Coorg for stargazing is from October to March.
9. Mt Katao in Yumthang Valley, Sikkim
Katao in the Yumthang Valley, one of Sikkim’s best-kept travel secrets, is the picture of tranquilly. This traveller’s paradise is a great choice for people who want to go on a stargazing trip because of its lofty snow-covered peaks, emerald slopes, and charming villages scattered with multicoloured prayer flags.
10. Sonmarg, J&K
Sonmarg has historical significance because it serves as the entry point to the historic Silk Road, a high-altitude mountain pass that connects Kashmir with China. Additionally, due to the lack of pollution and noise in this area, the night sky is a transparent shade with millions of sparkling stars
11. Jaisalmer, Rajasthan
Jaisalmer Fort’s serene desert setting offers a wonderful opportunity to observe the night sky’s constellations. The absence of pollution is essential for capturing breathtaking nighttime scenes like sand dunes covered in a sparkling canopy.
FYI, Research has shown that stargazing makes us more empathetic toward other people and calms our minds and spirits. You’re not the only one looking for serenity, calm, and a sense of direction during this period of utter chaos.
It is that time of the year again! No, not stuffing and turkey, but that most wonderful time of year when the G Style Magazine editors put together your shopping lists for those with very niche interests in your life. If you are looking to impress the PHOTOGRAPHER in your life, here is a list that is hard to beat.
Anker GaNPrime 65W Travel Charger
If your favorite photographer takes their workstation on the road, chances are they need somewhere to plug into. As a Mac user, one of my least favorite necessary accessories is the included adapter – it’s large, heavy, and clunky. That is where the Anker GaNPrime comes in. Weighing less than 5 ounces and slim enough to carry in a pocket, you can charge three devices, including two USB-C ports and a USB-A port – keeping you working all day long without carrying bulky chargers for every device you own.
I have been using the Anker GaNPrime for about a month now – fully replacing my included wall adapter. It has been solid for travel and for simply having a quick way to move my workstation from the desk to the couch.
You can pick one up from Amazon for about $60.
Pluto Trigger
Many of the cameras available today have a ton of programmed features into them – from astrophotography settings to focus stacking to stop-motion video – it seems like most cameras made in the last couple of years have a bunch of options that may make your aging camera system seem inadequate. Don’t fret, the Pluto Trigger is a simple remote triggering device that pairs with your smartphone to help you create several different effects – from time lapses to star trails to capturing falling waterdrops.
The Pluto Trigger has breathed life into my aging X-T2 – the photos it takes remain solid, allowing me to extend the life of my now decade-old camera. You can pick one up as a stand-alone device or as a full kit for high-speed photography, starting at around $120.
A Monitor Upgrade – BenQ Mobiuz 32-Inch Curved Gaming Monitor
Every photographer/videographer I know spends a considerable amount of time in front of a computer screen. Treat the photographer in your life right with a serious monitor upgrade like the BenQ Mobiuz EX3210U. Earlier this year, our very own Christian Rivera got a chance to review it and said, “the Mobiuz EX32 is absolutely sublime.”
While our original review focused on the monitor’s gaming chops, it should be noted that the Benq Mobiuz is ready out of the box and does not need color calibration (though you should if you plan to print your photos). With a 4K maximum resolution and a 144Hz refresh rate, you’ll find yourself loving your post-production workflow – it might even make me consider spending more time in post.
You can pick up the BenQ Mobiuz EX3210U for about $900
Ergonomic and Still Great Looking – Logitech MX Master 3S
Speaking of spending a lot of time in front of a computer, your input devices can help you work more effectively if not at the very least safe. The Logitech MX Master 3S offers a handsome alternative to what your computer came with. The Logitech MX Master 3S can help you stay comfortable for those marathon editing sessions.
Here’s a snippet from my review:
If my SteelSeries Aerox 3 Wireless mouse was my idea of a solid compromise between high customization and sized-to-travel, the MX Master 3S for Mac is a no-compromises workhorse of a mouse… Just about every button or wheel can be configured to your liking.
You can pick up the Logitech MX Master 3S for $99.
For the Film Photographer – the Lomography DigitaLiza Max
Make no two ways about it – I’m a big fan of analog (film) photography, and for those of us who know, we know it’s an expensive habit, but doing a few things on your own helps cut the cost. It’s by far one of the easiest ways to scan your negatives and share them on social media. Here’s an excerpt from our review:
If you’re casually into shooting film or have no interest in shooting film, this metal and plastic contraption sounds like a waste. For those of us that know better, the DigitaLIZA is a great way for analog lovers to digitize their negatives, whether they own a high-resolution camera or if they own a smartphone.
Whether you’re new to stargazing or simply looking to replace an old telescope, this roundup of the best telescopes will prove handy. We recommend that you hold off buying a new telescope until you’ve read this through. Not only do we cover what to look for in a telescope, but we also recommend some of the best telescopes on the market right now.
What to Look For in a Telescope
Telescopes come in different shapes, sizes, and prices. The best telescope for your needs could depend on your interests (what you want to view), the type of telescope (refractor, reflector, or compound), and of course the price. Here are five other key criteria to consider when shopping for telescopes.
Aperture Size: This is by far the most important feature to look out for in a telescope. A telescope’s aperture, a.k.a its objective, is the size of its lens or mirrors. Usually, the bigger, the better. However, note that the bigger the aperture, the bulkier the telescope.
F-ratio: The f-ratio is the focal length of the telescope divided by its aperture. It tells you what the scope is best suited for. Smaller f-ratios produce lower magnification, wider field of view, brighter images, and vice versa.
Mount: A telescope’s mount is one of its most underrated components. The mount allows the telescope to achieve balance and to point in different directions, and at different angles. The right mount ensures steady and clear images, unlike wobbly stands.
Ease of Setup and Use: For most newbie stargazers, one of the key things to consider about telescopes is the ease of setup and ease of use. Telescopes should be easy to install and use. The best telescopes share this trait.
Portability and Price: Stargazing is an outdoor activity, meaning that telescopes get moved around a lot. The best telescopes are usually lightweight and portable. As for price, it’s such a huge factor which is why we’ve included both budget and premium options.
Best Monocular: Pankoo Monocular
Pankoo
Pros
✓ Lightweight, compact, and handy
✓ Easy to set up and use
✓ Large aperture for enhanced view
✓ Phone adapter for astrophotography
Cons
✗ Easy to steal and conceal
✗ Beginner focused, not suitable for advanced users
✗ Magnification not quite as advertised
As the name implies, the Pankoo Monocular is a monocular telescope. Monocular telescopes like Pankoo are compact refracting telescopes. The Pankoo Monocular has a 60-millimeter aperture, measures 4.9 x 4.9 x 2.5 inches, and weighs in at 0.86 pounds. It has a velvet bag, dust cover, ZEESHY straps, and a user manual to get you started.
Designed for single-hand use, the 40 x 60 Pankoo Monocular is easy to use. Easily adjust the eye cup and focus wheel to explore its dual focus (419 feet/1,000 yards) feature. It also comes with a three-section tripod, a premium BAK4 prism, and a phone adapter. It is suitable for climbing, hiking, driving, racing, traveling, watching wildlife, bird watching, sightseeing, hunting, etc.
Best Monocular
Pankoo Monocular
Specially adapted for one-hand use, the Pankoo Monocular is handy and walks the talk.
Amazon
$69.99 $138.99 Save 50%
Best for Kids and Adults: ToyerBee Telescope
ToyerBee
Pros
✓ Kid and adult-friendly
✓ Large aperture and focal length
✓ Impressive magnification
✓ Supports wide-field observation and deep space exploration
Cons
✗ F-ratio less than five
✗ Tripod is rather flimsy
✗ Takes some doing to master
Whereas only a handful of earthlings may ever achieve space travel, a good telescope can bring the universe to you. The ToyerBee Telescope is one of the best telescopes for kids and adults that lets you behold the beauty of celestial bodies. This manual focus refractor telescope has a 70-millimeter aperture, a 300-millimeter focal length, and a 4.28 f-ratio.
The ToyerBee Telescope measures 11 x 5.5 x 46 inches, is beginner-friendly and is easy to set up and use. It features a 3x Barlow lens and two eyepieces offering 15x to 150x magnification which makes it suitable for wide-field observation and deep space exploration. It also has a tripod, wireless remote, and a phone adapter for astrophotography.
Best for Kids and Adults
ToyerBee Telescope
The ToyerBee Telescope is beginner-friendly and great for wide-field observation and deep space exploration.
Best Budget (Kids and Adults): Celestron PowerSeeker 50AZ Telescope
Celestron
Pros
✓ Budget-friendly and does the job
✓ Name brand telescope
✓ Wide aperture and superb f-ratio
✓ Quality build
Cons
✗ The Barlow lens could be better
✗ Tripod isn’t the most sturdy
If you’re interested in stargazing and space exploration on a budget, then you should definitely get the Celestron PowerSeeker 50AZ Telescope. Celestron makes some of the best telescopes on the market and the Celestron PowerSeeker is one of its best budget telescopes. It has a 50 millimeters aperture, 600-millimeter focal length, and an f/12 f-ratio.
The Celestron PowerSeeker is a manual focus refractor telescope that measures 33 x 5 x 8 inches and weighs just 3.6 pounds. It has a manual yoke mount with a slow-motion altitude rod for accurate pointing. It also features three Galilean eyepieces and a 1.5x image erecting eyepiece, a star diagonal, a 5 x 24 finderscope, and a 3x Barlow lens.
Best Budget
Best Premium: Celestron AstroMaster 130EQ-MD
Celestron
Pros
✓ Large 130 millimeter aperture
✓ Good f-ratio of five and large magnification
✓ German Equatorial tracking mount
✓ Sturdy stainless steel tripod
Cons
✗ Somewhat weighty
✗ Takes some getting used to
✗ The supplied eyepieces leave much to be desired
If price is not a factor for you and you want something more premium with more telescopic power, it should be the Celestron AstroMaster 130EQ-MD. It’s among the best premium telescopes available and is another Celestron product. However, unlike the PowerSeeker 50AZ, the 37-pound AstroMaster 130EQ-MD is a reflector or Newtonian telescope.
It features an amazing 130-millimeter aperture, 650-millimeter focal length, and an f-ratio of five. It has two eyepieces, a StarPointer red dot finderscope, and 345x light-gathering power, enough to show Saturn’s rings and Jupiter’s moons in great detail. It also comes with a German Equatorial tracking mount with slow-motion controls, and a sturdy stainless steel tripod.
Best Premium
Best Computerized: Celestron NexStar 6SE Telescope
Celestron
Pros
✓ Fully automated computerized telescope
✓ Large 150-millimeter aperture
✓ Up to 60x magnification
✓ GoTo Mount with SkyAlign technology
Cons
✗ Pretty pricey
✗ May require additional lenses and accessories for best results
✗ Requires some practice to gain mastery
Whereas most other scopes use manual or motorized tracking, the Celestron NexStar 6SE telescope is a computerized telescope. Computerized scopes are easy to set up and provide enhanced tracking accuracy, among others. This allows you to more easily, quickly, and precisely locate extra-terrestrial bodies.
One of the best computerized telescopes, the Celestron NexStar 6SE features a 150-millimeter aperture, 1,500-millimeter focal length, and an f-ratio of 10, double that of the Celestron AstroMaster 130EQ-MD. It can magnify objects up to 60x, has a fully automated GoTo Mount, and utilizes SkyAlign technology to guide you as you sojourn through the vast cosmos.
Best Computerized
Best for Travel: GSkyer Telescope
GSkyer
Pros
✓ Great for travel and camping
✓ Highly rated
✓ Altazimuth mount
✓ 5 x 24 finderscope
Cons
✗ Mere 70-millimeter aperture and 5.7 f-ratio
✗ Lenses can do better
Finding a hilly spot on a clear night sky away from city lights and tall buildings is almost impossible in the city, thus requiring some form of travel. Whether you’re going nearby or camping far away, the GSkyer Telescope is one of the best travel telescopes to go with. It’s lightweight and compact enough to fit into your car trunk as you go stargazing.
The GSkyer Telescope has a 70-millimeter aperture, a 400-millimeter focal length, and a 5.7 f-ratio. It uses two replaceable eyepieces and one 3x Barlow lens, as well as a 5 x 24 finderscope with mounting bracket and cross-hair lines. It has a wireless remote, phone adapter, Altazimuth Mount, and supports astrophotography. It comes with a carry bag which is handy when traveling.
Best for Travel
GSkyer Telescope
Going for the weekend or going camping? Explore the universe with the compact and portable GSkyer Telescope.
BAHRAINI astro-photographer Yusra Abdulqader Taj was over the moon when National Aeronautics and Space Administration (Nasa) featured one of her celestial images on their website, and hopes her photography will inspire young astronomers to shoot for the stars.
The 40-year-old Information Technology professional at the Interior Ministry turned her love for space into her passion during the pandemic, snapping up images with two dedicated cameras (ZWO ASI 533 one shot colour camera and ZWO ASI 294 monochrome camera) and 10 filters.
Her image of the SH2-132 Lion Nebula, taken in August, was featured on Nasa’s Astronomy Picture of the Day (APOD) site, that posts photographs of the cosmos captured by professionals from all over the world.
“I have been fortunate to represent Bahrain in the Nasa APOD,” Yusra, a resident of Riffa, told GulfWeekly. “I hope my images will encourage young astronomers from Bahrain to pursue this hobby and to represent Bahrain’s skies to the astro-community worldwide.”
An amateur astro-photographer for two years, Yusra’s love for the moon and stars started from a young age and her hobby was ignited by her laptop.
“I love gazing at the moon and I love the fact that the night sky is unique, in the sense that it is the one place we, as humans, share equally regardless of where we are on Earth,” she said.
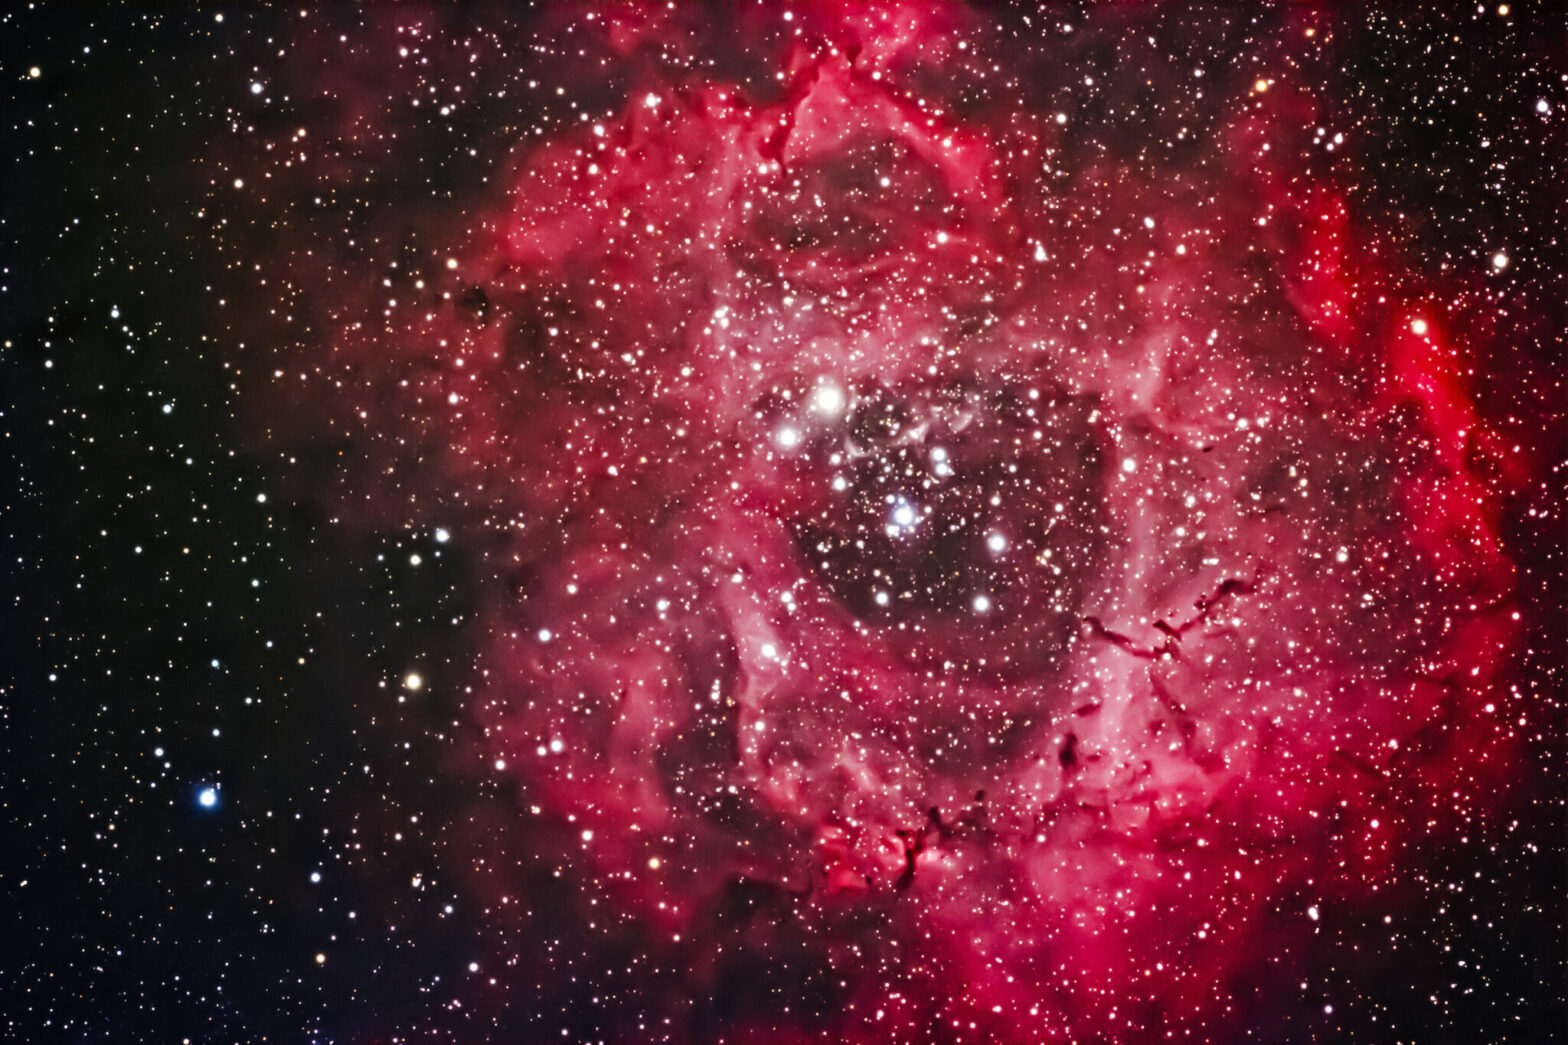
“But, I decided to take up this hobby quite recently when a random Windows wallpaper of the Rosette Nebula, by Hubble telescope, popped up on my laptop lock screen.
“This was the first time I had seen a nebula and I was amazed by its beauty. I went down the rabbit hole of astrophotography. The curiosity of the cosmos and the possibility of capturing something not visible to the human eye prompted me to delve into this hobby.”
While astrophotography is both challenging and fun, it does require a steep learning curve, and one should be prepared to spend his/her time to learn how to use the equipment and the software, and develop their skills to process images.
Yusra started her cosmic journey with a normal DSLR full frame Canon 6D Mark ii and a Canon 75-300mm lens. She also used Samyang 24mm and 135mm prime lenses for wide field photography. However, for imaging deep sky objects like the nebulas and galaxies, she used a William Optics telescope, that comes with an apochromatic lens with a focal length of 478mm and a focal ration of f/5.9, that can be reduced to f/4.7 with a focal reducer.
“Light pollution filters also reduce and block the glow of city lights and capture the emission signal of the object in the cosmos,” said Yusra.
She also advises in investing in the right mount, which is pivotal for astrophotography.
“The process is not as straightforward as normal photography,” she said. “It requires planning, patience, and image processing skills to get the best results. It is also important to know the weather forecast before starting any imaging session.
“Bahrain, in most part, has clear skies throughout the year, but heavy light pollution, hot weather and humidity make astrophotography a daunting process. It requires astrophotographers to spend many hours collecting multiple images of a specific object.”
Over time, she has captured star clusters, bright nebulas, emission nebulas, planetary nebulas and galaxies. All her images have been taken from her backyard.
Her favourite photograph is of the M31 – The Andromeda Galaxy, which she said ‘was very challenging’ as it took more than 4,000 shots (27hours and 70GB data). She now plans to shoot the IC 434 – The Horse Head Nebula in the Orion Constellation with a monochrome camera.
Her astro images are published on the Astrobin website, a community where astro photographers from all over the world showcase their work.
For details, visit Yusra Q’s gallery on AstroBin or @astronumb on Instagram.
The moon’s halo or lunar halo is an optical illusion that causes a large bright ring to surround the moon. This striking and often beautiful halo around the moon is caused by the refraction of moonlight from ice crystals in the upper atmosphere.
In effect, these suspended or falling flecks of ice mean the atmosphere is transformed into a giant lens causing arcs and halos to appear around the moon or the sun depending on whether the effect is happening during the night or day respectively.
The effect is so striking that it has given rise to a wealth of folklore and superstition, and was used not entirely unsuccessfully used to predict the onset of bad weather.
Related: 15 stunning places on Earth that look like they’re from another planet
What is a moon halo and how does it form?
A lunar halo is created when light is refracted, reflected, and dispersed through ice crystals suspended in cirrus or cirrostratus clouds located at an altitude of 20,000 feet (6,000 meters) and higher, up to 40,000 feet (12,000 meters).
The shape of these ice crystals focuses light into a halo around the moon or the sun. As ice crystals are usually hexagonal these lunar halos are almost always the same size, with the moon (or the sun) sitting 22 degrees from the other edge of the halo — roughly the width of an outstretched hand at arm’s length.
The uniform 22-degree radius and 44-degree diameter of halos mean that both solar and lunar halos are often referred to as 22-degree halos.
This uniformity in diameter arises because ice has a specific index of reflection and the hexagonal shape of an ice crystal means when its sides are extended it forms a prism with a 60 -degree apex angle. This results in an angle of minimum deviation for light passing through the ice crystal of 21.84 degrees.
These ice crystals also demonstrate a prism effect that separates white light from the sun or is reflected by the moon into various individual colors just like the atmospheric effect that creates a rainbow.
The radius of a moon halo is roughly the length of an outstretched hand at arm’s length. (Image credit: ClickAndPray Photography via Getty Images)
(opens in new tab)
This happens because different wavelengths of light, thus different colors, experience a different degree of refraction when they pass through a prism.
This means that lunar halos can be very lightly tinted with rainbow colors, longwave red light on the inside, and shortwave blue light on the outside. Colors in the lunar halo are often too weak to be seen with the naked eye and may be much more visible around the sun because of how much brighter it is than the moon.
The optical properties of the ice crystals also mean that they don’t direct light back toward the center of a halo. This means that the sky inside a 22-degree halo can often appear darker than the surrounding sky making it appear like a “hole in the sky.”
Do lunar halos have company?
Lunar halos are often accompanied by smaller more colorful rings that are caused by refraction and reflection of light by water molecules in the atmosphere called coronas. Lunar halos aren’t connected to coronas, which are around half as wide as halos with a radius of around 10 degrees, as these optical effects are caused by water droplets rather than ice crystals.
In addition to this, refraction from ice crystals can also create double halos. On rare occasions, these double halos even possess spokes radiating out to their outer edges.
Not only are lunar halos closely related to solar halos, but this icy refractive effect can also create rings opposite these astronomical bodies, or pillars of light, and even “sun dogs” — concentrated patches of sunlight seen 22 degrees to the left or right of the sun that can appear in pairs.
Moon halos are closely related to “sun dogs”, a solar phenomenon where pillars of light appear on either side of the sun. (Image credit: karinegenest via Getty Images)
(opens in new tab)
Halos with a radius of 22 degrees can also be accompanied by 46-degree radius halos, which can also occur independently too. Larger and much fainter than 22-degree halos, 46-degree halos form when sunlight enters randomly oriented hexagonal ice crystal at its face and exits through its base.
This causes light to be dispersed at a wider angle — one greater than the angle of minimum deviation — creating a halo with a more blurry and diffuse outer edge.
On its science site, NASA documents (opens in new tab) a rare incidence of a quadruple lunar halo. The four halos around the moon were sighted on a winter night above Madrid, Spain, in 2012. Falling hexagonal ice crystals created a 22-degree halo, while column ice crystals created a rarer circumscribed halo. More distant ice crystals created a third rainbow-like arc 46⁰ from the moon. Finally, part of a fourth whole 46-degree circular halo was also visible completing the quadruple lunar halo that NASA described as “extremely rare, especially for the moon.”
Related: Red lightning: The electrifying weather phenomenon explained
How common are moon halos: When and where to see them
Moon halo photographed over the Lyngen Alps, Norway. (Image credit: Posnov via Getty Images)
(opens in new tab)
Farmers’ Almanac (opens in new tab) describes lunar halos as being fairly common, meaning there is a good chance of spotting one, as long as you are willing to brave cold and possibly wet weather. That’s because though lunar halos can happen at any time of year, they are more common in winter.
A moon halo can be seen with the unaided eye, but if you’re looking for a telescope or binoculars to observe the moon in more detail, our guides for the best binoculars deals and the best telescope deals now can help. Our best cameras for astrophotography and best lenses for astrophotography can also help you prepare to capture an impressive lunar photo.
Related:Ultimate guide to observing the moon
Because cirrus clouds are the usual suspects behind lunar halos, this optical illusion is more likely to be visible when a bright full or nearly full moon is veiled by thin cirrus clouds. This means unlike hunting other astronomical events and objects, cloudy conditions can actually be a bonus when it comes to spotting lunar halos.
The cirrus clouds are transparent and cover wide areas of the sky — up to thousands of miles — producing a host of other halo effects like white or colored rings, spots, or arcs of light in addition to solar and lunar halos.
These clouds can be so thin and finely dispersed that sometimes lunar and solar halos are the only way of knowing they are actually present in the sky.
Myths and cultural significance of moon halos
According to the Farmers’ Almanac, in folklore, the observation of a lunar halo has been associated with forthcoming unsettled weather, especially during winter.
This is something that has often been proven true thanks to the phenomena behind these halos. This is because cirrus clouds sometimes indicate an approaching warm front which is, in turn, associated with a low-pressure system, a storm that can carry with it a sudden drop in temperature, heavy rain, hail, and even thunder and lightning.
Because cirrus clouds often signal rain falling within the next 24 hours the atmospheric optical illusions they cause became embedded in “weather lore” becoming an early method of empirically predicting the weather before the development of metrology.
One striking and poetic example of this folklore is a proverb listed in the book Dictionary of Proverbsby George Latimer Apperson (opens in new tab).
“If the moon show a silver shield,
Be not afraid to reap your field;
But if she rises haloed round,
Soon we’ll tread on deluged ground.”
This system isn’t particularly reliable when predicting bad weather as cirrus clouds aren’t always a sign of an approaching warm front.
Another folklore idea surrounding lunar halos is also worth being skeptical of is that by counting the stars encircled by the halo a person could tell how many days until the bad weather moved in.
More stars meant more time until the rain set in, and fewer stars signified that bad weather wasn’t far from descending.
Additional Reading
Ice crystals aren’t the only objects that can bend light and create stunning optical illusions. Astronomical bodies much further afield than the moon like distant galaxies can be blurred, stretched, magnified, and even caused to appear at multiple points in the sky when objects of tremendous mass warp the very fabric of spacetime between them and Earth. The European Space Agency (ESA) explains (opens in new tab) the phenomenon of gravitational lensing.
Bibliography
Ring Around The Moon? Here’s What It Means, Farmers’ Alamac, [Accessed 11/19/22], [https://www.farmersalmanac.com/ring-around-the-moon-9657 (opens in new tab)]
22° Halo around the moon, Atmospheric Optics, [Accessed 11/19/22], [https://atoptics.co.uk/halo/circmoon.htm (opens in new tab)]
Moon Halo, Hyperphysics, [Accessed 11/19/22], [http://hyperphysics.phy-astr.gsu.edu/hbase/atmos/moonhalo.html (opens in new tab)]
Quadruple Lunar Halo Over Winter Road, NASA Science, [Accessed 11/19/22],[https://science.nasa.gov/quadruple-lunar-halo-over-winter-road (opens in new tab)]
“Disk with a hole” in the sky, Atmospheric Optics, [Accessed 11/19/22], [https://atoptics.co.uk/halo/circ2.htm (opens in new tab)]
Apperson. G. L., Dictionary of Proverbs, Wordsworth Editions Limited, [ (opens in new tab)2006], ISBN 1 84022 311 1
Moon Airliner is a fascinating photo of an airliner accident photographed in front of a full Moon.
Western Nevada College is excited to celebrate the 20th anniversary of Jack C. Davis Observatory in 2023. The observatory is named after the college’s first president and opened in 2003 with astronaut Buzz Aldrin, the second man to walk on the Moon, lecturing at opening ceremonies. In honor of this milestone anniversary, WNC Foundation and the JCDO Director Dr. Thomas Herring have worked together to create some spectacular astrophotography for its annual fundraising note card campaign. A pack of these fascinating note cards is available for $10. Each pack includes two notecards for each photograph for a total of 12 note cards. To purchase a pack of note cards, please phone Hilda Villafana at 775-445-3325. Five of the six photographs were taken by John Dykes, an active volunteer at the observatory and a former president of the Western Nevada Astronomical Society (WNAS). The full Moon over WNC was a photo taken by Sam Golden of Choice 50 Photography. Each pack includes: • Moon Airliner: A plane caught by accident crossing in front of a full Moon. The photographer didn’t notice until the next day that something was in the way. • Horsehead: The Horsehead nebula is a reflection nebula located near Orion’s belt about 1375 light years from Earth. The dark shape is dense gas and dust blocking visible light from stars behind. The red surroundings are emissions from hydrogen, the most abundant element in the universe. • Pleiades: This is an open cluster of stars that has been given names by many cultures around the globe. This cluster of young hot stars is located about 444 light years from Earth. It is also known as Subaru in Japan, Makaliʻi to native Hawaiians, and Matariki to the Māori. • Rosette: This is a nebula of ionized atomic hydrogen about 5000 light years from Earth. The red glow is characteristic of hydrogen emissions. • Jack C. Davis Observatory with star trails: This photo is a time lapse of stars moving through the sky as the Earth rotates on its axis. Photos were taken over the course of the night and stacked together. During the final exposure a car’s headlights illuminated the building, providing the contrast with the dark sky and shadows across the building itself. • Full Moon over WNC: The fifth annual Reach for the Stars Gala fundraiser presented by WNC Foundation in August included an extra visual bonus from above — a spectacular full Moon. For people with an interest in astronomy or a desire to learn more about the universe, you are invited to attend free Saturday night Star Parties from dusk until 11 p.m. at the observatory. WNC also offers astronomy classes, such as Stellar Astronomy (AST 110), this spring, and Dr. Thomas Herring and Northern Nevada lecturer Mike Thomas provide free lectures to the community throughout the year.
The Horsehead nebula is a reflection nebula located near Orion’s belt about 1375 light years from Earth.


![G Style’s Top Picks for Photography This Holiday Season [2022] – G Style Magazine](https://www.bwuphoto.com/wp-content/uploads/2022/11/G-Styles-Top-Picks-for-Photography-This-Holiday-Season-2022.jpeg)