A Guide to Designing Your Own Custom Sweatshirt: Tips and Tricks

[ad_1]

Are you tired of wearing the same old sweatshirts everyone else has? Do you want to express your personal style and message through your clothing? If so, designing your own custom sweatshirt is a great option. But where do you start? In this guide, we’ll provide practical advice on how to create your own custom sweatshirt design, from selecting the right colors and fonts to choosing the best printing method and fabric type.

A Guide to Designing Your Own Custom Sweatshirt

#1 Choosing Your Design Elements

The first step in designing your custom sweatshirt is to determine the concept or theme you want to convey. Whether it’s a personal motto, a pop culture reference, or a simple graphic design, having a clear idea of what you want your sweatshirt to represent will make the design process easier. Once you have a concept in mind, it’s time to choose the design elements.

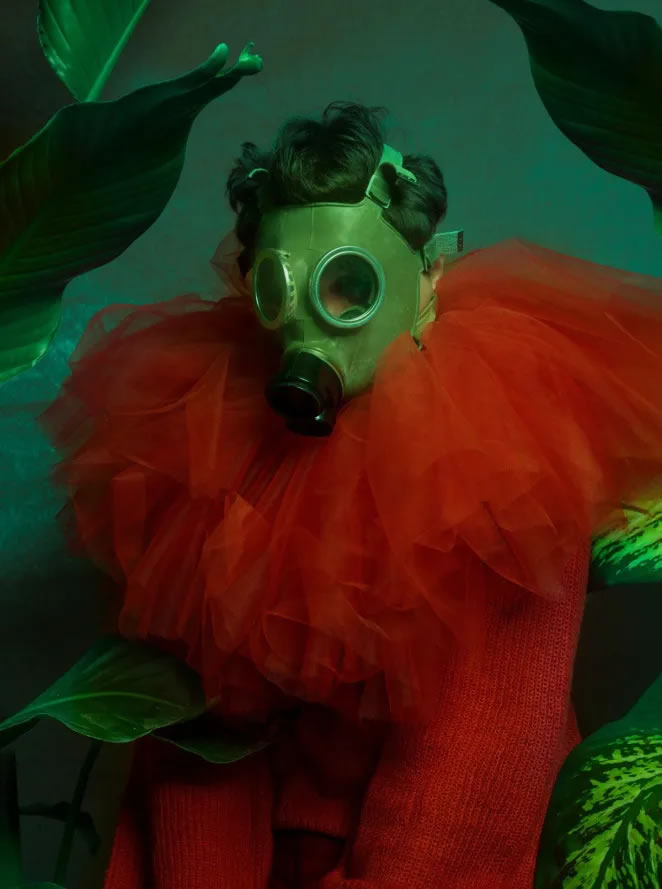
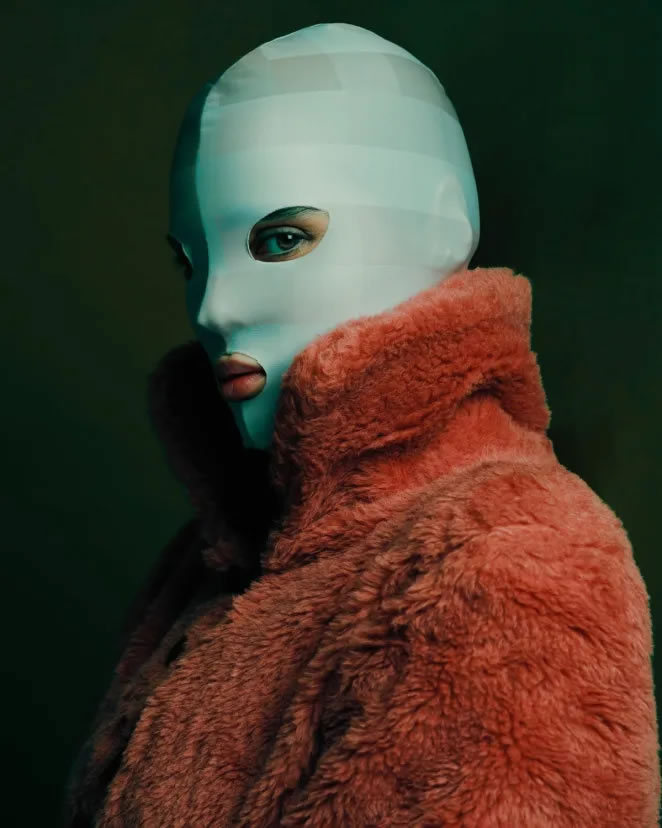
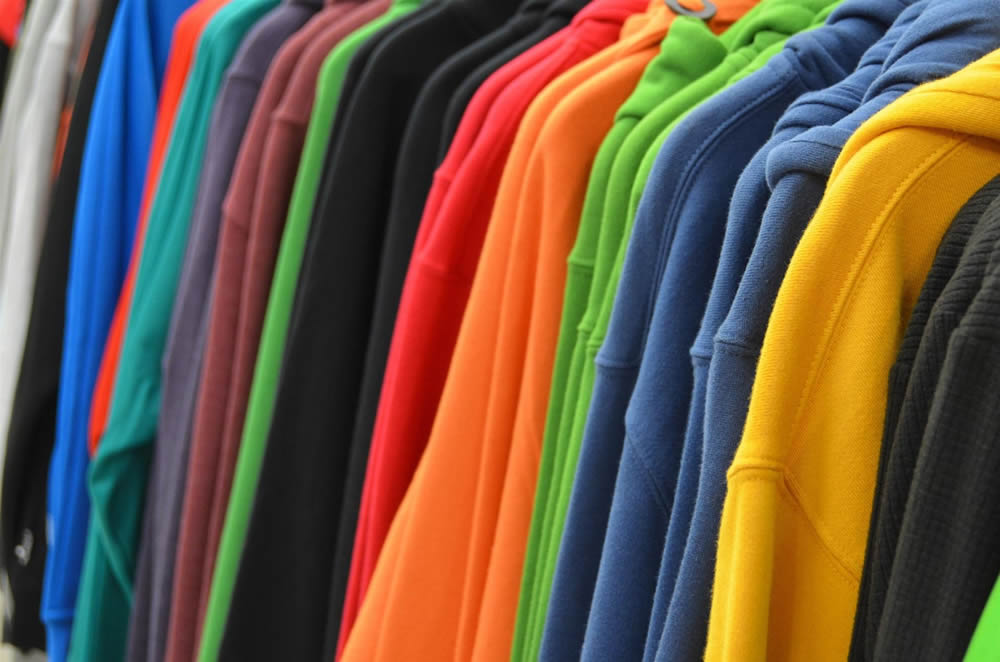
Selecting the right colors and fonts can make or break your design. Make sure the colors complement each other and the design itself. Consider the mood you want to convey and the message you want to send. For example, bright and bold colors might work for a fun and playful design, while muted and earthy tones might work better for a more serious message.

Fonts are another crucial design element. The font you choose can convey a specific tone or feeling, so it’s important to choose the right one. Make sure the font is legible and fits with the overall design. Avoid using too many different fonts, as this can make the design look cluttered.

Graphic elements, such as logos or illustrations, can add visual interest to your design. When choosing graphics, make sure they are relevant to your concept or theme. Avoid using copyrighted material unless you have permission to do so.

#2 Considerations for Printing Method and Fabric Type

Once you have your design elements selected, it’s time to think about the printing method and fabric type. There are several printing methods to choose from, including screen printing, DTG printing, and embroidery. Each method has its own advantages and disadvantages.

Screen printing is a popular method for printing custom sweatshirts because it’s cost-effective for large quantities. It involves using a stencil to apply ink onto the fabric. DTG printing, on the other hand, is a newer printing method that uses a printer to apply ink directly to the fabric. DTG printing is best for small quantities or one-off designs.

Embroidery is another printing method that involves stitching the design onto the fabric. Embroidery can add texture and depth to the design, but it’s not suitable for every design.

When choosing a fabric type, consider the printing method you’ve chosen. Different fabrics work better with different printing methods. For example, cotton is a popular fabric choice because it’s breathable and absorbent, making it suitable for screen printing. Polyester is another popular choice because it’s durable and easy to care for, making it suitable for DTG printing.

#3 Designing Your Sweatshirt

Now that you’ve selected your design elements, printing method, and fabric type, it’s time to create your design. Start by creating a mock-up of your design. This will give you an idea of how the final product will look. Make sure to size the design correctly and consider where it will be placed on the sweatshirt.

If you’re not comfortable with graphic design software, consider hiring a designer to create a digital version of your design. There are also online tools that allow you to create your own designs without any graphic design experience.

Once you have your design finalized, it’s time to upload it to a printing service or manufacturer. Make sure to follow their guidelines for file format and size.

#4 Quality Control and Sustainability

After your custom sweatshirt is printed, it’s important to check the quality of the finished product. Make sure the design is centered and aligned correctly, and that the colors are accurate. If there are any issues with the final product, contact the printing service or manufacturer to resolve the issue.

When designing your own custom sweatshirt, it’s important to also consider sustainability. Choose printing services and manufacturers that prioritize sustainability in their production processes. Look for companies that use eco-friendly printing methods and materials, and that prioritize ethical and fair labor practices.

A Guide to Designing Your Own Custom Sweatshirt

Conclusion

Designing your own custom sweatshirt can be a fun and rewarding experience, allowing you to express your personal style and message through your clothing. By following these tips and tricks, you can create a design that not only looks great, but also represents your individuality. Remember to choose your design elements carefully, consider the printing method and fabric type, and prioritize quality control and sustainability. With these considerations in mind, you can create a custom sweatshirt that you’ll be proud to wear for years to come.


Related Articles:

[ad_2]

You have 20/20 vision if you can spot the dangerous snake hidden in nature

[ad_1]

A DANGEROUS snake has been spotted in the bushes of a popular photo circulating the internet.

The serpent, however, couldn’t easily be spotted by everyone unless they have a good eye.

A photographer based in St. Petersburg, Russia spotted a poisonous viper in a Leningrad forest (stock)

2

A photographer based in St. Petersburg, Russia spotted a poisonous viper in a Leningrad forest (stock)Credit: Getty

St. Petersburg-based photographer Lelia Spb shared the capture.

She took the photo in the Leningrad region of Russia.

The picture showed green foliage, including sticks and leaves in the grass.

Upon further inspection, however, a snake can be seen slithering through the greenery.

The snake is actually a poisonous variety, called a viper.

The optical illusion became part of a series by Lelia.

She took two shots, showing the hidden dangers of the Leningrad forest.

“Hidden dangerous snake,” she titled the photo. “Viper in the forest of the Leningrad region.”

Lelia shared the optical illusion and what made the capture so remarkable.

“At first glance, it seems that the photo is only grass,” she said.

The grass, however, was the perfect environment for the viper to thrive in descretion.

“In fact, in the grass masked a dangerous poisonous snake – viper,” she added.

Vipers are typically not aggressive snakes, choosing environments where they can easily hide away.

However, the snakes are poisonous and potentially deadly.

The poisonous viper was hidden among the greenery in a forest in the Leningrad region of Russia

2

The poisonous viper was hidden among the greenery in a forest in the Leningrad region of RussiaCredit: Getty


[ad_2]

Capturing The Cosmos Like Never Before

[ad_1]

(CTN NEWS) – At [CTN NEWS], we are committed to pushing the boundaries of astrophotography by harnessing the power of artificial intelligence (AI).

With our cutting-edge AI tools, capturing awe-inspiring images of the cosmos has never been easier.

In this article, we will delve into the world of astrophotography and explore the incredible AI-powered tools that are revolutionizing the way we capture the beauty of the universe.

The Art of Astrophotography

Astrophotography is a captivating art form that allows us to document the mesmerizing beauty of celestial objects such as stars, galaxies, and nebulae.

Traditionally, astrophotographers faced numerous challenges, including long exposure times, precise tracking, and post-processing techniques.

However, with the advent of AI, these obstacles are now being overcome, enabling photographers to achieve stunning results with greater ease and efficiency.

AI-Powered Tools for Astrophotography

1. Intelligent Image Stacking

Image stacking is a powerful technique that involves combining multiple images of the same celestial object to enhance details and reduce noise.

Our AI-powered tool utilizes advanced algorithms to automatically analyze and align multiple images, resulting in a final composite image that showcases incredible clarity and depth.

By leveraging the power of AI, photographers can achieve breathtaking results in a fraction of the time it would traditionally take.

2. Noise Reduction and Enhancement

Capturing images of distant celestial objects often leads to the presence of noise, which can hinder the overall quality of the photograph.

Our AI tool employs sophisticated denoising algorithms to effectively minimize noise while preserving important details.

Additionally, it enhances the overall image by intelligently sharpening fine details and enhancing colors, bringing out the true beauty of the cosmos.

3. Automated Tracking and Guiding

Precise tracking is essential in astrophotography to prevent star trailing and capture sharp, pinpoint stars.

Our AI-powered tracking and guiding system utilizes state-of-the-art algorithms to automatically adjust the telescope’s positioning, ensuring accurate tracking throughout the exposure.

This eliminates the need for manual adjustments and allows photographers to focus on composition and creative aspects of their shots.

4. Deep Sky Object Identification

Identifying deep sky objects such as galaxies and nebulae can be a time-consuming process. Our AI tool incorporates deep learning algorithms to analyze images and provide real-time identification of celestial objects.

This feature significantly reduces the time spent on manual identification, enabling astrophotographers to spend more time capturing stunning images and less time on tedious tasks.

5. Post-Processing Assistance

Post-processing plays a vital role in astrophotography, allowing photographers to fine-tune their images for optimal results.

Our AI-powered post-processing assistance tool provides intelligent recommendations for adjustments, such as contrast, saturation, and color balance, based on advanced image analysis.

This invaluable feature helps photographers achieve professional-grade results efficiently and consistently.

Conclusion

With the emergence of AI tools, astrophotography has reached new heights, empowering photographers to capture the wonders of the cosmos like never before.

From intelligent image stacking to automated tracking and guiding, these tools have revolutionized the way we approach astrophotography, enabling us to create breathtaking images with remarkable ease and efficiency.

At [CTN NEWS], we are proud to be at the forefront of this technological advancement, providing photographers with the tools they need to unlock the full potential of their astrophotography endeavors.

So why wait? Join us on this incredible journey and embark on a celestial adventure with our state-of-the-art AI tools for astrophotography. Start capturing the cosmos like never before and witness the beauty of the universe unfold before

RELATED CTN NEWS:

10 Best PDFsam Alternatives: Unlocking Powerful Document Management Solutions

PDFsam: The Ultimate PDF Split And Merge Tool – PDFsam.org

Nvidia Stock: The Rocket Ship To Financial Prosperity – Get On Board Now!

[ad_2]

In Pursuit of the Perfect Shot: Justin Abernethy’s Meteoric Rise in the World of Photography & Film

[ad_1]

For many people, transforming a hobby into a successful career is wishful thinking.  Yet Toronto-based Director and Photographer, Justin Abernethy, not only accomplished this feat but did it in lightning-fast time. Abernethy’s meteoric ascent is a story of audacity and passion. Born with an innate fascination for art and visual storytelling, Abernethy’s journey is an inspiration for anyone seeking to turn a dream into reality.

Abernethy’s artistic inclinations can be traced back to his early years. His youthful fascination with comic books evolved into a deep appreciation for the narratives encapsulated in a single, still image. His first steps into photography began with a Nikon D5100, a birthday gift from his parents that accompanied him on a family trip to New York. The city’s dynamic palette of people, places, and textures inspired Abernethy to translate these vivid impressions into still images, which soon found a home on Flickr, garnering him his initial recognition.

High school years found Abernethy fervently documenting his daily life, his camera a constant companion. While his peers pursued conventional career paths, Abernethy boldly chose to pursue his dreams, immersing himself in art and photography at Ryerson University. His university years also saw him delve into the world of film.

After graduating from Ryerson, Abernethy embarked on a tumultuous journey as a photographer and director in Toronto. Despite financial hardships, he stayed true to his vision, consistently investing in his projects. His dedication soon started to pay off, as his distinctive style and creative direction began to make waves in the industry.

Yet, Abernethy’s story isn’t just about artistic triumph. It’s about battling self-doubt and learning patience in an industry that often invites comparisons. Abernethy highlights these struggles as the most significant challenges in his journey, advocating for the importance of appreciating one’s progress and steering clear from comparisons, often referred to as “the thief of joy.”

Among the myriad lessons learned along the way, Abernethy emphasizes the importance of embracing failure. To him, every project, successful or not, brings invaluable lessons, a stepping stone toward becoming a better artist. Simultaneously, he stresses the need to celebrate victories, no matter how small, urging aspiring artists to take a moment to appreciate their achievements.

Today, Abernethy’s vision for his future remains unswerving. He sees himself continuing on a fast-paced career trajectory, creating art alongside those he cherishes, his aspirations never falling short of the pinnacle. A firm believer in the transformative power of art, Abernethy hopes to inspire others to pursue their artistic dreams.

His career highlights are a testament to his success. Abernethy’s work has been showcased in international campaigns, with his stills gracing Times Square, NYC, and Yonge-Dundas Square, Toronto. His music videos have amassed over 175 million views on YouTube, and he’s collaborated with international brands like Footlocker, Roots, Samsung and Adidas, as well as artists like Wondagurl, Kehlani, Ali Gatie, Anders, Lilyisthatyou, 12 am, and Baka Not Nice.

In a short span of five years, Abernethy has established himself as one of Toronto’s top directors and photographers. His meteoric rise is a tribute to his relentless pursuit of the perfect shot, embodying the power of passion and persistence. His story serves as an inspiration, underlining the magic that happens when one dares to chase their dreams.

Advertising disclosure: We may receive compensation for some of the links in our stories. Thank you for supporting LA Weekly and our advertisers.

[ad_2]

Hoops During The Golden Hour: Photo Of The Day

[ad_1]


Captured in mid-flight, teammates and defenders await the conclusion of a three point attempt at Upper Washington Park.


© Jeff Cambra
Captured in mid-flight, teammates and defenders await the conclusion of a three point attempt at Upper Washington Park.

ALAMEDA, CA — Jeff Cambra caught this photo of a spirited basketball game during the golden hour at Upper Washington Park. The weather forecast for the weekend is fabulous — get out and enjoy it! And send your photos to Patch.

If you have an awesome photo of nature, breath-taking scenery, kids caught being kids, a pet doing something funny, or something unusual you happen to catch with your camera, we’d love to feature it on Patch.

We’re looking for high-resolution images that reflect the beauty and fun that is Northern California, and that show off your unique talents.

Email it to [email protected].

Thanks for your photo, Jeff!

Also See:

The article Hoops During The Golden Hour: Photo Of The Day appeared first on Alameda Patch.

[ad_2]

‘Capture the Atlas’ reveals Milky Way Photographer of the Year winners

[ad_1]

 Cafayate Star Factory’ by Gonzalo Javier Santile

Cafayate Star Factory’ by Gonzalo Javier Santile

It’s Milky Way season. From early spring through late summer our galaxy’s billions of stars arc across the night sky and it’s become a staple of astrophotography. The trend comes into the spotlight with the announcement this week by travel photography blog Capture the Atlas of its 6th annual Milky Way Photographer of the Year collection.

Published in late May each year – the peak time for photographing the Milky Way –

– its aim is to inspire astrophotographers and others to capture and share the beauty of our galaxy.

The 25 stunning Milky Way images it showcases come from 25 photographers from 16 countries. The final 25 images were selected by Dan Zafra, editor of Capture the Atlas, from over 3,000 entries. They include stunning images from unusual locations for astrophotography including Yemen, Madagascar, Switzerland, Bulgaria, Slovenia, Japan, Iran and Indonesia.

The winning images also include plenty taken in classic astrophotography locations such as Namibia, Chile’s Atacama desert and New Zealand.

Here are our favorite images from the Milky Way Photographer of the Year:

‘Night under the Baobab Trees’ by Steffi Lieberman

‘Night under the Baobab Trees’ by Steffi Lieberman

1. ‘Night under the Baobab Trees’ by Steffi Lieberman 

One of the most notable winning images in this year’s competition was this one, above, taken using a Sony A7R III astro-nodified camera by photographer Steffi Lieberman in Madagascar, a location not normally associated with astrophotography. “This photo means a lot to me, and I can’t even begin to tell you how difficult it was to take it,” said Lieberman. “From the road conditions to the armed security guards protecting you while you take photos, everything about it was an adventure.”

South of Home’ by Lorenzo Ranieri Tenti

South of Home’ by Lorenzo Ranieri Tenti

2. ‘South of Home’ by Lorenzo Ranieri Tenti

Namibia – a dream destination for astrophotographers after incredible foregrounds – featured heavily in the contest. “The panoramic photograph captures the breathtaking scene in the Gross Spitzkoppe Nature Reserve, where the southern Milky Way gracefully spans a remarkable formation of smooth granite boulders,” said Lorenzo Ranieri Tenti about the above image. “This area holds a unique charm, with Mount Spitzkoppe being the sole prominent feature for kilometers, majestically rising 700 meters above the endless savannah.” The photographer used a Sony A7S astro-modified camera.

‘The La Palma Astroexperience’ by Jakob Sahner

‘The La Palma Astroexperience’ by Jakob Sahner

3. ‘The La Palma Astroexperience’ by Jakob Sahner

The Canary Islands are blessed with volcanic peaks that sit above the clouds, shielded from light pollution, as proven by this image, above, from the island of La Palma by Jakob Sahner. “La Palma and the Canary Islands are ideal for astrophotography due to the trade wind clouds that sit at around 1000 meters,” said Sakner who also used a Sony A7S astro-modified camera. “Being above these clouds makes it clear enough for capturing images, provided there is no haze or high cirrus clouds.”

‘The Night of Huayhuash’ by Jose D. Riquelme

‘The Night of Huayhuash’ by Jose D. Riquelme

4. ‘The Night of Huayhuash’ by Jose D. Riquelme 

Jose D. Riquelme used a Sony A7 IV to capture Peru’s Huayhuash (pronounced “why-wash”), an Andes mountain range within the Cordillera Huayhuash Reserved Zone. “It’s home to stunning landscapes with mountains and lakes, offering unique opportunities to capture the Milky Way in all its splendor,” said Riquelme. “Night photography in this location is an unforgettable experience, as the altitude and clean air allow the stars to shine brightly.”

‘Celestial Shield’ by Iván Ferrero

‘Celestial Shield’ by Iván Ferrero

5. ‘Celestial Shield’ by Iván Ferrero

Ávila, Spain was the location for Iván Ferrero’s image of Aunqueospese, a 14th-century Gothic castle. “I embarked on a two-and-a-half-hour drive … the rough dirt road forced me to abandon my car and trek for about thirty minutes,” said Ferrero, who used a Sony A7R III camera. “Once it got dark, I captured a panoramic shot of the ground before tracking the Milky Way as Orion took its position … I kept the tripod low to prevent blurring and ensure stability.”

When the ‘Milky Way season’ takes place depends on your position on the planet. Large referring to the time of the year it’s possible to see the bright core of the Milky Way – located within the constellations Sagittarius about 25,800 light-years distant – it’s January-November in the Southern Hemisphere and February-October in the Northern Hemisphere. However, the best time to see and photograph the Milky Way is typically between May and June.

• Astrophotography in June 2023 – what to shoot this month
• Why you need to plan now for Great American Eclipse of 2024
• Best lenses for astrophotography
• Best star tracker camera mounts

[ad_2]

Photographer Paolo Barretta Captures Poetic And Enigmatic Portrait Photography

[ad_1]


Italian photographer Paolo Barretta captures poetic and enigmatic portrait photography. He started taking pictures when he was very young and he immediately felt a connection between himself and the way in that he sees the world.

He began his studies in photography when he was in high school, approaching photography the first time using analogue techniques. Here in this gallery you can find 20 portraits that very poetic and enigmatic.

Scroll down and inspire yourself. You can find more work from Paolo’s Instagram.

You can find Paolo Barretta on the web:

#1

Poetic And Enigmatic Portrait Photography

#2

Poetic And Enigmatic Portrait Photography

#3

Poetic And Enigmatic Portrait Photography

#4

Poetic And Enigmatic Portrait Photography

#5

Poetic And Enigmatic Portrait Photography

#6

Poetic And Enigmatic Portrait Photography

#7

Poetic And Enigmatic Portrait Photography

#8

Poetic And Enigmatic Portrait Photography

#9

Poetic And Enigmatic Portrait Photography

#10

Poetic And Enigmatic Portrait Photography

#11

Poetic And Enigmatic Portrait Photography

#12

Poetic And Enigmatic Portrait Photography

#13

Poetic And Enigmatic Portrait Photography

#14

Poetic And Enigmatic Portrait Photography

#15

Poetic And Enigmatic Portrait Photography

#16

Poetic And Enigmatic Portrait Photography

#17

Poetic And Enigmatic Portrait Photography

#18

Poetic And Enigmatic Portrait Photography

#19

Poetic And Enigmatic Portrait Photography

#20

Poetic And Enigmatic Portrait Photography


Related Articles:


[ad_2]

The photo that made the plastics crisis personal

[ad_1]

When photographer Chris Jordan first stepped onto Midway Atoll, a tiny stretch of land in the middle of the Pacific Ocean, in September 2009 to document “overwhelming” levels of ocean waste, little did he know that his striking image of a dead albatross chick would go viral and change the world’s response to the plastics crisis.

After taking some shots of waste piled high, Jordan was looking for a more personal way to highlight the scale of overconsumption. After hearing about an island 1,300 miles (2,100 km) northwest of Honolulu covered in thousands of dead birds, all with their stomachs full of everyday plastic items like bottle tops and toothbrushes, “I immediately felt this magnetic pull to go,” he says. He was determined to “find a way to photograph [these birds] that honoured the depth of this environmental tragedy”.

Jordan was not the first photographer to capture the impact of the plastics crisis on Midway’s albatross population. The first known photo was taken by US researchers in 1966 and published in 1969, says Wayne Sentman, a biologist and board president of the Friends of Midway Atoll organisation. Plastic ingestion is likely to cause “poor outcomes” for albatross chicks because fragments can puncture the gut wall or cause dehydration, and heavy metals and other chemicals can leach off in concentrations which may be lethal to the birds, says Sentman.

While Jordan knew of previous photos taken on Midway, he attempted to bring a more emotional dimension to his images. He likens composing photographs of these dead birds to “a grief ritual”.

“When we arrange sacred objects on an altar, there’s a way that we naturally do it, with a symmetry and balance and we might spend a lot of time doing it until it all holds together,” says Jordan. He chose to use a diffuser – a white material stretched across a frame that disperses bright light – to create a softer glow “that contributes to a feeling of a photograph that goes a little deeper”.

You might also like:

When Jordan returned to Seattle, he thought he’d completed this project. “I said goodbye to the island and went home, then processed the images and put them out there.” He had no expectation that his images would go viral, long before the era of social media. But his photos quickly began appearing in magazines and newspapers all over the world. “It sort of appeared everywhere all at once,” he recalls. Tens of thousands of emails poured into his inbox, and he had to employ a full-time assistant just to answer them all. “So many people were writing a trauma response,” says Jordan. “People wanted to go to Midway and save the albatrosses, but the plastic is not coming from this island. It’s a systemic problem.”

[ad_2]

William Optics RedCat 61 | Everything You Need to Know

[ad_1]

William Optics has introduced their third variation of the original RedCat Petzval Astrograph, the William Optics RedCat 61.

It’s small, it’s mighty, and it’s REDDER than ever. There’s also a huge change to this version of the RedCat when compared to the RedCat 51 and RedCat 71.

Like most reviews/first lights, I do my best to cover everything you need to know about this telescope before buying it while also capturing a beautiful deep-sky object to show you what it can do.

I have not been compensated for a positive review, nor does the company have any say in my review. It’s a ‘play with it and let us know what you think’ kind of deal.

William Optics RedCat 61

The RedCat 61 has a focal length of 300mm and a focal ratio of F/4.9. This means it is best used for wide-field nebulae projects and only the biggest galaxies. The moon is also in play, but planets are just too small for this scope. 

Like the RedCats before it, the 61 uses FPL-53 glass in a Petzval lens design.

You can attach your full-frame DSLR, mirrorless, or dedicated astronomy camera to the T-mount and enjoy a 46mm image circle.

William Optics RedCat 61 WIFD Telescope

The William Optics RedCat 61 is Available at Agena Astro

In the past, when using a full-frame camera, I’ve had to crop about 5% of the frame away using the RedCats. I expect to do the same with this one. 

The scope weighs just 7.5 pounds, and you can likely tack on another 3-4 pounds for camera gear. This places the RedCat 61 in the small equatorial mount category or even on a well-balanced star tracker setup like the Star Adventurer or GTI.

Internal Focus Design

The new internal focus design on the RedCat 61 (WIFD).

The biggest change to this Cat is one that I think will make people who may have ignored the first version take notice. The helical focuser is gone, and it now uses the patented WIFD internal focus design.

You know what that means – you can now use a traditional autofocuser with this scope, like the popular EAF. This internal focuser design is also available on the latest GT 81 APO, and I think William realizes he has a winner with this one. 

William Optics RedCat 61 Specifications

Let’s have a look at the core specs of this refractor telescope.

  • Focal Length: 300mm
  • Diameter: 61mm
  • Aperture: f/4.9
  • Image circle: 46mm FF
  • Flattener: Petzval Flat Field
  • Focuser: Internal Focus Design 
  • OTA Weight: 5.43lbs / 2.465kg
  • Total Weight: 7.47lbs / 3.390kg

Redcat 61 WIFD Review

What’s Included in the Box?

In terms of overall presentation and attention to detail,  all of the William Optics stuff is really slick. It always includes a stitched, padded bag and certificate of inspection. 

Included with the RedCat 61 are the red tube rings, a cat series handlebar for attaching other accessories, and a dovetail bar. Like most other William Optics telescopes, a dew shield cover and patented built-in Bahtinov mask are also included. 

What Comes with the RedCat 61:

  • Stitched and padded carry bag
  • Tube Rings
  • Cat Handlebar
  • Dovetail bar
  • Built-in dew shield
  • Built-in Bahtinov mask 

The Set Up 

As you can see, it’s RED overload here on the ZWO AM5 mount – some may say it’s even TOO red. 

astrophotography telescope

My Astrophotography Setup featuring the RedCat 61.

In terms of mounting, a GoTo mount in the 20-30 lb payload range is more than enough. I’m sure the AM5 will be a popular choice if you plan on traveling with the rig.

Sticking with the lightweight motif, you can see the tiny 32mm guide scope I’ve mounted to the cat saddle. You can pick up an ASI120MM Mini and a little guide scope like this for about $250 (all in). 

I’m a big fan of ultra-portable setups like this, but make no mistake, a configuration like this is best for capturing WIDE field images. If you want to go deeper, you’ll need a longer focal length. 

I used the ASIAIR Plus to run the camera, which is an ASI2600MM Pro with an electronic filter wheel in front. With this camera – I get an image scale of about 2.5 arc seconds per pixel. This may be a little crispy (i.e. pixely, boxy, stars) for some, but overall it’s pretty well matched.

I would suggest not obsessing over image scale because a lot of these ‘rules’ don’t mean a whole lot after you apply techniques like BlurXterminator afterward anyway. 

Because of its compact size, I am looking forward to testing it out with my full-frame mirrorless camera in the future as well. The threaded M48 connection at the back of the scope couldn’t be easier, and with no additional flattener or reducer needed the correct backspacing at this connection is ready to go.

Astrophotography Results with the RedCat 61

To all the people that accuse me of shooting the same targets over and over again, I am happy to inform you that I went after something a little more obscure with this telescope.

Just north of the star Sadr lies a collection of sinewy ribbons of hydrogen gas and a fascinating object known as the Propeller Nebula. After over a decade of shooting, I have never attempted to photograph this nebula before!

This is what a stack of images looks like in Ha, OIII, and SII with the RedCat 61. Everything looks as it should in terms of optics  – but as I said, narrowband imaging doesn’t exactly scrutinize a scope. 

Image Results

I shot this target in narrowband due to a bright, 82% illuminated Moon. The seeing conditions during this image were not great and I was shooting through high clouds for a while.

If we combine the narrowband image stacks together into RGB channels, you get a little something like this.  

Propeller Nebula

The Propeller Nebula in Cygnus. 3 Hours Total Exposure.

Image Details:

  • 15 x 4-minutes (H-Alpha)
  • 15 x 4-minutes (SII)
  • 15 x 4-minutes (OIII)

The images were registered and calibrated in DeepSkyStacker, and processed in Adobe Photoshop and PixInsight. For a better understanding of the way I process my astrophotography images, feel free to check out my premium image processing guide

To test the color correction of the scope, I’ll need to collect some broadband images. You can expect to see those added to this article as soon as I get the RedCat 61 under a moonless sky.

Differences Between RedCats

Here is a table showing the differences between the three generations of RedCat telescopes.

RedCat 51 RedCat 61 RedCat 71
Aperture 51mm 61mm 71mm
Focal Length 250mm 300mm 348mm
Focal Ratio f/4.9 f/4.9 f/4.9
Optical Design Petzval Refractor Petzval Refractor Petzval Refractor
Weight (OTA with ring, dovetail and saddle) 3.9 lbs / 1.76 kg 7.47lbs / 3.390kg 8.2lbs / 3.7kg
Tube Length (fully extended) 291mm 365mm 435mm
Image Circle 43mm 46mm FF 45mm
Focuser Manual Helical focuser WIFD (WO Internal Focus Design) Helical Focuser with 2GT Gear Ring
Field of View 4.88° x 3.25° (with APS-C camera) 4.88° x 3.25° (with APS-C camera) 4.88° x 3.25° (with APS-C camera)
Approximate Price (USD) $865 $1,598 $1,698

Unlike when the original RedCat 51 came out in 2019, there are several telescope options to choose from at this focal length.

With the introduction of the internal focuser, it seems like William is moving away from the ‘is it a telescope or a lens’ idea, and doubling down on the idea of an astrophotographic-specific Petzval APO refractor.

I personally experienced some slight issues with TILT on the previous Redcats, but to be fair, I didn’t really have the right tools or know-how to properly identify and adjust them. They did come with a tilt adjuster, but it was a hard thing to get just right. 

I have a feeling that a big part of the new focuser design will address this issue, I will have to use it more to find out for sure.  

Final Thoughts

The William Optics RedCat 61 is a premium astrograph with high-end optics. There are no additional field flatteners or reducers needed for optimum performance.

It has a huge image circle and rotator, the types of things you have come to expect from the Cat series of telescopes.

The internal focuser was a good call, and you can now use a standard autofocuser. The WIFD design means you’re not extending the imaging train to reach focus, which is a nice change for those of us who are used to a long imaging train.

One issue I had with the RedCat 61, so far, was the size of the huge focuser knob, and its central position on the telescope. It runs into the mounting plate on the AM5.

To fix this, I had to move the scope up a bit, but at first, I couldn’t understand why the focuser wouldn’t move. Not technically an issue – more of something to keep in mind

The other thing to consider is, of course, the cost. It is currently $1600 USD, and for a 61mm telescope, that’s pretty steep. However, you save the cost of a corrector and it comes with a bag, dovetail to mount a guide scope, and Bahtinov mask.

I think there is a huge market for this telescope. I think it has to potential to outsell the original RedCat 51, which would really be something.

There’s definitely a goldy-locks vibe to the 61. The 51 was impressive and small, the 71 had more reach but kept the helical focuser but this one gets just about everything right.

Related Content: 

[ad_2]

The Reason Why No Photography is Allowed in the Sistine Chapel

[ad_1]

As the home of some of the greatest works of art produced by humankind, the Sistine Chapel in Vatican City is a popular tourist destination (to put it mildly). If you’ve been one of the 4 million annual visitors to the famous landmark, you’ve probably learned of one aspect of the room filled with Michelangelo’s beautiful, biblical frescoes that tends to come as a surprise to first-time guests.

There’s no photography or video allowed in the Sistine Chapel.

Yes, despite the rules that encourage quiet contemplation of the fantastic, eye-popping art that adorns nearly every inch of the walls and ceiling of the Sistine Chapel, visitors to the chapel will find their experience peppered with terse shouts of “No photo! No video!” from security guards. The prohibition against photography has been in place for several decades, and while many assume that the no-photography rule is in place to prevent the flashing of cameras from affecting the art, the real reason dates back to the restoration of the chapel that began in 1980 and took nearly 20 years to complete.


A before-and-after display of one of Michelangelo's frescoes in the Sistine Chapel. | Michelangelo, Wikimedia Commons // Public Domain in the United States


© Michelangelo, Wikimedia Commons // Public Domain in the United States
A before-and-after display of one of Michelangelo’s frescoes in the Sistine Chapel. | Michelangelo, Wikimedia Commons // Public Domain in the United States

When Vatican officials decided to undertake a comprehensive restoration of Michelangelo’s art in the chapel, the price tag for such an endeavor prompted them to seek outside assistance to fund the project. In the end, the highest bidder was Nippon Television Network Corporation of Japan, whose $3 million offering (which eventually ballooned to $4.2 million) was unmatched by any entity in Italy or the U.S.

In return for funding the renovation, Nippon TV received the exclusive rights to photography and video of the restored art, as well as photos and recordings of the restoration process by photographer Takashi Okamura, who was commissioned by Nippon TV. While many initially scoffed at the deal, the high-resolution photos provided by Nippon offered a hyper-detailed peek behind all of the scaffolding that hid each stage of restoration, and eventually won over some critics of the arrangement.

As a result of the deal, Nippon produced multiple documentaries, art books, and other projects featuring their exclusive photos and footage of the Sistine Chapel restoration, including several celebrated collections of the photographic surveys that informed the project.

The ban on photography within the chapel remains in effect despite the waning of the terms of Nippon’s deal. In 1990, it was revealed that Nippon’s commercial exclusivity on photos expired three years after each stage of the restoration was completed. For example, photos of Michelangelo’s epic depiction of the Last Judgment were no longer subject to Nippon’s copyright as of 1997, because that stage of the restoration was completed in 1994.

For the record, Nippon has stated that their photo ban did not apply to “ordinary tourists,” but for simplicity’s sake—lest some professional photog disguise themself in Bermuda shorts and a fanny pack—authorities made it an across-the-board policy.


A detail of the Sistine Chapel frescoes. | SOPA Images/GettyImages


© SOPA Images/GettyImages
A detail of the Sistine Chapel frescoes. | SOPA Images/GettyImages

The “No photos! No video!” rule remains in place for the Sistine Chapel (though as some recent visitors can attest, its enforcement isn’t exactly strict). Given the damage that can be caused by thousands of camera flashes going off in the chapel each day, it’s no surprise that Vatican officials decided not to end the ban when Nippon’s contract expired.

After all, the chapel houses some of the greatest art in the world—and a gift shop stocked with souvenir photos.

A version of this story ran in 2019; it has been updated for 2023.

This article was originally published on mentalfloss.com as The Reason Why No Photography is Allowed in the Sistine Chapel.

[ad_2]