[ad_1]
November 14, 2022

From the Milky Way to stars, to solar and lunar eclipses, the night sky is full of wonders. However, photographing them is no easy task. Usually this has also been an expensive task, one you could only carry out with a chunky DSLR and an even chunkier lens. Phones are starting to catch up, and while the outcome doesn’t quite compare to what a DSLR or mirrorless camera can achieve just yet, there are ways of getting good smartphone photos of the night sky if you follow our guide.
Preparing to photograph the night sky
Whether you’re shooting with a DSLR, mirrorless, or a smartphone, this guide will outline what you need to consider when photographing the night sky.
What camera equipment do I need to photograph the night sky?
- Cameras vs Smartphones: Yes, smartphones like the Xiaomi 12T Pro and the Google Pixel 7 and Pixel 7 Pro have made enormous strides when it comes to camera technology. However, a DSLR or a mirrorless camera is more capable when it comes to night photography thanks to having a larger sensor, and a bigger range of lens choices. Read more on the best cameras for astrophotography. If you don’t own a camera or one of the latest smartphones, however, don’t be discouraged. Smartphones can still photograph the night sky, but the results won’t be as clear.
- Lenses: Photography literally means to draw with light. So, what do you do when you have so little of it? You let it all in. This means using the fastest, widest lens you can. You’ll find our recommendations for the best lenses for astrophotography.
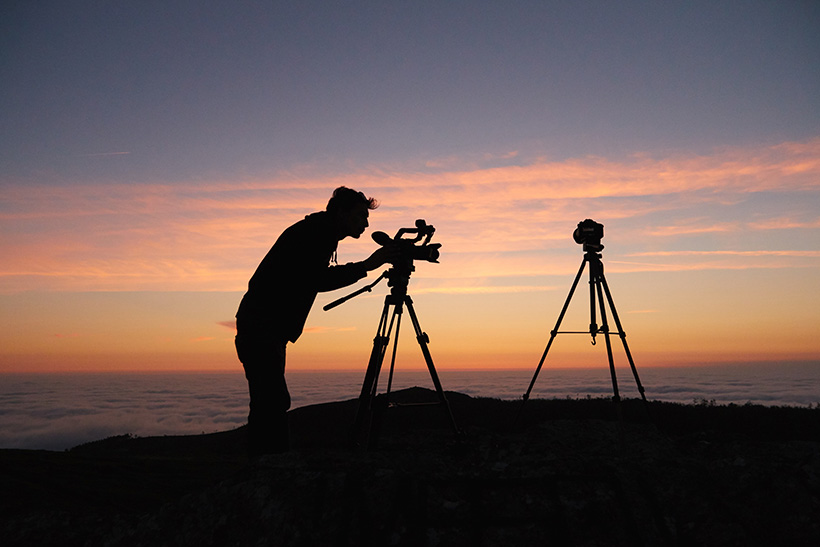
- Tripods: Whether you’re shooting with a camera or a phone, keeping your camera stable is key. In addition, a tripod coupled with a remote shutter-release cable is a helpful addition when shooting long exposures. This will decrease any camera shake or vibration. Find the best tripods available.

Photo credit: Sergio Capuzzimati via Unsplash.
- A Flashlight: Unless you’re a photography ninja who can comfortably set up their camera in the dark, a torch, or red-light headtorch, will come in handy.
- Spare batteries: It’s always good practice to take a few spare batteries with you, particularly if you’re using a camera and shooting long exposures (as you probably will if you’re shooting the night sky), as this will drain your battery life. If it is cold out, remember to keep them in your pocket as exposure to the cold will drain them quicker. If you’re using a smartphone make sure you bring a spare charger.
- Spare memory cards: Shooting the night sky takes planning, but like any other type of photography it also takes some flexibility. Shooting in raw allows for this flexibility. The downside is raw files take up more space that JPEGs and if you’re looking to shoot both raw and JPEG, extra space is going to be a welcome addition.
- Fingerless gloves: You’ll probably be outdoors a lot and if you live somewhere cold, a pair of gloves is a must to avoid your fingers from freezing off.
- Timer: A shutter release cable will help minimise any potential camera shake and enable you to shoot exposures longer than 30 seconds. For those shooting on your smartphone, in place of a shutter release cable you can set up a self-timer. For those who use a camera with Wi-Fi or Bluetooth, see if you can use your smartphone as a remote release.
Photographing the night sky

Clouds don’t always need to spell the end for your night shoot. They can be used for dramatic effect. Photo credit: Ganapathy Kumar via Unsplash.
Main things to consider
- Finding a good location: Clear skies are critical to clearer shots and checking the weather forecast is a must. Light pollution is to be avoided, particularly from artificial light sources like street lights. National Parks are good spots for night-sky photography as they are often away from cities and towns. It is also a good idea to avoid a full moon, that is, unless you’re photographing the moon, of course. As it is a light source, and it will compete with the other light sources in the night sky like the stars or the Milky Way.
- Pencil in a date for shooting: The moon, stars and the rest stop for no one. This is why to get your optimal shot of say, the full moon, it is a good idea to keep up with the moon cycle in advance to pencil in a date for your shoot.
- Composition: The sky is not the limit. Playing around with letting in other interesting objects into your frame is a good way to add some more detail into your image, particularly if you’re shooting on a smartphone that doesn’t quite pick up all the fine details. You might even want to arrive at your location earlier to think of ways to compose your shots.

Be creative when taking your night photos. Photo credit: Yash Raut via Unsplash.
What camera settings should I use for night sky photography?
- The holy trinity of settings: Namely ISO, aperture, and shutter speed settings.
- Set your camera to Manual mode, turn off autofocus and set it to infinity. Use the rear screen to check focus using a magnified view (and live view mode when using a DSLR). If you have a modern Olympus/OM System camera, then you can use the Starry Sky AF setting.
- To reduce noise, you’ll want to use the lowest ISO speed possible on your camera, so that any stars don’t get confused with noise. Make sure you check what the best “Base ISO” speed is on your camera, as some of the “LOW” or “L” ISO speeds have lower dynamic range.
- If you want as much as possible in focus set your aperture to f/10 – f/16 on a full-frame camera, f/8 – f/14 on an APS-C camera, and f/5.6 – f/8 on a Micro Four Thirds camera. However, be aware that this will result in very slow shutter speeds. For those that have a bright, and high-quality lens, you can use it at brighter apertures, such as f/1.4, f/1.8, to f/2.8.
- You will need to experiment with the shutter speed to find out what exposure works best for the scene. The longer the exposure, the more likely you’ll get star trails (as shown above), but if you want to avoid these then you’ll need a shorter shutter speed (and may need a higher ISO speed).
- For smartphones, tap your screen to lock your focus and set the exposure manually if your phone has manual control. Alternatively look for a dedicated night mode. Google Pixel owners will be able to use the Astrophotography mode when the phone is used on a tripod or stable surface. For more tips on how to use manual focus, click here.

This Milky Way is already breath-taking, but you can add a dash of uniqueness to your image by having elements like buildings, mountains, people, or reflective lakes in your frame. Photo credit: John Fowler via Unsplash.
Can you take pictures of the night sky with a smartphone?
Thanks to smartphones getting better and better, you can also take photographs of the night sky with a smartphone. Make sure you read through our tips above, as the also apply when using a smartphone.
You’ll normally need to use a tripod (with smartphone adapter), or steady surface, in order to keep your camera still and as steady as you can. But a word of warning to smartphone photographers: Do not give in to the temptation to zoom excessively. Just because you can zoom in doesn’t mean you should. Your photos will most likely not be as clear, as often smartphones will simply use digital zoom in low-light conditions.
Check to see if your smartphone has a manual mode, or a dedicated Night mode. If you’re using a Google Pixel phone, then using it on a tripod or stable surface will enable the Astrophotography mode.

Many of the latest smartphones have very good night photography capabilities and many of the principles for shooting the night sky with a camera apply. Photo credit: Joey Huang via Unsplash.
Tips on how to photograph…
If you’re looking for something more specific, say, you really want to photograph the moon or star trails, have a look at our guides below.
The Milky Way and other stars
Like with the moon, it’s all about timing with the Milky Way. It’s a good idea to do some research on the Milky Way’s pattern and the app Sky Guide is superb resource for this. It will allow you to check out where the Milky Way is to frame your shot. Given as the Milky Way’s vibrant colours tend to be what catches the eye, shooting in raw is essential. This way you can go back and make adjustments to your image, taking control of how much noise reduction is applied to get your image just right.
For the Miky Way and stars, have a look at this article on how to photograph the Milky Way and stars.
The Moon and stars
Are you a beginner Astro photographer? Consider starting with the moon. It is considered an excellent starting point because of its brightness.
When photographing the moon, the main thing you want to account for is the Earth’s rotation. The moon moves across the sky, and if your shutter speed is too slow, then it will blur as the earth rotates. To learn more, read our guide on how to photograph the moon.
Star Trails
There are a number of ways to photography star trails. One way is to take a number of photos quickly one after the other and stack them (you’ll need a tripod and a stacking software or video editing software for this one). Another way is to create a timelapse – using your camera’s timelapse settings.
Depending on what camera settings your camera has, and how long an exposure you can capture will influence what’s the best way to capture star trails – check what your slowest shutter speed is by having a look at a review of your camera. If you have a camera with Live Composite (such as an Olympus / OM System or Panasonic), then you can use this to watch the exposure on-screen as it happens.
How to shoot star trails
Fireworks
With New Year’s Eve right around the corner, there will be many celebratory fireworks shows around the world. To capture such special occasions, check out our essential tips for photographing fireworks for more.
Featured image credit: Kobu Agency via Unsplash.
Follow AP on Facebook, Twitter, Instagram, and YouTube.


[ad_2]