
[ad_1]
You have likely heard about the “green comet” that’s all over the news. It is known as Comet C/2022 E3 ZTF, and it is currently visible in the night sky.
This particular comet only comes around approximately every 50,000 years, so I set up my camera and telescope to photograph it while it is still here.
In this post, I will explain my approach and provide some photography tips on how you can capture this elusive green comet from the far reaches of our solar system. You can also view my experience in the video below.
What is a Comet?
A comet is a small celestial object made up of ice, dust, and rocky particles that orbit the sun. They are believed to have formed at the birth of our solar system and are thought to contain some of the oldest and most primitive materials in the solar system.
The nucleus of a comet is often described as a “dirty snowball” due to its composition. When it approaches the Sun, the heat causes the ice to vaporize creating a bright coma around the nucleus and a visible tail. This tail will always point away from the Sun due to the solar wind.
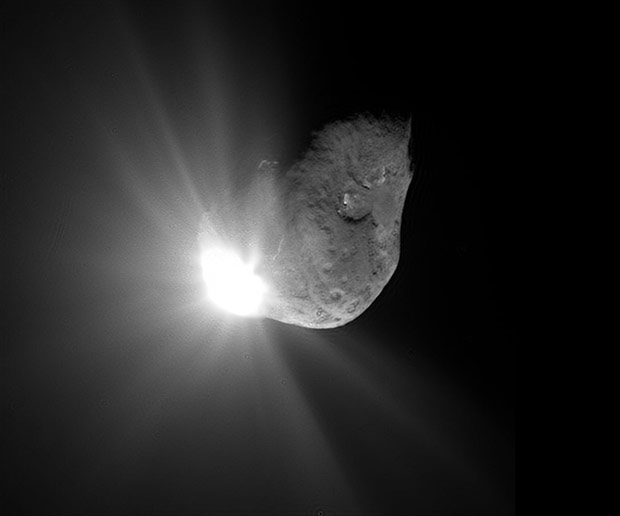
Comet Tempel 1 after it obliterated Deep Impact’s impactor spacecraft. (NASA/JPL-Caltech/UMD).
Comet C/2022 E3 ZTF
This particular comet has a massive orbit, completing its path around the sun every 50 thousand years. The last time it was visible on earth was during the stone age, when there was absolutely zero light pollution to contend with!
At the start of 2023, this comet traveled closest to the Sun. By February 1, it will be closest to Earth meaning there is still time to view this comet. In fact, on February 5, when it’s next to the bright star Capella, or February 9-13 when it’s near Mars, could be great chances to spot the comet.
Astrophotography offers your best chance to see the tail of comet 2022 E3 and the green nucleus that glows with a green coma.

This graphic shows the massive 50,000-year orbit of Comet ZTF around the Sun. (The Sky Live).
How to see it?
If you’re in the northern hemisphere, you will have had the chance to see this comet since January 2023. But now that it has journeyed closest to Earth this month, there are still a few weeks of viewing before those in the southern hemisphere will have their chance to see it.
It can be found in the area of the sky that is right near the north star, Polaris. Use your favorite astronomy app on your phone, like Stellarium, to guide you in the right direction.
You will also want to use a pair of binoculars or a telescope to view this object as it is not bright enough to see with the naked eye. Ideally, you would view it without the bright glow of the moon interfering, but that’s precisely what I’ll be doing since there have been limited clear nights for me this winter.

The path of Comet C/2022 E3 ZTF as it travels past Polaris in the night sky. Astronomy.com
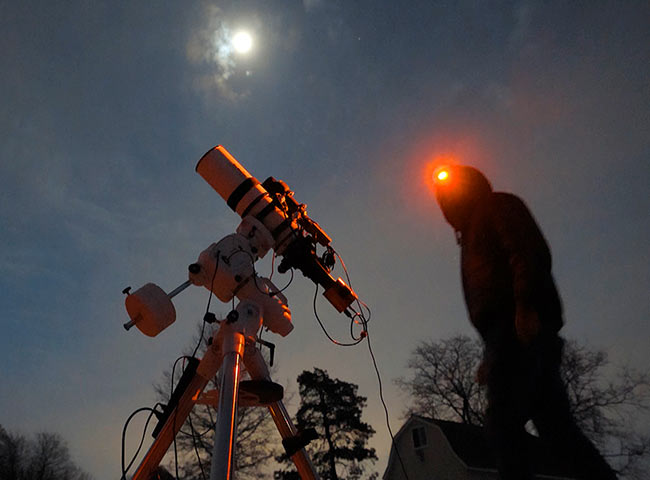
My Approach
To capture the green comet I used a refractor telescope with a focal length of 550mm. This brings the comet in nice and close, but not close to avoid missing the tail, which luckily, was still there. That’s the exciting (and difficult) part about photographing comets – they are evolving, and unpredictable. The last comet I photographed was comet Neowise in 2020.
I used a full-frame color camera, which utilizes the native focal length of this scope, to capture a nice big chuck of the sky in a single shot. I was able to see it right away through a test exposure, and then it’s a matter of choosing the ideal exposure time to reveal it without too much motion.
The comet is moving at a different speed and angle than the motion of the stars, so my standard method of sidereal tracking wouldn’t work. I’ve seen others use autoguiding on the comet itself (as if it were a star) with positive results.
I adjusted my exposure time to 60 seconds, to avoid too much motion in the comet in a single exposure. This resulted in a somewhat ’round” shape of the comet nucleus, with a slight amount of trailing when viewed up close.
My Imaging Session
To run the image sequence on this comet I used a ZWO ASIAIR WiFi device to control the session. I can’t say enough about how great these little devices are.
It’s a powerful accessory capable of running a dedicated astronomy camera, guiding, and even autofocusing for those that want it all. I’ve recently switched to a bigger tablet to use the dedicated ASIAIR app, and it’s a treat seeing the huge preview images of the comet as they come through.
Although the WiFi range isn’t great, I can still control the imaging session just inside the garage to stay warm. The ASAIAR mounts directly to the finder scope bracket of my telescope and allows me to clean up all of the cables running to various devices.
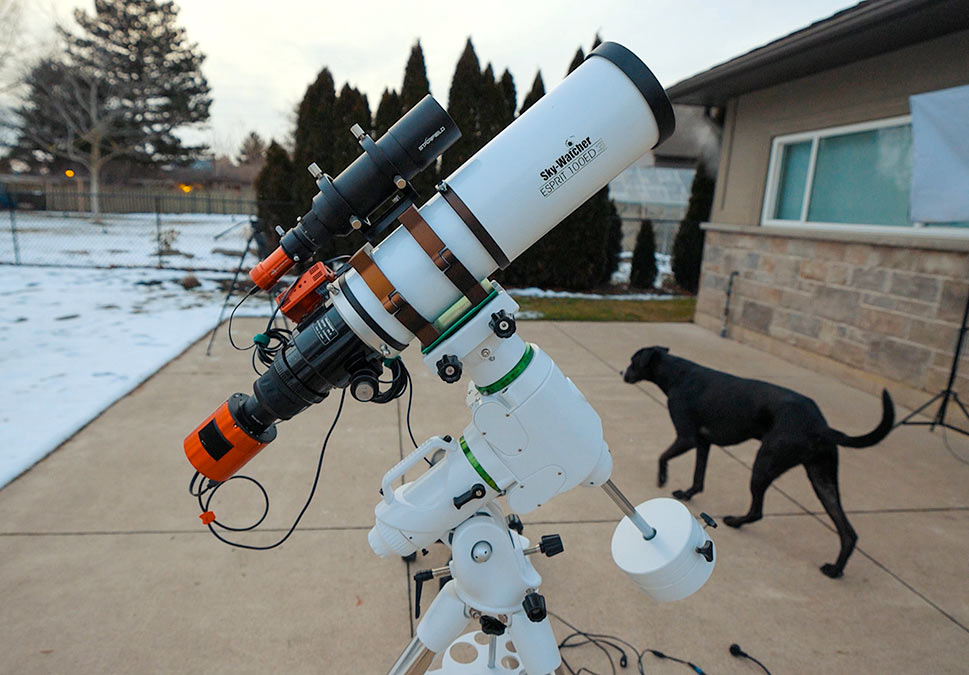
I chose to use my Sky-Watcher Esprit 100 telescope as it has the perfect mid-range focal length (550mm) for an object of this size. This model is included on my list of best astrophotography telescopes available in 2023.
In total, I captured 100 x 60-second tracked exposures centered on the comet. I utilized autoguiding for the stars to avoid star trailing and dithering between each frame (though it probably wasn’t necessary).
I stacked the images in DeepSky Stacker using comet mode and stacked the images of the comet (not the stars) which created star trails in my final image.
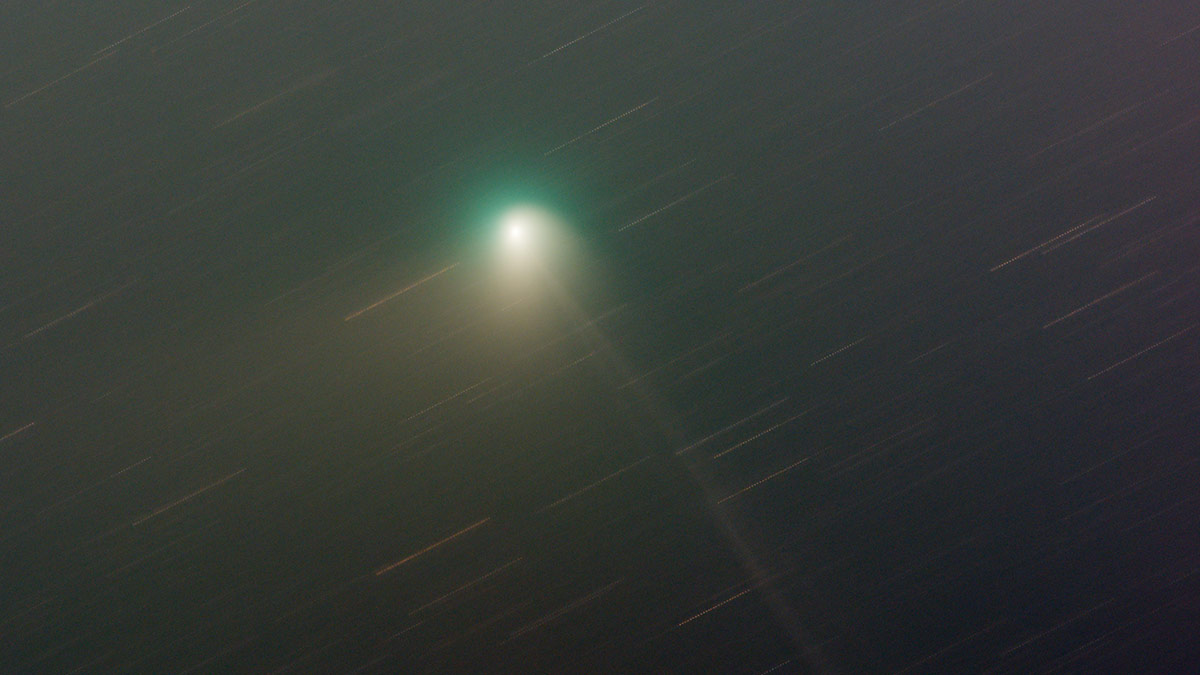
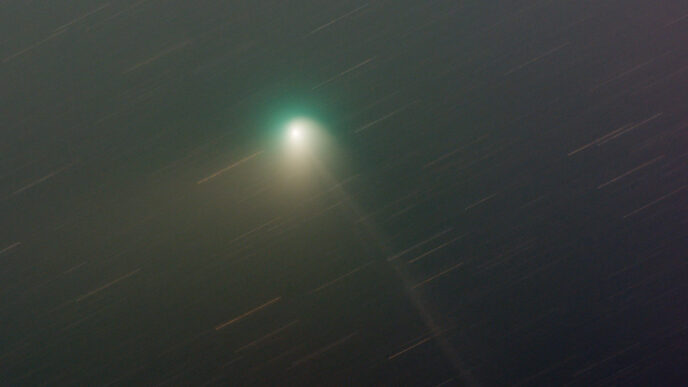
My photo of Comet C/2022 E3 (ZTF)
I also created an animation of the comet moving across the star field, using the individual 60-second frames in a sequence. To do this, I simply converted the .FIT files to .jpg, and played the image frames in sequence using Adobe Premiere.
You can watch this animation in action in my video on YouTube.
Comet Stacking
Both DeepSkyStacker and PixInsight (my go-to image stacking tools) offer a ‘comet stacking’ mode. They allow you to select the comet within the star field and stack the images in accordance with this point.
I have not tried the PixInsight comet stacking tool yet, but for those interested, be sure to watch this helpful tutorial video by fellow astrophotographer and friend, Bray Falls.
The process of stacking the comet in DeepSkyStacker involves manually selecting the comet in each sub-frame (which is a little tedious), and then choosing the ‘comet stacking’ mode in the stacking parameters (see below).
Be sure to locate the ‘comet’ tab within the stacking parameters window, and select ‘comet stacking’ if you wish to create an image like mine. This simple tutorial video may help.

Using the comet stacking mode in DeepSkyStacker.
The tool includes a ‘stars + comet’ mode, but it did not work for me on this project. A potential workaround for creating an image of a stacked comet without star trailing is to remove the stars from the comet image and place a background of tracked stars behind it.
Tips for Shooting the Comet
In terms of astrophotography-specific tips, I have a few things to keep in mind.
- Decide on your composition: You can either track the comet itself with a star-trailed background or capture the motion of the stars, and the comet will be blurred. As mentioned above, unlike a typical deep-sky object, they are moving independently from one another.
- Track the comet: For the ultimate portrait of this dirty snowball, you’ll definitely want your telescope to track the COMET – this will allow you to take a clear, long-exposure shot. You may want to stick to shorter subs tracking the stars and stack the image.
- Use the correct stacking mode: The stacking process is a bit different for comets and there are actually comet-stacking modes in both DeepSkyStacker and PixInsight. Try both to see which one delivers the best result.
- Get Creative: Many people like to create an animated timelapse of the comet traveling through the stars, which is a pretty cool effect because you can see how fast it’s actually moving through space.
The bottom line is, once you’ve found it, the way you capture it is up to you. If you’re like me, just the whole idea of the event is fun – I don’t need to take the best photo out there.
Just remember, comets can be faint and difficult to see, so be patient. It will help if you let your eyes adjust to the darkness and use a star chart to help you locate it using the surrounding stars.
Final Thoughts
Unlike some of the celestial events that get media attention, I think comets are a pretty big deal. They’re visitors from the far reaches of our solar system and they’re only here for a short period of time.
The fact that they’re (kind of) doing their own thing makes it cool. Whether it’s every 76 years or every 50,000, when they visit, it reminds us of our comparatively short lives here on our rock and how incredible this whole experience is.
So go outside and look for the green comet while you can, because nothing lasts forever.
Helpful Resources:
Share This
Related Tags
[ad_2]