All the best features, news, tips and great deals to help you live a better life through technology
Thank you for signing up to T3. You will receive a verification email shortly.
There was a problem. Please refresh the page and try again.
The Sky-Watcher Explorer 130 EQ2 telescope is one of the best beginner telescopes (opens in new tab) simply because it’s one of the most unusual. At its core it’s a Newtonian reflector telescope like many others available on the market, but the Sky-Watcher Explorer 130 EQ2 has something different in the shape of its equatorial mount (EQ). While most telescopes at this price come on a basic alt-azimuth mount that moves up and down, left and right, the Sky-Watcher Explorer 130 EQ2 moves much more fluidly thanks to having one axis aligned to Polaris, the North Star. Here’s everything you need to know about the unique and impressive Sky-Watcher Explorer 130 EQ2 – and just why its EQ mount could be worth investing in.
(Image credit: Jamie Carter)
Sky-Watcher Explorer 130 EQ2 review: Specifications
Optical design: Newtonian reflector
Aperture: 130 mm
Focal length: /900 mm
Focal ratio: f/6.9
Eyepiece focal length: 10 mm (30x) and 25 mm (75x)
Total kit weight: 12.6 kg
Mount type: German equatorial (EQ2)
Sky-Watcher Explorer 130 EQ2 telescope review: price and release date
The Sky-Watcher Explorer 130 EQ2 originally went on sale in 2012 and costs $236 / £195 / AU$600. It’s of mid-range size in Sky-Watcher’s line-up of Newtonian reflector telescopes, though its EQ2 is an entry-level model in its vast range of equatorial mounts.
(Image credit: Jamie Carter)
Sky-Watcher Explorer 130 EQ2 telescope review: features and what’s new
The Sky-Watcher Explorer 130 EQ2 is all about its clever equatorial mount, but there is more to it than that. It’s a Newtonian reflector with 5.1 inch/130 mm aperture, which enables it to collect just enough light to make the sky objects look bright and detailed. In the box are two eyepieces – 25mm for wide-angle views and 10mm for close-ups – as well as a 2x Barlow lens for doubling the magnification. Unlike most smaller budget telescopes that’s something the Sky-Watcher Explorer 130 EQ2 can cope with because of its 900mm tube length.
Although its reasonably long tube makes it heavier than most, it’s actually that equatorial and the counterweight it comes with that piles on the pounds. Although it’s equipped with two axes just like any telescope mount, instead of the simple left/right, up/down design of an alt-azimuth mount – the kind you get with almost all budget telescopes aimed at beginners – the Sky-Watcher Explorer 130 EQ2 has one axis that must be aligned to Polaris, the North Star. Why? Polaris sits directly above the Earth’s northern axis. So aligning it to a Polaris puts the mount’s bearings parallel to Earth’s axis, which means it can move in alignment to how the stars appear to move as Earth rotates. The end result is that it can track objects in the night sky. This is not a motorised telescope, so it won’t automatically follow objects, but a simple nudge is all that’s needed to keep an object in the telescope’s field of view.
(Image credit: Jamie Carter)
Sky-Watcher Explorer 130 EQ2 telescope review: set-up and use
If you have not had experience with an equatorial mount before then setting up the Sky-Watcher Explorer 130 EQ2 will at first appear slightly counterintuitive. However, it’s worth persevering with because of the freedom and fluidity of movement that equatorial mount gives this telescope. After fall, it’s an almost unique proposition at this price point. That’s not to say that setting it up isn’t a bit of a pain. It’s partly down to the weight of both the telescope itself and the equatorial amount, as well as the tripod and the counterweight. Truly, this is not a good choice of telescope if you intend to go hunting for dark skies. Yes, it is possible to deconstruct it, with two rings around the telescope tube easily coming apart. However, setting up the mount requires getting the perfect balance, something that’s best done carefully and infrequently.
What this telescope does have in common with other telescopes in its price point is its manual design. This is not a ‘go to’ telescope in any way; you’ll need to find everything in the night sky yourself and position the telescope accordingly. It comes with a basic finderscope to help with that. What is a bit of a shame is that the Explorer 130 lacks a motor drive because telescopes using equatorial mounts are ideal for astrophotography. For example, attaching a camera to a telescope on a motorised EQ mount is a great way of taking multi-minute exposures of faint objects. The Explorer 130 even comes with fixings on those tube rings specifically for attaching a camera, though the motor drive to make that a live feature costs extra.
(Image credit: Getty)
Sky-Watcher Explorer 130 EQ2 telescope review: performance
Once you’ve got the hang of its equatorial mount the Sky-Watcher Explorer 130 EQ2 is a lot of fun to use. Getting objects back into the field of view once they’ve drifted out of it is easy. However, it does lack a little accuracy. That equatorial mount is, not surprisingly at this price, not of the very best quality. In our tests we did encounter a little bit of droop. It won’t make too much difference to most observers, though we wouldn’t recommend the Sky-Watcher Explorer 130 EQ2 be used for deep sky astrophotography.
What it’s good at is being an all-round astronomical telescope. During our tests we were able not only to get high resolution views of Jupiter and its four giant moons, but we could even glimpse the pinkish bands of Jupiter’s atmosphere through the Barlow lens. Crucially, the Sky-Watcher Explorer 130 EQ2 has some versatility, with planets and craters of the Moon looking sharp while distant star clusters looked brighter than on many other beginner telescopes of a similar price.
(Image credit: Jamie Carter)
What the Sky-Watcher Explorer 130 EQ2 lacks is a motor to make it easier to operate. That can be fixed in one fell swoop by instead purchasing a variant called the Sky-Watcher Explorer 130PM, which sells for a slightly higher price, but adds a motor drive system with handset that allows you to track objects in the night sky and add a camera. For another Newtonian reflector telescope with a similar aperture as the Sky-Watcher Explorer 130 EQ2, but no EQ mount try the Celestron StarSense Explorer DX 130AZ, which must be moved manually yet has a sleek smartphone mount system that shows you exactly where to point it.
Sky-Watcher Explorer 130 EQ2 telescope review: verdict
Although it’s a great choice for anyone desperate to get their hands on an equatorial mount without spending big, the Sky-Watcher Explorer 130 EQ2 does lack a little precision. Physically it’s not a particularly mobile telescope, but what the Sky-Watcher Explorer 130 EQ2 does have is good quality optics that prove versatile enough to be used for faint deep sky objects as well as solar system objects. It could also be a fantastic first step in astrophotography, though you’ll need to add a motor drive and even then be prepared to rely on wide-angle imaging due to the Explorer 130’s slight lack of accuracy.
This beginners guide to astrophotography will show you everything you need to know to start photographing the night sky, from which camera and lenses to use, finding the best locations, and which celestial objects to look for.
While astrophotography can be one of the most rewarding styles of photography, it’s also one of the hardest, and most frustrating and time consuming. You definitely need to do your research before you head out into the field, so we’ve put together this guide on everything you’ll need to know to get you started and get the results you’re hoping for.
In this guide we are going to cover what to look for in a camera, which lenses suit astrophotography best, what settings to use to get epic results, as well as other must-have accessories. We’ll also offer tips on finding a good location and recommend good targets for beginners to look for in the night sky, plus handy apps and software to use to be able to find them. You may also want to check out the best astronomy books to learn more about the cosmos.
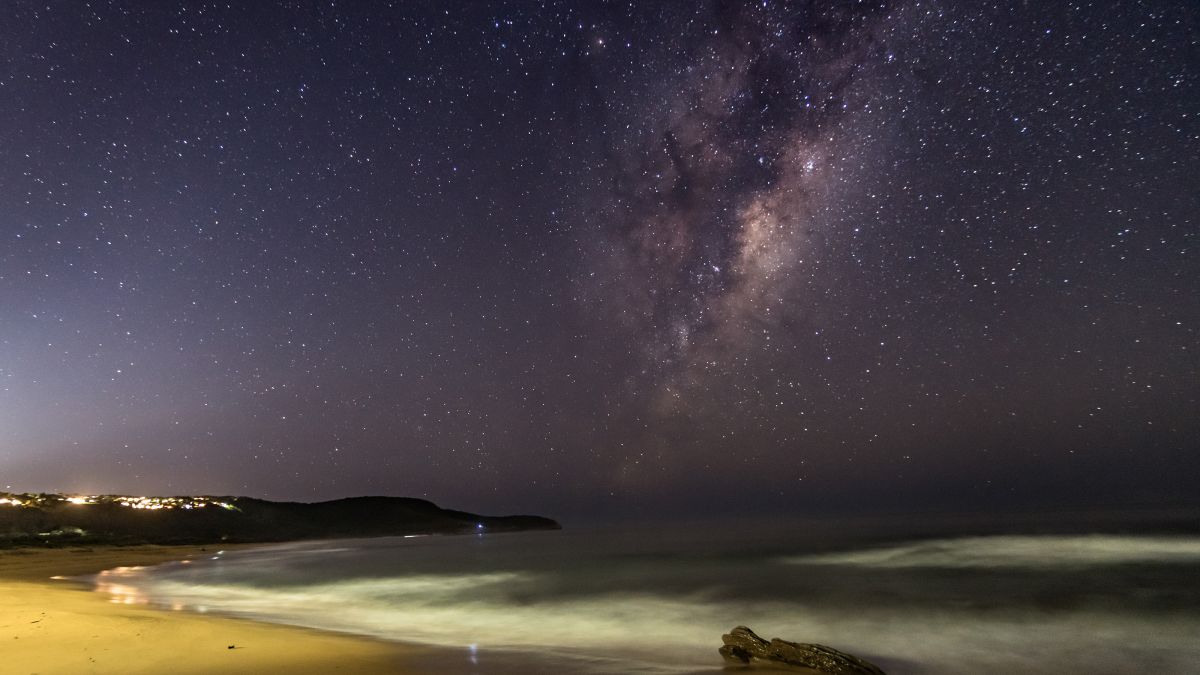
My first attempt at astrophotography was, in short, a complete disaster. After speaking to other photographers, it turns out that a bad astro shoot is a bit of a rite of passage. So, don’t get disheartened if it doesn’t quite work out the way you want at first. On my shoot I’d left the quick release plate on a different camera at home, which rendered my tripod completely useless, and I had to balance the camera on a blanket on the ground. We also didn’t scout our exact composition beforehand, so we got lost on a golf course and ran into a herd of cows in the dark, and, as it was a coastal location, I ended up with half the beach in my shoes.
Thankfully, the shot turned out well despite all of that, but it’s often the small things you tend to not think about which end up having a big impact, so it’s best to plan for all scenarios if you want a successful shoot. With that in mind, let’s dive in and run through our top tips for astrophotography.
Choosing the right camera
Pentax K-1 Mark II is a pretty impressive camera for astrophotography and has a Night Vision mode. (Image credit: James Artaius)
When it comes to choosing equipment for astrophotography, generally speaking, the lens is usually more important than the camera. The main factors to consider in a camera when it comes to doing astrophotography is its ISO sensitivity, sensor size, and megapixels. The camera’s size and weight should also be something to consider if you’re going to be hiking to certain locations.
ISO can be a tricky one here, as you need to be able to crank the ISO up high enough so your shots aren’t completely dark. However, setting it too high can result in too much noise that will ruin your shot. Finding a camera that has a good ISO sensitivity and performs well in low light situations is a big advantage for astrophotography – take a look at our guide on the best astrophotography camerasfor some top recommendations.
Full frame cameras are preferable for astrophotography as they have the bigger sensor and a higher megapixel camera will give better quality, more detailed images, but they are obviously at the pricier end of the spectrum. If you want to take a lot of shots and stack them to create more detailed images, choosing a camera that has “interval shooting” will save you a lot of time and stress when you’re shooting.
Lenses
If you have the cash, the the Sony FE 20mm F1.8 G Lens is great for astrophotography. (Image credit: Sony)
Lens choice is an important one for astrophotography, and you really do get what you pay for here. What lens you choose Your really does depend on what kind of astrophotography you want to do, because that will determine which focal length you should go for. If you want to do deep sky photography of nebulas, galaxies, planets, etc., then a longer focal length is better for that, but for milky way shots with a bit of foreground, you want as wide as possible. Sadly, there isn’t a lens out there that can do both well.
Aperture is also important when choosing a lens, as you want as wide an aperture as possible (aka a lower f number). Prime lenses with a fixed focal length are usually preferable for astrophotography because they have wider apertures than zoom lenses, and you can get more detailed shots with them. For wide prime lenses, Sony’s 20mm f/1.8 (opens in new tab) is a very popular lens for astro, or if you have the budget for it, the Sony 14mm f/1.8 (opens in new tab) is also fantastic. For longer lenses, anything above 200mm will perform well – you can also attach them to a telescope if you have one. Sigma and other third parties also do some great lenses for astrophotography if you don’t have the budget for native lenses.
Camera settings
(Image credit: James Artaius)
It’s all well and good having a great camera, but it won’t be of much use if you don’t know which settings to use for astrophotography. There is a certain degree of trial and error involved here depending on what you want to capture, plus the light levels in your chosen location will also have an effect. You’ll want your shutter speed to be long enough to let as much light in as possible, but not too long where everything starts to trail (unless star trails are what you’re going for).
How do you figure out where the sweet spot is, you ask? By using the 500 rule: you divide 500 by the focal length of the lens you’re using, and that will give you the amount of time you can have your shutter open for before everything starts to trail. So, if you’re using a 20mm lens, 500 divided by 20 is 25, so your shutter speed can be up to 25 seconds.
For aperture, you generally want it as low as it can go to let as much light into the lens as possible – this is why prime lenses are better for astrophotography as they generally have lower apertures. With ISO, it largely depends on your camera’s capabilities and the ambient light levels – somewhere around 1,600 is usually a good place to start, then you can adjust it as necessary by taking a few test shots.
Locations and how to find them
Map of the USA showing where to find dark sites so you can find the best location for astrophotography. (Image credit: Dark Site Finder)
While you may be thinking that the location for astrophotography is, well… the sky, there’s a little more to it than that. Particularly if you want some sort of landscape or vista in your shot as well as the starry sky, you’re going to need to pick your location wisely. You want to select somewhere where there’s as little light pollution as possible – think national parks and big natural spaces, far away from towns and cities.
To get an idea on good dark sky locations in your area, check out this light pollution map (opens in new tab) and dark site finder (opens in new tab) before you plan your trip so you can make sure your shot isn’t ruined by excessive light.
In terms of finding a composition in your location, try going there before it gets dark to work out a composition you like, then once its dark you’re already in the right place. You can also check out Google Maps (opens in new tab) to scout a location before you go to give you a general idea of where you want to be.
Other accessories
(Image credit: Future)
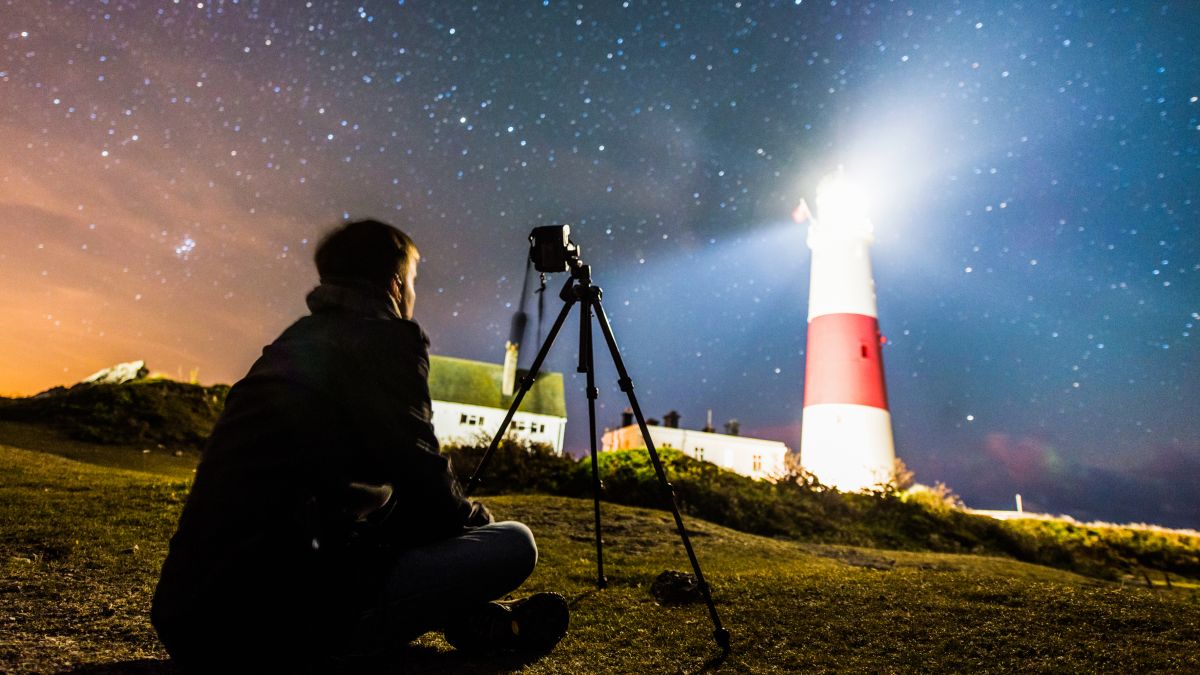
As I found out the hard way, a tripod is pretty necessary for a successful astrophotography shoot. As the shutter needs to be open for anywhere up to 25/30 seconds, it’s simply impossible to use it handheld, and even my blanket-on-the-ground method involved a certain amount of problems. As the camera needs to be as still as possible, a sturdy tripod is your best bet, or one that has a weight hook on the central column so you can hang your camera bag on it to weigh the tripod down.
Having a remote shutter release also makes life a lot easier when shooting the night sky, as you eliminate the risk of moving the camera slightly when pressing the shutter button on the body. These are very affordable and easy to keep in your camera bag, although you can just use the timer on your camera if you don’t have one. Once you get a bit more advanced you could also invest in a star tracker, particularly if you want to take a lot of shots to stack them, as it will be able to track and follow the stars as they move without you having to readjust your composition.
Targets in the sky
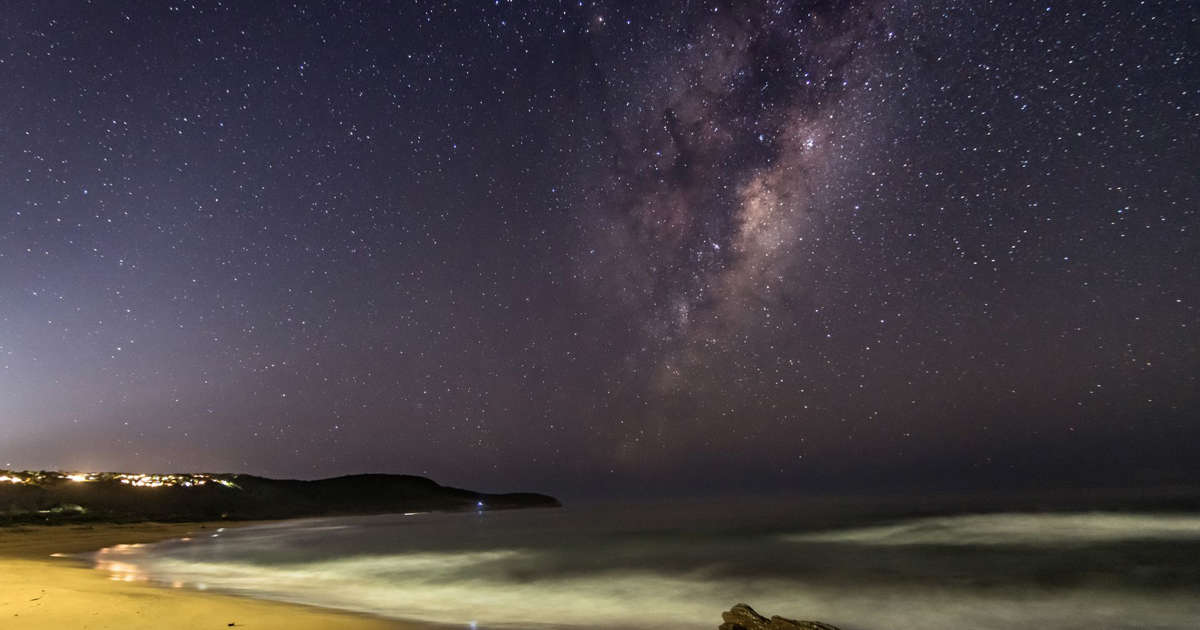
Now that you’ve got your gear and your location sorted, you can start finding things in the sky to photograph. If you’re wanting to shoot wide angle, shooting the milky way can be a great way to hone your astro skills. For longer focal lengths you could try the Orion Nebula, Andromeda galaxy, or even just the moon and other planets.
This aspect of astrophotography is what takes planning, as you need to know when a certain object is going to be visible in the sky, and at what time of night (or even what time of year). There are a ton of great smartphone apps out there that are good for this, such as Stellarium (opens in new tab) (free), The Photographer’s Ephemeris (opens in new tab) (sign up for free), and PhotoPills (opens in new tab) ($10.99, but jam-packed full of handy features) to name a few.
(Image credit: James Artaius)
Once you find an object you want to shoot, these apps can show you where exactly it’s going to be over the course of the night, so you can plan your composition accordingly to get it in the right place in your image. Milky Way season is usually somewhere between late February to late September (weather you’re in the Northern or Southern Hemisphere), so make sure you check how high in the sky it’s going to be in your chosen location.
In general, you want to make sure you’re shooting on a clear night, at either a new moon or when the moon isn’t visible in the sky as that will create more light – unless the thing you want to shoot is the moon! So be sure keep tabs on the upcoming phases of the moon so you can get that perfect picture.
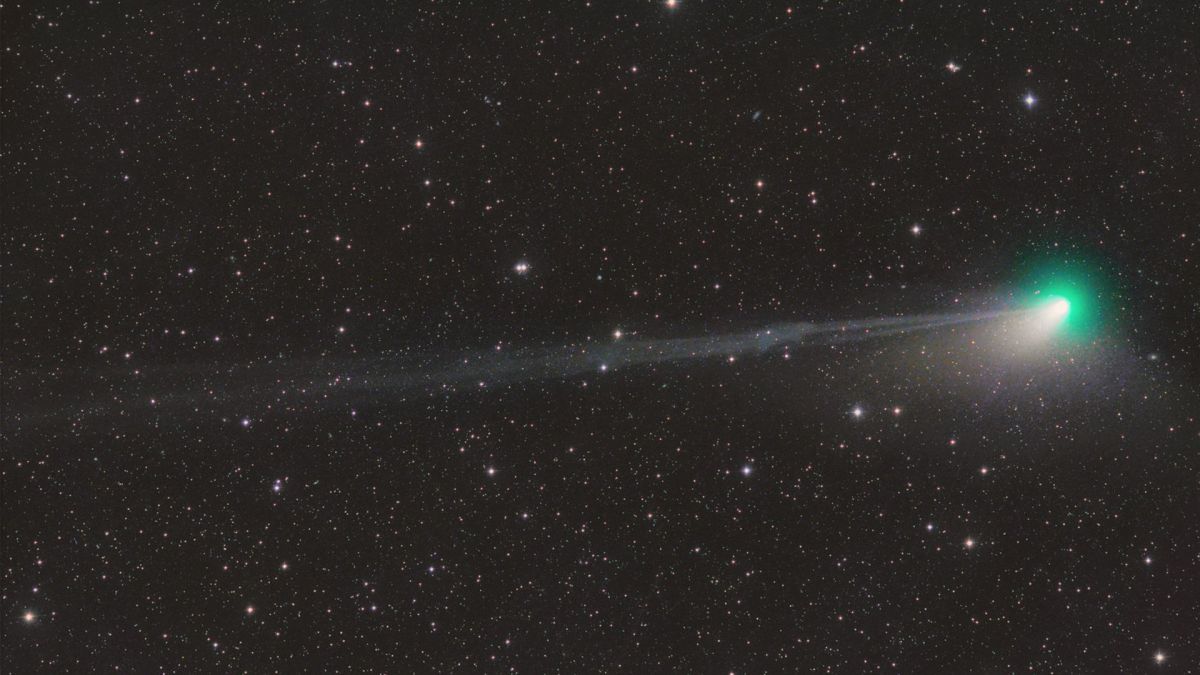
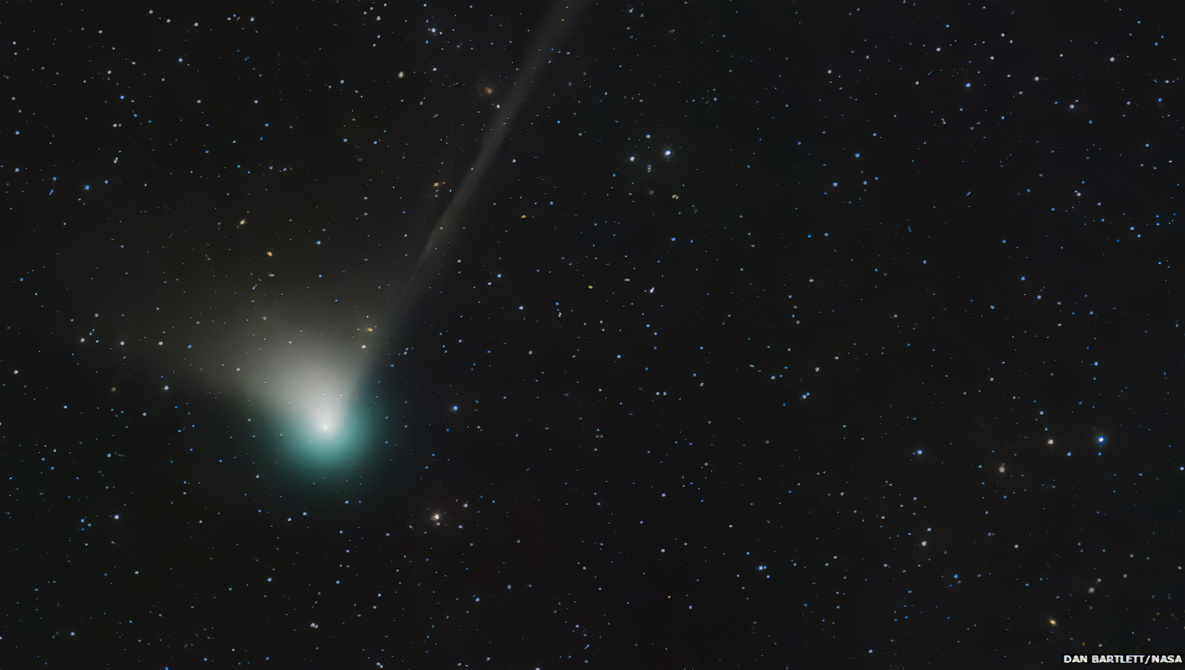
An image taken by an Austrian comet hunter reveals a disconnection in a stunning green comet’s tail that may have been caused by turbulent space weather.
Seasoned astrophotographer Michael Jäger took this image of the Comet C/2022 E3 (ZTF) on Tuesday (Jan. 17) after driving 500 miles (800 kilometers) from Austria to Bavaria in Germany to get a clear view of the night sky. Jäger shared the image on Twitter (opens in new tab), along with more photos video of the comet.
“The journey was not in vain,” Jäger told Space.com in an email. He added that when it comes to capturing images of comets, an astrophotographer can waste no time as these icy balls change rapidly when they reach the warmer regions in the inner solar system.
Related: Amazing photos of gorgeously green Comet C/2022 E3 (ZTF) More: How to view and photograph comets
This particular image reveals what astronomers call a disconnection event, essentially a weakening in the comet’s signature tail, which makes it look as if the tail was breaking off.
According to SpaceWeather.com (opens in new tab), this disruption in the tail is likely caused by turbulent space weather, namely the stronger-than-usual solar wind that has been released during a recent coronal mass ejection (CME). CMEs are bursts of highly energetic particles from the sun’s upper atmosphere, the corona, that travel across the solar system, interfering with the atmospheres of planets and other bodies.
“A piece of Comet ZTF’s tail has been pinched off and is being carried away by the solar wind,” SpaceWeather.com wrote. “CMEs hitting comets can cause magnetic reconnection in comet tails, sometimes ripping them off entirely.”
Read more: Green comet a rare ‘messenger from the outer reaches of solar system’
A comet’s tail is made of vaporized material and dust released by the icy body as it heats up closer to the sun. While the comet itself is usually no more than a few miles wide, the tail can stretch for hundreds of thousands of miles across the inner solar system, providing the unusual celestial spectacle that gets astronomers and astrophotographers buzzing.
SpaceWeather.com (opens in new tab) added that multiple CMEs have swept past Comet ZTF this month as its visit to our region of the solar system coincides with a surge in the activity on the sun’s surface. Currently, there are eight numbered sunspots traversing the sun’s Earth-facing disk, according to the U.K. space weather forecaster Met Office (opens in new tab), so more CMEs can occur as the comet comes closer to us. Sunspots are darker, cooler regions visible on the surface of the sun that feature twisted and dense magnetic fields, which give rise to solar flares and CMEs.
A NASA image showing the path of comet C/2022 E3 ZTF across the January sky for the Northern Hemisphere. (Image credit: NASA/JPL-Caltech)
C/2022 E3 (ZTF), which was discovered by the Zwicky Transient Facility (ZTF) at the Palomar Observatory in California in March 2022, is making its first close approach to Earth in about 50,000 years. The comet will soon become visible to the naked eye, experts say, and will reach its closest distance to Earth on Feb.1, zooming past our planet at about one quarter the sun-Earth distance.
Jäger, who has photographed more than 1,100 comets since he took up astrophotography four decades ago, is certain to take more awe-inspiring images, which you can find on his Twitter account (opens in new tab). He admitted that weather in this part of the year is not ideal for this rare celestial encounter, however.
“The weather in Central Europe is very bad and I have to travel a lot to see the comet,” Jäger wrote.
If you want to get your own breathtaking photos of comet C/2022 E3 (ZTF), be sure to see our guides on the best telescopes and best binoculars that can help you get a closer look. And don’t miss our guides on the best cameras for astrophotography and best lenses for astrophotography to get the best comet photos you can.
Editor’s Note:If you get a good photo of comet C/2022 E3 (ZTF) and would like to share them with Space.com’s readers, send your photo(s), comments, and your name and location to [email protected].
Follow Tereza Pultarova on Twitter @TerezaPultarova (opens in new tab). Follow uson Twitter @Spacedotcom (opens in new tab) and on Facebook (opens in new tab).
This beginners guide to astrophotography will show you everything you need to know to start photographing the night sky, from which camera and lenses to use, finding the best locations, and which celestial objects to look for.
While astrophotography can be one of the most rewarding styles of photography, it’s also one of the hardest, and most frustrating and time consuming. You definitely need to do your research before you head out into the field, so we’ve put together this guide on everything you’ll need to know to get you started and get the results you’re hoping for.
In this guide we are going to cover what to look for in a camera, which lenses suit astrophotography best, what settings to use to get epic results, as well as other must-have accessories. We’ll also offer tips on finding a good location and recommend good targets for beginners to look for in the night sky, plus handy apps and software to use to be able to find them. You may also want to check out the best astronomy books to learn more about the cosmos.
My first attempt at astrophotography was, in short, a complete disaster. After speaking to other photographers, it turns out that a bad astro shoot is a bit of a rite of passage. So, don’t get disheartened if it doesn’t quite work out the way you want at first. On my shoot I’d left the quick release plate on a different camera at home, which rendered my tripod completely useless, and I had to balance the camera on a blanket on the ground. We also didn’t scout our exact composition beforehand, so we got lost on a golf course and ran into a herd of cows in the dark, and, as it was a coastal location, I ended up with half the beach in my shoes.
Thankfully, the shot turned out well despite all of that, but it’s often the small things you tend to not think about which end up having a big impact, so it’s best to plan for all scenarios if you want a successful shoot. With that in mind, let’s dive in and run through our top tips for astrophotography.
Choosing the right camera
When it comes to choosing equipment for astrophotography, generally speaking, the lens is usually more important than the camera. The main factors to consider in a camera when it comes to doing astrophotography is its ISO sensitivity, sensor size, and megapixels. The camera’s size and weight should also be something to consider if you’re going to be hiking to certain locations.
ISO can be a tricky one here, as you need to be able to crank the ISO up high enough so your shots aren’t completely dark. However, setting it too high can result in too much noise that will ruin your shot. Finding a camera that has a good ISO sensitivity and performs well in low light situations is a big advantage for astrophotography – take a look at our guide on the best astrophotography cameras for some top recommendations.
Full frame cameras are preferable for astrophotography as they have the bigger sensor and a higher megapixel camera will give better quality, more detailed images, but they are obviously at the pricier end of the spectrum. If you want to take a lot of shots and stack them to create more detailed images, choosing a camera that has “interval shooting” will save you a lot of time and stress when you’re shooting.
Lenses
Lens choice is an important one for astrophotography, and you really do get what you pay for here. What lens you choose Your really does depend on what kind of astrophotography you want to do, because that will determine which focal length you should go for. If you want to do deep sky photography of nebulas, galaxies, planets, etc., then a longer focal length is better for that, but for milky way shots with a bit of foreground, you want as wide as possible. Sadly, there isn’t a lens out there that can do both well.
Aperture is also important when choosing a lens, as you want as wide an aperture as possible (aka a lower f number). Prime lenses with a fixed focal length are usually preferable for astrophotography because they have wider apertures than zoom lenses, and you can get more detailed shots with them. For wide prime lenses, Sony’s 20mm f/1.8 is a very popular lens for astro, or if you have the budget for it, the Sony 14mm f/1.8 is also fantastic. For longer lenses, anything above 200mm will perform well – you can also attach them to a telescope if you have one. Sigma and other third parties also do some great lenses for astrophotography if you don’t have the budget for native lenses.
Camera settings
It’s all well and good having a great camera, but it won’t be of much use if you don’t know which settings to use for astrophotography. There is a certain degree of trial and error involved here depending on what you want to capture, plus the light levels in your chosen location will also have an effect. You’ll want your shutter speed to be long enough to let as much light in as possible, but not too long where everything starts to trail (unless star trails are what you’re going for).
How do you figure out where the sweet spot is, you ask? By using the 500 rule: you divide 500 by the focal length of the lens you’re using, and that will give you the amount of time you can have your shutter open for before everything starts to trail. So, if you’re using a 20mm lens, 500 divided by 20 is 25, so your shutter speed can be up to 25 seconds.
For aperture, you generally want it as low as it can go to let as much light into the lens as possible – this is why prime lenses are better for astrophotography as they generally have lower apertures. With ISO, it largely depends on your camera’s capabilities and the ambient light levels – somewhere around 1,600 is usually a good place to start, then you can adjust it as necessary by taking a few test shots.
Locations and how to find them
While you may be thinking that the location for astrophotography is, well… the sky, there’s a little more to it than that. Particularly if you want some sort of landscape or vista in your shot as well as the starry sky, you’re going to need to pick your location wisely. You want to select somewhere where there’s as little light pollution as possible – think national parks and big natural spaces, far away from towns and cities.
To get an idea on good dark sky locations in your area, check out this light pollution map and dark site finder before you plan your trip so you can make sure your shot isn’t ruined by excessive light.
In terms of finding a composition in your location, try going there before it gets dark to work out a composition you like, then once its dark you’re already in the right place. You can also check out Google Maps to scout a location before you go to give you a general idea of where you want to be.
Other accessories
As I found out the hard way, a tripod is pretty necessary for a successful astrophotography shoot. As the shutter needs to be open for anywhere up to 25/30 seconds, it’s simply impossible to use it handheld, and even my blanket-on-the-ground method involved a certain amount of problems. As the camera needs to be as still as possible, a sturdy tripod is your best bet, or one that has a weight hook on the central column so you can hang your camera bag on it to weigh the tripod down.
Having a remote shutter release also makes life a lot easier when shooting the night sky, as you eliminate the risk of moving the camera slightly when pressing the shutter button on the body. These are very affordable and easy to keep in your camera bag, although you can just use the timer on your camera if you don’t have one. Once you get a bit more advanced you could also invest in a star tracker, particularly if you want to take a lot of shots to stack them, as it will be able to track and follow the stars as they move without you having to readjust your composition.
Targets in the sky
Now that you’ve got your gear and your location sorted, you can start finding things in the sky to photograph. If you’re wanting to shoot wide angle, shooting the milky way can be a great way to hone your astro skills. For longer focal lengths you could try the Orion Nebula, Andromeda galaxy, or even just the moon and other planets.
This aspect of astrophotography is what takes planning, as you need to know when a certain object is going to be visible in the sky, and at what time of night (or even what time of year). There are a ton of great smartphone apps out there that are good for this, such as Stellarium (free), The Photographer’s Ephemeris (sign up for free), and PhotoPills ($10.99, but jam-packed full of handy features) to name a few.
Once you find an object you want to shoot, these apps can show you where exactly it’s going to be over the course of the night, so you can plan your composition accordingly to get it in the right place in your image. Milky Way season is usually somewhere between late February to late September (weather you’re in the Northern or Southern Hemisphere), so make sure you check how high in the sky it’s going to be in your chosen location.
In general, you want to make sure you’re shooting on a clear night, at either a new moon or when the moon isn’t visible in the sky as that will create more light – unless the thing you want to shoot is the moon! So be sure keep tabs on the upcoming phases of the moon so you can get that perfect picture.
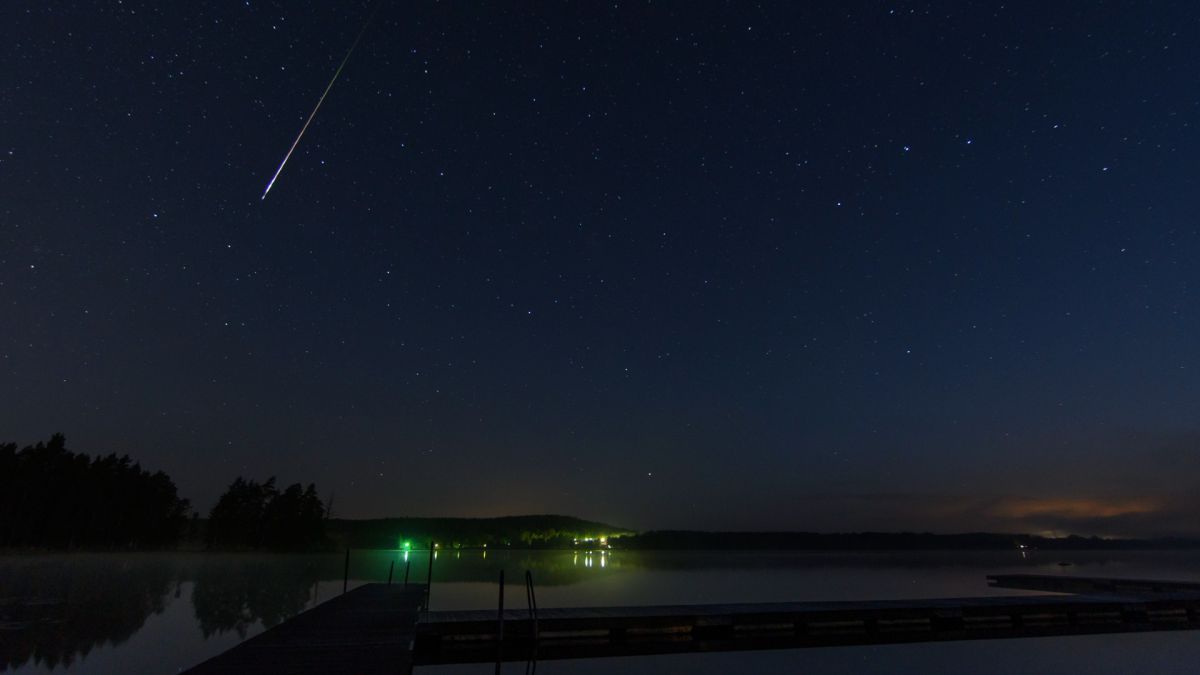
The annual Gamma-Ursae Minorid meteor shower peaks on Thursday (Jan.19), offering eagle-eyed skywatchers who are willing to brave the cold the opportunity to view meteorites through the night.
The shower, which this year is active between Jan. 15 and Jan. 25, will peak at 11:00 a.m. EST (1600 GMT) so the best time to spot meteors is in dark skies either before dawn or after dusk on Thursday.
The best time to view the meteors from any shower is when its radiant point is above the horizon. The radiant point of a meteor shower, or radiant, is the area of the sky from which the meteors appear to streak. The radiant of the Gamma-Ursae Minorid meteor shower is in the constellation of Ursa Minor, giving the shower its name.
Related: Meteor showers 2023: Where, when and how to see them
According to In the Sky (opens in new tab), for observers in New York City, the radiant point of the Gamma-Ursae Minorid meteor shower is “circumpolar” meaning that from this position it never actually sinks below the horizon.
Not only are Gamma-Ursae Minorid meteors better seen when Ursa Minor, or the “little bear” best seen when the constellation is above the horizon, but the higher above the horizon the radiant point is the more visible meteorites are.
Ursid meteors will appear to radiate from the constellation Ursa Minor, the Little Dipper, in the northern sky. (Image credit: Daisy Dobrijevic/Future)
The radiant point of this meteor shower is the highest in the sky at around 7:00 a.m. EST (1200 GMT) but because meteors are easier to see with dark skies, an opportune time to view the Gamma-Ursae Minorids is just before dawn.
This is when New York City will be turned towards the direction of the meteors as they enter Earth’s atmosphere. This means the number of meteors that streak vertically down over Earth is at its maximum, in the process creating short trails near the radiant point.
When the radiant point isn’t as high in the sky, the Gamma-Ursae Minorids will produce fewer meteors, but the meteors that can be seen at these times travel further through the atmosphere and produce longer, more horizontal streaks. This is because the meteors are longer-lived, thus covering more of the sky, taking longer to burn up in the atmosphere than those that streak vertically downwards through towards the planet.
Even at its peak, the Gamma-Ursae Minorid meteor shower isn’t one of the flashiest of annual meteor showers, expected to produce just three meteors per hour in perfectly dark skies. The visibility of the peak of this shower on Thursday will get a boost from the fact the moon is close to its new moon phase and is thus almost completely dark with moonlight having little impact on visibility.
Like all meteor showers, the Gamma-Ursae Minorids are created when the Earth passes through a cloud of debris left behind by a comet or asteroid as our planet progresses on its annual orbit of the sun. This means each meteor shower occurs around the same time each year.
The debris is ejected from comets or asteroids as they travel through their own orbit around the sun. When they make their close approach to the star radiation heats comets or asteroids causing them to vent solid material which lingers around the sun.
This debris that gives rise to the Gamma-Ursae Minorids enters the atmosphere of Earth at speeds of around 67,000 mph (108,000 km/h). The small grit-like pieces of debris burn up at an altitude of around 40 to 60 miles (70 to 100 kilometers) above the surface of the Earth.
If braving the bitterly cold nights of January to observe the Gamma-Ursae Minorids doesn’t sound too appealing, one of the next major meteor showers over Earth is the Lyrids which according to the Greenwich Observatory (opens in new tab) kick off on April 14 and last until the final day of that month.
If you’re hoping to observe the Gamma-Ursae Minorid meteor shower, our guides for the best binoculars could be a great place to start. For a look at Ursa Minor, don’t miss our list of the best telescopes. If you’re looking to snap photos of the night sky, check out our guide on how to photograph the moon, as well as our best cameras for astrophotography and best lenses for astrophotography.
Editor’s Note:If you snap Gamma-Ursae Minorid meteors, and would like to share it with Space.com’s readers, send your photo(s), comments, and your name and location to [email protected].
Follow us on Twitter @Spacedotcom (opens in new tab)or on Facebook (opens in new tab).
Astrophotographers and even regular photographers have a chance at a comet that is now appearing in our early morning, pre-dawn skies. I’m talking about Comet C/2022 E3 ZTF, rapidly approaching its closest encounter with our sun. It hasn’t been to our part of the solar system for about 50,000 years. It’s a striking green in color, and not all comets are, so it’s created a stir among astrophotographers.
It could be the first naked eye comet since Neowise, which graced our night skies in the summer of 2020.
Comet C/2022 E3 ZTF was discovered in March of last year by the f/2.4 Schmidt telescope at Mt. Palomar. It was very dim then, but as it approaches the sun it is steadily brightening.
Where Is C/2022 E3 ZTF?
For the next couple of weeks, observers in the Northern Hemisphere can spot it in the Northeastern sky. The BBC Website has some good info on finding the comet.
Look for the comet above the northeastern horizon after midnight between the constellations of Hercules and Bootes.
By the third week of January, the comet will become circumpolar for mid-northern latitude viewers. Then, the comet will be visible after sunset and all night long for viewers in the Northern Hemisphere. On January 29, it will pass close to Polaris, the North Star. If it brightens up to say, the 5th magnitude, it should be visible to naked eye observers away from city lights.
By February, the Moon will be growing brighter, making observations difficult. Here’s a chart from NASA that will help you locate the comet.
If you want to capture it, you can probably do it with a medium to long lens (80-200mm) because the object is small. Don’t expect a dramatic tail on the comet, but that could change. You’re looking for basically a smudge.
Capturing the Comet
If you’re going to give the comet a go in the Northern Hemisphere, try around the 25th of this month, after 10 pm. The moon won’t interfere on that date. Using the chart below, point your DSLR or mirrorless camera to the area shown that matches the date. You’ll want to be at least ISO 400 or higher, but you’ll get more noise as the ISO increases. A tripod, of course, will be required. About 15 seconds, is the maximum exposure to avoid star trailing, unless you have a tracking mount.
By some reports, it’s approaching Magnitude 7, not a naked eye object, but visible with a longer exposure.
I gave the comet a try on January 13 from Arizona. Sadly, there were a lot of high clouds.
I wasn’t too impressed with what I got by stacking 10 30-second exposures on a tracking mount. There was only a hint of a tail, but I expect the comet to become brighter with more of a tail as the month progresses.
Comets are somewhat unpredictable, so it may get a lot brighter or fade. Still, naked eye comets are rare, and this one won’t be back for another 50,000 years, so the next couple of weeks are your only chance.
If you get some worthwhile shots of our cosmic visitor, please send it along in the comments. Good hunting.
AstroFest, Galway Astronomy Club’s annual festival of all things astronomy, will return next week after a three year hiatus.
The festival will take place in the Menlo Park Hotel on Saturday January 28, and promises a packed programme of talks, along with trade displays, photographic displays, and a lunchtime workshop with Tom O’Donoghue, one of Ireland’s best known astrophotographers.
Registration will open at 9.15am on the January 28, and will run all day.
On January 27, the evening before AstroFest, Galway Astronomy Club will host a special screening of Contact, the 1997 film starring Jodie Foster as Dr Ellie Arroway, who after years of searching finds conclusive radio proof of extraterrestrial intelligence, which has been sending plans for a mysterious machine. The screening will take place in the Pálás Cinema at 9pm, and is a rare opportunity to see this classic film on the big screen.
The day-long festival on the Saturday will include talks on a wide variety of topics; these include ‘Cutting Edge Radio Astronomy in Ireland’ with Jeremy Rigney, ‘Is there Anybody Out There’ with Brian MacGabhann, ‘Ancient Irish Rock Art and Astronomy’ with Aoibheann Lambe, and ‘Detecting Exo-Earths with Future Telescopes’ with Nicholas Devaney.
Tuam native Tom O’Donoghue is well-known in the Irish astronomy community. One of Ireland’s leading astrophotographers, his work has won several awards. He has been featured in the BBC’s The Sky At Night, and in magazines such as Astronomy and Space, Astronomy Now, the French Astronomie Magazine, and Practical Astronomer. Those familiar with our AstroFest will have seen O’Donoghue’s images bring colour and the ‘wow’ factor to previous festivals. For more information see www.astrophotography.ie
The highlight of the day will be the Patrick Moore Memorial Lecture, ‘Artemis and Beyond: Where Past Meets Our Future’ with Shehnaz Soni, an aerospace engineer at NASA who will be speaking live from the US on the Artemis Project, an ambitious plan to return humans to the Moon and, ultimately, Mars. The festival dinner on Saturday evening will give attendees the opportunity to meet and chat informally.
The talks are geared toward a general audience, and will appeal to both scientists and laypeople. Children aged over 11 years who are interested in all things science and space are also welcome to attend.
Tickets for the festival are €30 for guests, and €20 for club members and students. Entry is free for children under 16. The festival dinner is €40, and can be booked online or on the door. The festival screening tickets are available from the Pálás Cinema, www.palas.ie/films
For full details visit www.galwayastronomyclub.ie/astrofest-2023 or find Galway Astronomy Club
You’ve seen it before: a photo shot at night or in low light that’s distorted with a random pattern of speckles. That’s what’s known as photo noise. Here we’ll explain what photo noise is, how to avoid it when shooting, and how to nearly get rid of it in editing using either Photoshop or specialty photo-editing software that’s better at denoising photos than Photoshop.
You’ll be amazed at how much better photos look after running them through the denoising steps below: They can turn even unusable shots into ones you can be proud of! These tricks can even be used on old photos from cameras with less-than-great noise characteristics—or even on scanned film photos with too much graininess—to make them look like you shot with a newer model.
What Is Photo Noise?
In digital systems, noise pops up in pictures in the form of false color and rough texture. Conceptually it is not that different from film grain, especially since the false color aspect is relatively simple to remove with raw processing software. Noise can sap photos of fine detail and harm color accuracy, but it’s not impossible to remove.
In fact, all digital photos have some noise, but the camera and photo software can usually remove most of it. Noise tends to show most when the sensor is set to a high ISO, the numerical measurement of light sensitivity. As such, we tend to think of noise as a problem for low light situations more than for brightly-lit scenes. You’ll see it in unedited raw format images as splotches of false color, along with a rough, grainy texture, evident in the image below.
(Credit: PCMag)
Why Does Photo Noise Happen?
A camera’s ISO sensitivity setting determines how much light the sensor gathers in a set amount of time. Higher ISO settings gather more light and are the main contributor to image noise. You can avoid them by using brighter lenses or a longer shutter speed, but in some situations there’s no getting around using a high ISO to freeze a subject in motion and capture a properly bright image.
Though cameras are continually improving in how well they capture images at high ISOs, you still end up with noise if you shoot above ISO 6400 with an APS-C system or above ISO 12800 with many full-frame cameras. These are settings you’ll use to freeze subjects in motion in tough light, and often come into play when using telezooms with smaller f-stops, or when snapping photos at parties and events.
Astrophotography is a special case. Night sky photographers and others who are interested in making photos with long exposure times will contend with heat buildup. Many cameras take a dark exposure immediately after a long exposure photo in order to better control noise.
Luminance vs. Chroma Noise
There are two main kinds of noise that photo-editing programs usually address: luminance (light) and chroma (color). The latter is unique to digital photography, and it’s the most unpleasant form. Luminance noise shows up not only in digital images but also in film photography, where it’s usually referred to as grain. It’s just a matter of not having enough light available to produce a clear, sharp image, so the sensor or film reproduces the image imperfectly.
Tips for Reducing Photo Noise When Shooting
The conundrum of reducing noise in a photo is that by smoothing out the jagged, spotty edges in an image, you lose the detail that those spots were representing. So, you end up with either a detailed noisy shot or one with details smoothed over and blurred. The tips below offer ways to do both—remove the noise and retain the detail.
Shoot in a Raw camera file format. An image in a Raw file format gives you far more powerful de-noising capability editing than a JPG. Raw formats are usually proprietary to each camera with file extensions like CR2 or CR3 for Canon, NEF for Nikon, and ARW for Sony. Leica and Pentax offer support for Adobe’s Digital Negative (DNG) format. The file extension isn’t that important, though—instead, you’ll need to make sure you’ve got software that supports your particular camera to process Raw images. Most programs are updated regularly to support new cameras.
Shoot with the lowest possible ISO setting. When you do decrease the ISO setting, the shutter speed slows down, and the aperture is larger, or both. Of course, those changes come with compromises. A slower shutter speed can mean more motion blur, and a higher aperture reduces the depth of field. Many cameras let you set a maximum ISO so that you won’t shoot over your tolerance for noise.
Get a better camera! The older your camera and the smaller its sensor size, the worse its image noise. Ideally, you want a new full-frame camera, according to PCMag’s camera expert Jim Fisher. Megapixel count isn’t as huge an influencer over noise as in years past, but full-frame models in the 24-33MP range show less noise than 45-60MP models, generally speaking. Many newer models employ Backside Illuminated (BSI) or Stacked CMOS chips, which offer an advantage in noise control versus older FSI CMOS and ancient CCD sensors.
Shoot with sufficient light. Light your subject and expose the shot so that the subject is bright enough. If you crank up the exposure or shadows in software after the fact, noise is likely to appear. Since getting sufficient light isn’t always possible, knowing how to denoise a photo using Photoshop or another tool comes in handy, and I show you how to do that in the next section.
Don’t rely on in-camera noise reduction. Even if your camera has it, in-camera noise reduction doesn’t give you the control you get with the software solutions below, and it tends to smooth out the image too much, losing detail. In-camera noise reduction only works with JPGs, which aren’t nearly as editable as Raw format photos.
Below, we’ll go through the process of reducing photo noise in several of the most popular programs for doing so: Photoshop, Lightroom Classic and non-Classic, DxO PhotoLab, and Topaz DeNoise AI. The last two can actually be used as Lightroom Classic and Photoshop extensions to conveniently slide into your workflow. These aren’t your only options, with worthy offerings from companies like Capture One, CyberLink, On1, and Skylum, but those outlined below offer a great start, and the process is similar with other tools. If there’s interest in the comments section at the bottom of this article, I’ll update it to add more denoising software.
Note that some of the differences in the images below are due to programs rendering Raw files differently in general, rather than to their noise correction tools. Also, note that you can get a slightly larger version of the image by right-clicking on it in your browser and viewing it in a new tab.
How to Denoise a Photo in Photoshop
Adobe Photoshop has long offered noise reduction tools, and they have improved over the years. But I wish the company would put some of its AI know-how to deliver a tool that automatically analyzes photos for noise and automatically eliminates it, as other tools like DxO PhotoLab, DxO PureRaw, On1 NoNoise, Topaz DeNoise, and CyberLink PhotoDirector do. I’m a fan of one-button fixes that don’t require lots of tinkering, and I expect a lot of other photographers are too. That said, you can do a decent job reducing noise in the top photo software. In fact, the software offers two noise-reduction tools, one for Raw camera files in Adobe Camera Raw utility and one for JPGs in the main interface as a filter.
Here’s how to reduce noise in Photoshop’s Adobe Camera Raw tool:
Open the photo, preferably one that’s shot in raw camera format. When you open a photo in raw format, you must go through Adobe Camera Raw utility before you can open the picture in Photoshop. But you can still use Camera Raw as a filter for images already open in Photoshop. Below, I zoomed in to 200% to clearly show the noise. Unless you zoom to at least 100%, it’s hard to see the noise adequately to deal with it.
(Credit: Adobe/PCMag)
Scroll the right-hand control panel down to the Detail section and uncollapse it. Here you see sliders for Sharpening, Noise Reduction, and Color Noise Reduction. Photoshop automatically sets the Color Noise Reduction to 25, since color noise is always undesirable, but the plain Noise Reduction (luminance) to 0.
(Credit: Adobe/PCMag)
You can further expand the two noise reduction sliders to reveal more sliders for Detail and Contrast (we’re now at 100% zoom):
(Credit: Adobe/PCMag)
The first thing to try is to slide the top Noise Reduction slider to increase its effect. For some photos, this may be all you need to do. Here’s what I got when raising this setting to 100:
(Credit: Adobe/PCMag)
While, yes, the noise is gone, the photo has lost sharpness and detail—though this aspect has greatly improved over previous versions of Photoshop.
To fix those byproducts, you probably want to lower the noise reduction strength and push up the Detail and Contrast sliders. The image below shows how the image looks with 78% noise reduction and 79% Detail, and 36% Contrast. I find that more contrast can produce an unpleasant effect. It’s a definite improvement on the noisy original and is a decent compromise between noise and detail. (Note that the dumbbell in this shot has a texture lost in the 100% reduction.)
(Credit: Adobe/PCMag)
If you see color noise, move the Color Noise Reduction slider further to the right. Below is a shot with no color noise reduction applied, so you can really see the distracting off-color pixels, looking like an old color TV set image:
(Credit: Adobe/PCMag)
And here it is after color noise reduction in Photoshop (note that some luminance noise remains):
(Credit: Adobe/PCMag)
When done adjusting, open the image in the main Photoshop program by choosing Open at the bottom right of the ACR window.
Export it using File > Export to the format of your choice, usually JPG.
Another Photoshop Option: Use the Reduce Noise Filter
You can also reduce noise with a standard Photoshop Filter option, Noise > Reduce Noise. You may want to duplicate the background layer that contains the photo and create it as a new Smart Object layer(Opens in a new window) when using this tool to separate it from any other edits you may be doing to the photo and retain the ability to adjust the layer further.
(Credit: Adobe/PCMag)
Select the layer containing the photo
Go to the Filter > Noise > Reduce Noise menu option
Move Strength, Preserve Details, Reduce Color Noise and Sharpen Details sliders to taste. This tool uses a scale of 1 to 10 rather than up to 100.
Its results aren’t as good as those you get with the Adobe Camera Raw tool (the right side of the shot above shows its effect at a setting of 8), but if you have a noisy JPG, it’s an option. This tool opens with correction levels preloaded and adds the ability to remove JPG artifacts; if you’re working on a low-res image, check this box.
You could also choose the Advanced view, which simply lets you adjust the noise separately for red, green, and blue color channels. The need for doing this is an edge case since the noise will usually affect but if you see noise in a particular color, it’s worth a try. One final point in this section is that you can also use Adobe Camera Raw as a filter to use its noise reduction tools on photos that are already open in the main program.
How to Denoise a Photo in Lightroom
Lightroom uses the same tools as Photoshop’s Adobe Camera Raw utility for noise reduction, but you get to them a little differently. The noise-reducing process is the same for both Adobe Lightroom Classic and the non-Classic version of Lightroom. With either app you don’t need to go through Adobe Camera Raw, but you do need to import the photo into your library (simply called Add Photos in newfangled Lightroom).
Import the photo if it’s not already in your collection and select it in the Library view.
In Classic, switch to Develop mode. In non-Classic, open the Edit right-side panel.
Scroll down to the Detail section of adjustments, and you’ll see the same Noise Reduction options as in Photoshop’s Adobe Camera Raw tool above.
(Credit: Adobe/PCMag)
Move the Noise Reduction slider to the right until the noise is gone but not so far as to blur the image excessively. Pro tip: For this kind of photo in which the unpleasant noise is mostly only the background, you can select and mask the subject so that the correction only affects the background.
(Credit: Adobe/PCMag)
Then move the Detail slider to bring back lost image definition. You usually end up with some blurring, so it’s a judgment call as to how much noise reduction you want versus how much detail you want.
Export the photo to the desired output.
How to Denoise a Photo in DxO PhotoLab
DxO was the first company that brought to market a denoising tool that didn’t compromise effectiveness for speed. The company’s Prime (Probabilistic Raw IMage Enhancement) noise reduction tool was the first to take the approach of not worrying about how long the correction took and only worrying about how good the result was. It often took nearly a minute to process a raw image file. The later DeepPrime got even better results in less time, and finally, DeepPrime XD, introduced in DxO PhotoLab 6, takes the noise reduction another step further.
The algorithm the company’s imaging scientists came up with examines a larger area of neighbor pixels to determine what is noise and what isn’t. It differs from the Adobe tools in that there’s no tinkering with sliders—it works automatically. And it delivers noise-reduced images with more detail retained than you can get with Photoshop or Lightroom. DxO also includes a denoising tool called HQ, which works on compressed image formats like JPG.
You can use DxO’s software as a Lightroom Classic or Photoshop plug-in (the non-Classic Lightroom doesn’t support plug-ins) or in DxO’s own PhotoLab and its PureRAW, which costs less. The latest version, DeepPrime XD, is only available in PhotoLab 6, though I expect it to arrive in PureRAW at some point. The software uses graphics hardware to accelerate its performance; if you don’t have a decent graphics card, you may be waiting longer for it to finish.
Recommended by Our Editors
Open your raw format photo and choose one of DxO’s four levels of denoising—HQ, Prime, DeepPrime, or DeepPrime XD (PhotoLab only). We’ll stick with DeepPrime XD since it’s the most powerful correction tool the software offers.
(Credit: DxO/PCMag)
You won’t see the fix in the main image preview window, but you get a small preview loupe of its effect above the correction slider. You can move it around, though it takes a few seconds to update. Tap the magic wand button to get the automatic correction; you can also make tweaks with the Luminance slider and uncover Advanced settings for dead pixels and “noise model.” Moving the slider up for that last one can add sharpness to the result.
Export the corrected image. A blue Export to Disk button at the lower right makes this easy, and you can export to DNG, JPG, or TIFF formats. Exporting is the only way to see the full image with corrected noise, and it can take some time, slightly under 30 secondsfor a 24MP test shot on my PC with a 3.4GHz Core i7 CPU and an Nvidia GTX 1650 graphics card and 16GB RAM. Here’s the hummingbird shot after processing. The speckled noise of the background is gone, yet the feathers are more clearly defined.
(Credit: DxO/PCMag)
How to Denoise a Photo in Topaz DeNoise AI
Topaz DeNoise AI is one of the most highly regarded denoising tools out there. It’s impressive indeed. It’s a rather large program, taking up 4GB on my hard drive, more than Photoshop itself. DeNoise AI offers five methods for denoising: Standard, Clear, Low Light, Severe Noise, and Raw. I found that the latter works best for me, but of course you need to use it only with Raw files.
Open an image in DeNoise AI. You can start with either a JPG or a Raw image file. You see a grid of four denoising options. You can change that to show just one or two versions using buttons at the top. You can also switch the view to the original noisy shot.
(Credit: Topaz/PCMag)
Select the option that looks best to you. For Raw files, the Raw option always looks best to me; with JPGs I find the Clear option a good choice.
(Credit: Topaz/PCMag)
Make sure the lightning bolt is enabled for automatic correction, or play with Remove Noise and Enhance Sharpness sliders to get a result you like.
Click the big blue Save Image button. As with DxO Prime, the process takes a bit of time—about 40 seconds for the same sample image.
Denoised Photo Comparisons
So which methods produced the best results? Here’s a comparison of two of my test shots in the three tools mentioned (counting Photoshop, Lightroom, and Lightroom Classic as a single tool).
We’ll start with hummingbird shot corrected with Photoshop/Lightroom:
(Credit: PCMag)
Then in DxO DeepPrime XD:
(Credit: PCMag)
And finally in Topaz DeNoise AI (Topaz didn’t provide me with a license after repeated requests, hence the watermark):
(Credit: PCMag)
It’s quite clear that both the DxO and Topaz corrections are significantly better than the Adobe one, which neither removes all the noise nor delivers sharp detail. Topaz seems to come out on top for detail and naturalness.
Here’s the portrait shot denoised by Photoshop/Lightroom:
(Credit: PCMag)
By DxO:
(Credit: PCMag)
And by Topaz:
(Credit: PCMag)
Again, Topaz retains the most detail, while removing the noise. Don’t worry about the less vibrant colors in this result, because the program outputs DNG files that can easily be edited in Lightroom or other software for color correction. Here, we’re just concerned about noise and detail.
Do More With Photos!
To dig deeper into getting the most out of your digital photos, read our roundup of the best photo editing software. To choose a better camera, read about the best digital cameras. And for some advice on taking better pictures, check out our 10 beyond-basic digital photography tips.
Like What You’re Reading?
Sign up for Tips & Tricks newsletter for expert advice to get the most out of your technology.
This newsletter may contain advertising, deals, or affiliate links. Subscribing to a newsletter indicates your consent to our Terms of Use and Privacy Policy. You may unsubscribe from the newsletters at any time.
Venus and Saturn are on a visual crash course, and you can watch the planets make their close approach all this week.
The two planets are, of course, more than 800 million miles (nearly 130 million kilometers) apart on average, so there’s no chance of them literally colliding. But their orbits will make them seem like they might from the vantage point of skywatchers here on Earth.
Starting Wednesday (Jan. 18), the planets will begin their close approach toward one another. About 45 minutes after sunset, look to the northwest sky, close to the horizon, and you’ll spot the two planets. Venus will be substantially brighter than Saturn — it’s the third brightest celestial body in the sky, after the sun and the moon.
Related: See Venus and Saturn snuggle in the sky Sunday (Jan. 22)
The two planets will make their closest approach, also known as an appulse, on Sunday, (Jan. 22). At the same time, Venus and Saturn will also reach conjunction, which is when planets share the same right ascension (an angular distance used to locate celestial bodies in the night sky).
On Jan. 22, the planets will become visible from New York City at 5:18 pm EST (2218 GMT), according to skywatching site In-the-Sky.org (opens in new tab) about 14 degrees above the horizon in the southwest sky. (If you need help measuring that distance, it’s about one and a half of your fists stacked on top of each other at arm’s length.) The pair won’t be visible for long, though — they’ll sink below the horizon at 6:48 p.m. EST (2348 GMT).
But while they’re visible on Sunday (Jan. 22), they’ll appear to be extraordinarily close together, just a tiny one-third of a degree apart, according to NASA’s Jet Propulsion Laboratory (opens in new tab). That means they’ll be close enough to see within the field of view of a pair of binoculars, and perhaps even some low-powered telescopes.
Need to purchase some gear before before the big show? Check out our lists of the best binoculars and best telescopes to help you find the right device for you. If you’re looking to catch some photos of the pair, check out our guides on the best cameras for astrophotography and best lenses for astrophotography.
Editor’s Note: If you snap a photo of the close encounter between Venus and Jupiter and would like to share it with Space.com’s readers, send your photo(s), comments, and your name and location to [email protected].
Follow Stefanie Waldek on Twitter @StefanieWaldek (opens in new tab).Follow uson Twitter @Spacedotcom (opens in new tab) and on Facebook (opens in new tab).
When you’re tired of just looking at the stars, the best astrophotography cameras will enable you to enjoy and explore the heavens above in ways that your telescope simply can’t compete with.
Instead of just looking at the stars, you can record the universe for creative expression or scientific record-keeping. The best astrophotography cameras are carefully tuned imaging devices with extremely specialized features, so you can’t capture good pictures of space with just any old equipment.
The best astrophotography cameras unlock the secrets to taking breathtaking pictures with the kind of clarity and detail that others are just not able to do, thanks to bespoke sensors made to cut through solar radiation and custom GPS features that follow the path of the stars.
No matter what kind of astrophotography camera you’re searching for — a conventional camera, a CCD camera that mounts to your telescope, or even just the best smartphone for astrophotography — we’ve got you covered in our guide, and everything is split up into sections so you’ll know exactly what you’re looking at. If you’re starting from scratch and are looking for more than just a camera, we think you’d be interested in our guides to the best binoculars for stargazing and the best telescopes to build your stargazing kit.
After the camera options listed below, you’ll also find some useful information about astrophotography cameras, and what you should be looking for when making your purchase. You can also check out our guide to the best astronomy books if you want to learn more about the night sky.
Best astrophotography cameras
(Image credit: Canon)
1. Canon EOS Ra
A pure astro camera with custom full-frame sensor
Specifications
Camera type: Mirrorless
Sensor size: Full frame (IR modified)
Resolution: 30.3 megapixels
ISO range: 100-40,000 (expandable to 50-102,400)
Rear screen: 3.15-inch vari-angle touchscreen, 2.1 million dots
Viewfinder: 0.5-inch OLED, 3.69 million dots
Max video resolution: 4K up to 30p
Reasons to buy
+
IR-modified full-frame sensor
+
30x magnification in live view / viewfinder
+
Uses Canon RF and EF glass (with adapter)
Reasons to avoid
–
4K video is cropped
–
Single memory card slot
–
Not well suited to non-astro shots
There have been a handful of dedicated astrophotography cameras over the years, such as the Canon EOS 60Da and Nikon D810a. However, the only model currently on the market is this, the Canon EOS Ra. A special edition of the standard EOS R mirrorless camera, its 30.3MP image sensor has a modified IR filter array to accommodate quadruple the amount of hydrogen alpha rays – enabling the camera to capture the distinct details and deep red hues of nebulae.
That same full-frame sensor also allows for beautiful 4K video, albeit with a 1.6x crop (effectively increasing your focal length and ‘zooming in’ on your composition). Perhaps most useful of all, the EOS Ra also boasts a 30x magnification when previewing your scene – most cameras top out at 10x, so this is invaluable for punching in and making sure that your stars are as sharp as possible.
The camera employs the new Canon RF (mirrorless) lens mount, which is populated by optics that are generally fantastic in quality but have a price tag to match. However, it is compatible with Canon EF (DSLR) lenses via an affordable adapter – which gives you a much greater selection of glass and at lower prices.
(Image credit: Sony)
Astonishing low light performance and best in class video
Specifications
Camera type: Mirrorless
Sensor size: Full frame
Resolution: 12.1 megapixels
ISO range: 80-102,400 (expandable to 40-409,600)
Rear screen: 3-inch vari-angle touchscreen, 1.44 million dots
Viewfinder: 0.5-inch OLED, 9.44 million dots
Max video resolution: 4K up to 120p
Reasons to buy
+
Incredible low light performance
+
Insanely detailed viewfinder
+
In-body image stabilization
Reasons to avoid
–
Low 12.1MP resolution
–
Magnification limited to 4x
–
“Star eater” in video mode
The Sony A7S III boasts near night vision performance, thanks to its ridiculous native ISO range of 80-102,400 (expandable to 409,600, though you’ll never actually shoot that high) which also features dual native ISO. While most cameras have just one native ISO (the point at which performance is cleanest), the A7S III has two – one at ISO640 and another at ISO16000 (though this varies in video modes).
As a body designed primarily for video, it should come as no surprise that this is the ultimate astrovideography camera. However, herein lies a compromise: the A7S III only features a 12.1MP sensor. This aids the camera’s low light performance (since there are fewer pixels, each one is larger and able to gather more light), but means there is less detail if you want to print your photographs.
While this is the best camera for filming stars, though, there is one sting in the tail: the “star eater” phenomenon that plagued earlier Sony cameras (where overactive noise reduction would ‘eat’ stars misidentified as noise) occasionally rears its head when shooting video with wide angle lenses that are very sharp. And where the EOS Ra has a monstrous 30x magnification, the Sony only has a paltry 4x – which can make focusing a challenge, especially if you have poor eyesight.
(Image credit: James Artaius)
Innovative GPS and IBIS tech, with lighting and night mode
Specifications
Camera type: DSLR
Sensor size: Full frame
Resolution: 36.4 megapixels
ISO range: 100-819,200
Rear screen: 3.2-inch vari-angle, 1.04 million dots
Viewfinder: Optical pentaprism
Max video resolution: 1080p up to 60p
Reasons to buy
+
Weather sealed
+
Astrotracer to prevent star trails
+
Night mode LCD + external illumination
Reasons to avoid
–
No touchscreen control
–
No 4K video
–
Launched in 2016, so tech is old
Mirrorless bodies are great for shooting the stars, but some of the best astrophotography cameras are still DSLRs. The Pentax K-1 Mark II is the best of the bunch, with its 36.4MP full-frame sensor, weather sealing, in-body image stabilization (IBIS) and cleverly designed flexible angle rear screen. And while it can’t beat the EOS Ra or A7S III for specialist features, the K-1 Mark II might be the best all-round astro camera when you consider everything else it has to offer.
Central to this is Pentax’ Astrotracer technology. Rather than using the stabilization (which makes micro-adjustments to the image sensor) to compensate for camera shake, Astrotracer uses it in tandem with the inbuilt GPS to compensate for the movement of the stars. Using GPS data, it moves the sensor to prevent unwanted star trails when the camera is mounted to a tripod – so you can capture long exposure shots without getting unwanted star trails.
Throw in a Night Vision mode that turns the LCD screen red to optimize it (and your eyes) for shooting in the dark, along with external illumination that lights up the underside of the rear screen as well as the camera mount (for changing lenses in the black of night), this is a camera that’s tailor made for awesome astrophotography.
(Image credit: Nikon)
A fantastic DSLR that lends itself brilliantly to astrophotography
Specifications
Camera type: DSLR
Sensor size: Full frame
Resolution: 45.7 megapixels
ISO range: 64-25,600 (expandable to 32-102,400)
Rear screen: 3.2-inch tilting touchscreen, 2.36 million dots
Viewfinder: Optical pentaprism
Max video resolution: 4K up to 30p
Reasons to buy
+
Huge 45.7MP full-frame resolution
+
Brilliant battery life
+
(Some) illuminated buttons
Reasons to avoid
–
LCD is tilt-only, not fully articulated
–
No inbuilt WiFi for image transfer
–
Not all buttons are illuminated
Unlike other cameras on this list, the Nikon D850 doesn’t have any astro-specific features. Instead, it is simply a fantastic DSLR whose specs lend themselves wonderfully to photographing the night sky.
Its 45.7MP image sensor is back side illuminated (constructed so that the circuitry is on the underside, so as not to obstruct the front), which means that it has superior light-gathering capabilities with less noise and better all-round image quality. This works in tandem with a good, if not great, ISO range to produce enviably low light performance. Like the Sony A7S III, the D850 also has dual native ISO – but at the less useful ISO64 and ISO400 sensitivities.
The chunky DSLR design is a pleasure to handle, boasts weather sealing, and also has a curtain mechanism for the optical viewfinder to stop unwanted light when shooting long exposures. It also boasts two card slots, one XQD / CFexpress and one SD. A big bonus is the inclusion of illuminated buttons, but only on the left-hand side of the camera – we’d love to have all the buttons light up, but being able to see key controls in the dark is a hugely welcome feature.
(Image credit: OM Digital Solutions)
5. Olympus OM-D E-M1 Mark III
Light enough to carry anywhere – and shoot stars handheld!
Specifications
Camera type: Mirrorless
Sensor size: Micro Four Thirds
Resolution: 20.4 megapixels
ISO range: Low-25,600 (200 base)
Rear screen: 3-inch tilting touchscreen, 1.04 million dots
Viewfinder: Electronic, 2.36m dots
Max video resolution: 4K up to 30p
Reasons to buy
+
Starry Sky Autofocus
+
Shoot astrophotography handheld!
+
MFT is compact, lightweight, affordable
Reasons to avoid
–
MFT sensor not optimum for low light
–
Modest megapixel count
–
Rear screen very low resolution
Micro Four Thirds sensors are approximately 50% the size of full frame sensors, enabling the bodies (and lenses) to be much smaller, lighter and cheaper – so your kit is compact enough to take anywhere. However, because the sensor is so much smaller, it has less surface area with which to absorb light. As the Olympus OM-D E-M1 Mark III proves, though, there is more to consider than just sensor size when it comes to astrophotography.
The E-M1 III features a unique Starry Sky AF algorithm, which can perform precision autofocus on even the smallest stars. The Accuracy Priority mode will help you nail focus when the camera is on a tripod, but the Speed Priority mode (which uses the powerful image stabilization, good for up to 7.5 stops of compensation) means that you can shoot astrophotographs handheld with a wide-angle lens!
Coupled with the Live Time and improved Live Composite mode (which enables you to keep the shutter open for six hours, and only adds exposure when illumination changes to keep your images clean and evenly lit) makes capturing light trails an absolute breeze. You can even use a USB source like a power bank to charge the camera while shooting. If size, weight and cost are considerations, the E-M1 Mark III offers powerful tools that make it a formidable choice despite the smaller sensor.
(Image credit: Sony)
Sony’s super-popular camera is a capable stargazer
Like the Nikon D850, the Sony A7 III isn’t a dedicated astrophotography camera – it’s just a darned good mirrorless camera that is very adept at shooting the stars. And again like the D850, the A7 III boasts a back side illuminated full frame sensor (with a lower 24.2MP resolution) and a sky high ISO range – which hits a staggering 51,200 natively, and is expandable all the way to 204,800.
With dual memory card slots and the ability to employ USB power (such as a power bank) while shooting, taking long exposures all night long won’t cause you any problems. However, the camera does feature a few Sony specific quirks that you’ll have to be able to overlook to get the most out of it.
The main culprit is the dreaded “star eater” phenomenon when shooting stills, whereby aggressive noise reduction can make stars disappear during long exposures. It’s not as bad as earlier Sony bodies, but the problem does raise its head from time to time. The other issues relate to the rear screen, which is a tilt-only affair, has only limited touch functionality, and is very low resolution at less than a million pixels.
Best astrophotography CCD cameras
Where normal cameras are standalone devices, a CCD (charged couple device) camera is purpose-built to work with a telescope. Previously they were prohibitively clunky and costly, but nowadays they are both easier to use and much more affordable – and they are designed to capture images of deep space.
They remain the preserve of more advanced, dedicated astrophotographers, but if you really want to up your game then it’s worth considering one of these CCD cameras from astrophotography specialist ZWO.
(Image credit: ZWO Company)
7. ZWO ASI183MC (Color)
Packs a powerful sensor for deep sky imaging
Specifications
Camera type: CCD
Sensor size: 1-inch BSI CMOS
Resolution: 20.2 megapixels
Max video resolution: 5496 x 3672 up to 19fps
Reasons to buy
+
Great for galaxies and nebulae
+
Formidable image sensor
+
Double cooled for low noise imaging
If you’re looking to get into long-exposure deep sky photography of subjects like nebulae, the ZWO ASI183MC (with color sensor) is an affordable entry point to the world of expensive, cooled cameras.
Its high-sensitivity 1-inch 20.2MP CMOS sensor is made by Sony, and is back side illuminated for clean and efficient imaging (aided by the cooling system to further reduce noise in long exposure imaging).
With a claimed 12 stops of dynamic range, impressive spectral response (the amount of light that enters the telescope and is used by the sensor) and software finely tuned to reduce amplifier glow, the ASI183MC offers impressive performance.
(Image credit: ZWO Company)
8. ZWO ASI120MC (Color)
A great entry level CCD camera to use with your telescope
Specifications
Camera type: CCD
Sensor: 1/3-inch CMOS
Resolution: 1.2 megapixels
Max video resolution: 1280 x 960 up to 60fps
Reasons to buy
+
Perfect for moon and planet images
+
Low price
+
Ideal first CCD camera
Reasons to avoid
–
Not optimal for galaxies and nebulae
Where the ASI183MC is an ideal entry point for deep sky imaging, the ZWO ASI120MC is the perfect beginner camera for CCD astrophotography – making it a great option if this is your first time taking images using your telescope.
While its bigger brother is the one to go for if you intend to shoot galaxies and nebulae, this is camera’s image sensor is a smaller and lower megapixel affair with slightly lower spectral response. It is still very capable for photographing the moon and planets, though, and can capture video at up to 60fps at just under 1080p resolution (1280 x 960).
It’s not well suited to deep sky astrophotography, but otherwise it’s a fantastic choice for your first time shooting the stars.
Best astrophotography camera phones
While they aren’t going to give you anything like the results of a traditional or CCD camera, some camera phones have been designed to take impressive images of the night sky with starscapes and even the galactic core.
So if you’re an astro shooter looking for a new handset, or you’d like a camera that fits in your pocket that can take some impressive (if limited) nightscape images, it’s well worth checking out these camera phones.
(Image credit: Samsung)
9. Samsung Galaxy S21 Ultra
Hands down, the best camera phone for astrophotography
The Samsung Galaxy S21 Ultra is arguably the best camera phone on the market, so it should come as no surprise that it’s also the best phone when it comes to shooting astrophotography.
This is thanks to the fact that you can take fully manual control. While other phones features night shooting modes, they are powered by computational photography that produces results via software wizardry. The S21 Ultra, by contrast, enables you to use Pro mode to shoot exposures up to 30 seconds, adjust the ISO up to 3200, and even perform manual focus.
Away from astro shooting it’s an incredible all-round photography device, with four cameras including its headline 108MP f/1.8 primary unit and its 12MP f/2.2 ultra-wide. For the best photos right from your pocket, the S21 Ultra is a no brainer.
(Image credit: Google)
10. Google Pixel 5a
Hands down, the best camera phone for astrophotography
Google wasn’t the first company to feature an astro mode in its phones, with the likes of Huawei beating it to the punch. However, the Astrophotography mode that debuted in the Google Pixel 4 was a cut above the competition – and it’s better than ever in the Google Pixel 5a.
Built on Google’s HDR+ technology – a system that ‘brackets’ a series of multiple exposures, in order to preserve highlight detail and prevent blown-out images, then boosts the shadows to create artificial dynamic range – Astrophotography mode takes around 15 exposures of about 15 seconds each, processing the sky separately in order to accurately render the stars.
So it’s a completely software-driven system, unlike the manual control offered by the Samsung, but that makes this a much more streamlined point-and-shoot solution to shooting astrophotography on your phone.
What is an astrophotography camera?
Astrophotography cameras are imaging devices that enable you to capture clean long-exposure images of the night sky. This is achieved, primarily, by opening the camera’s shutter long enough (usually around 30 seconds) to allow the dim starlight to be clearly visible through the black of night.
In order to accomplish this, you’ll obviously need a camera with pristine image quality – though getting great photographs in low light conditions is one of the most challenging tasks that any camera can perform.
Thus, the best astrophotography cameras need to possess a number of critical characteristics: exceptional ISO performance (the sensitivity of the camera’s image sensor), the ability to record low noise and high dynamic range, and a capable image processor to translate all this technology into the best possible image.
Some cameras even feature a specially modified IR filter on the sensor, which is designed to allow the infrared rays of deep space to be recorded by the camera (rather than being blocked, as they are by stock sensors in 99% of cameras).
Cameras come in two flavors: DSLR and mirrorless. DSLRs (digital single lens reflex) are chunkier cameras with a traditional mirror mechanism inside that flips out of the way to record an image. These tend to be cheaper and sturdier, but are built on older technology. Mirrorless cameras are smaller and lighter cameras that ditch the mirror, giving you a live ‘what you see is what you get’ view of exactly what your photograph will look like, both on the rear screen and through the viewfinder.
(Image credit: Future)
What else do you need for astrophotography?
Even with one of the best astrophotography cameras, though, you’re still not quite set to start taking great pictures of the Milky Way; the camera body is just one part of the equation…
The right lens Firstly, you’ll need an appropriate optic – the slow kit lens that came bundled with the camera won’t really be up to the job. Invest in a fast, wide-angle lens – fast meaning an aperture with a large f-number (such as f/1.8 or f/2.8), and wide-angle meaning something ideally between 10mm and 24mm. Prime lenses (with a fixed focal length) tend to be both faster and sharper, though zoom lenses (with a variable focal length) offer greater versatility at the expense of speed.
A sturdy tripod Since you’ll be shooting long exposures of 30 seconds or so, you’re going to need something to keep your camera rock-steady. Travel tripods and vlogging-friendly Gorillapods will do in a pinch, but you should really invest in a full size, heavy tripod with as few sections as possible. You want to ensure that your camera is being held as rigid as possible, since even a slight gust of wind will be visible when shooting a long exposure.
Remote shutter Even with a tripod, just the act of depressing the camera’s shutter can cause vibrations. To combat this, invest in a remote shutter or shutter release cable – this enables you to control the shutter without physically touching the camera, and some even come with intervalometers that make it easier to shoot multiple exposures (handy for star trails). Alternatively, you can use the camera’s self-timer to avoid shake when hitting the shutter.
Star tracker A motorized star tracker does exactly what it says on the tin: it tracks the movement of the stars, enabling your camera to move in sync to avoid unwanted trails when capturing long exposures. These are advanced tools of the trade, so once you’ve cut your teeth in astrophotography they’ll offer you the next step to up your game.
Of course, at the heart of your setup is the camera itself – so here are the best astrophotography cameras you can get right now…