[ad_1]
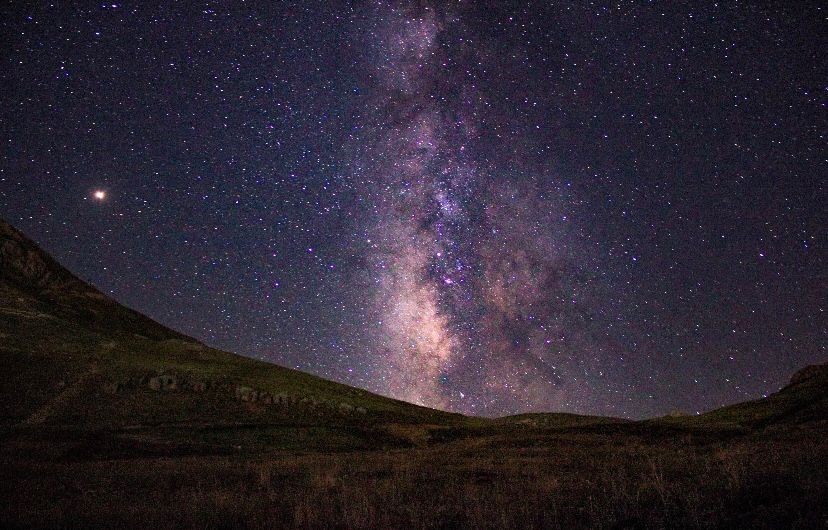
Astrophotography simply is to photograph the celestial objects and night sky. Let’s get into the basics of astrophotography by starting the explanations of the basic pieces of equipment and the process of the photographing.
First of all, the most important thing in astrophotography is to manage the light, which means the necessity of some information about the features of the camera. While taking pictures of the night sky, we need to collect lots of light to get the most detailed picture and the highest resolution. For this reason, our camera must be capable of long exposure. A DSLR camera will do the job.
SHUTTER SPEED
The whole point is to gather light, and in that regard, the first thing we can do is extend the exposure time. This method is called long exposure and is done by slowing down the shutter speed. Shutter speed is exactly what it sounds like: It’s the speed at which the shutter of the camera closes. A fast shutter speed creates a shorter exposure — the amount of light the camera takes in — and a slow shutter speed gives the photographer a longer exposure. Longer exposure means gathering more light, which we need in Astrophotography because the objects in the night sky are dim; therefore, the light that comes from the objects is less than enough. However, due to the Earth’s rotation, star trails can form as the long exposure time increases. If we don’t specifically take a star trail photo, these traces are something we avoid. Star trackers can help to extend the exposure time by following the stars in accordance with the earth’s rotation, but it is quite expensive. Therefore, it’s better to have a look at the other possibilities that may be useful to increase the light.
DIAPHRAGM
A diaphragm is a camera component within a lens comprised of overlapping metal blades (the iris) that open and close to change the size of the opening (they allow different levels of light to pass through to the sensor – thus controlling the aperture (or f-number) and depth of field of an image – and the aperture hole of the lens. Therefore, its working principle can be compared to our pupils. When our pupils are exposed to more light, they shrink and pass less light to the eyeball. In low-light environments, the pupils dilate and try to gather more light. In astrophotography, we try to gather more light by expanding the aperture.
ISO SPEED
ISO Speed refers to your camera sensor’s sensitivity to light. The higher the ISO speed, the more light-sensitive it is. What this means is that you can use a quicker shutter speed, which is useful in sports photography and low light, or a smaller aperture, for where you want a wide depth of field. However, as you progressively increase ISO speed, you also increase the incidence of ‘noise’ in the image, which in turn reduces the overall image quality. In choosing your ISO speed, you, therefore, need to set it at a level that will ensure you get the shot – high enough to get enough light, but low enough to retain maximum quality and avoid noise. In astrophotography, it’s not just about taking the photo. We need a process similar to the task performed by a long exposure. Unlike normal photography, we photograph the same area many times and overlay these frames through various software. In this way, we get more light in total. This is also useful for reducing the signal-to-noise ratio.
Astrophotography is not limited to shooting, much of the work takes place in the processing of the photograph. Raw images are processed in applications such as Photoshop, Pixlnsight or Lightroom. The processing of astrophotography images requires knowledge and experience. There can be significant differences between the images obtained by two people with exactly the same data. This is the essence of the introduction to amateur astrophotography. However, astrophotography is a much deeper field and you are advised to check this page for much more detailed and exemplary information: https://astrobackyard.com/beginner-astrophotography/
[ad_2]