[ad_1]
March 20, 2022

Spring is here! Five top landscape and nature photographers share their essential tips for getting the best Spring photos
Finally, the March Equinox has arrived and Spring is here! The countryside looks its prettiest, the trees are beginning to blossom, and all in all you couldn’t ask for better conditions for some great landscape photography. Of course, seasons come and go before you know it, and that’s why it’s important to make the most of them. With that in mind, we asked five top landscape and nature photographers to share their top Spring photo tips to get the best results.
33 Spring photo tips
Mark Bauer

Mark Bauer has been a full-time landscape photographer for more than ten years. He is based in Dorset and takes his inspiration from the beauty of the surrounding landscapes. He is the author of four books and has won numerous awards. www.markbauerphotography.com
1. Use flowers for foreground interest
Most wideangle landscapes benefit from having some foreground interest, and with flowers coming into bloom at this time of year there’s plenty of choice. Get in close and fill the bottom of the frame with flowers.

Mark Bauer
It’s important to keep everything sharp from foreground to background, so choose a small aperture such as f/11 or f/16 and focus about a third of the way into the scene. For greater accuracy, set the hyperfocal distance for the focal length/aperture combination you’re using. To help calculate this, make a chart to keep in your camera bag or use a smartphone app.
Six tips for photographing spring flowers
2. Spring showers are great for landscape photography
It may be tempting to stay indoors on rainy days, but you’ll be missing out on some amazing landscape photography opportunities. When showers clear, the light is often dramatic: dark stormy clouds above, spotlighting on the landscape below, and incredible clarity, as all the particles have been washed out of the atmosphere. If a rainbow appears, use a polariser to enhance the colours.
For the best shots, you’ll need to be in position, ready for when the rain stops and the sun bursts through the clouds. You’ll be standing around getting wet for a while, but the results are worth it.
3. Check the forecast for misty mornings
Mist simplifies the landscape, hiding unwanted detail and clutter, and gives the scene a romantic atmosphere. The most photogenic type of mist is ‘radiation fog’, which lies low on the ground, often in valleys, and looks great when shot from above, with the tops of hills, trees and other features above it.

Mark Bauer
Spring is a great time for finding these conditions. Head out early after a clear, still night when the temperature has dropped a little. A gentle south-westerly breeze first thing can encourage the development of mist.
4. Use a polariser
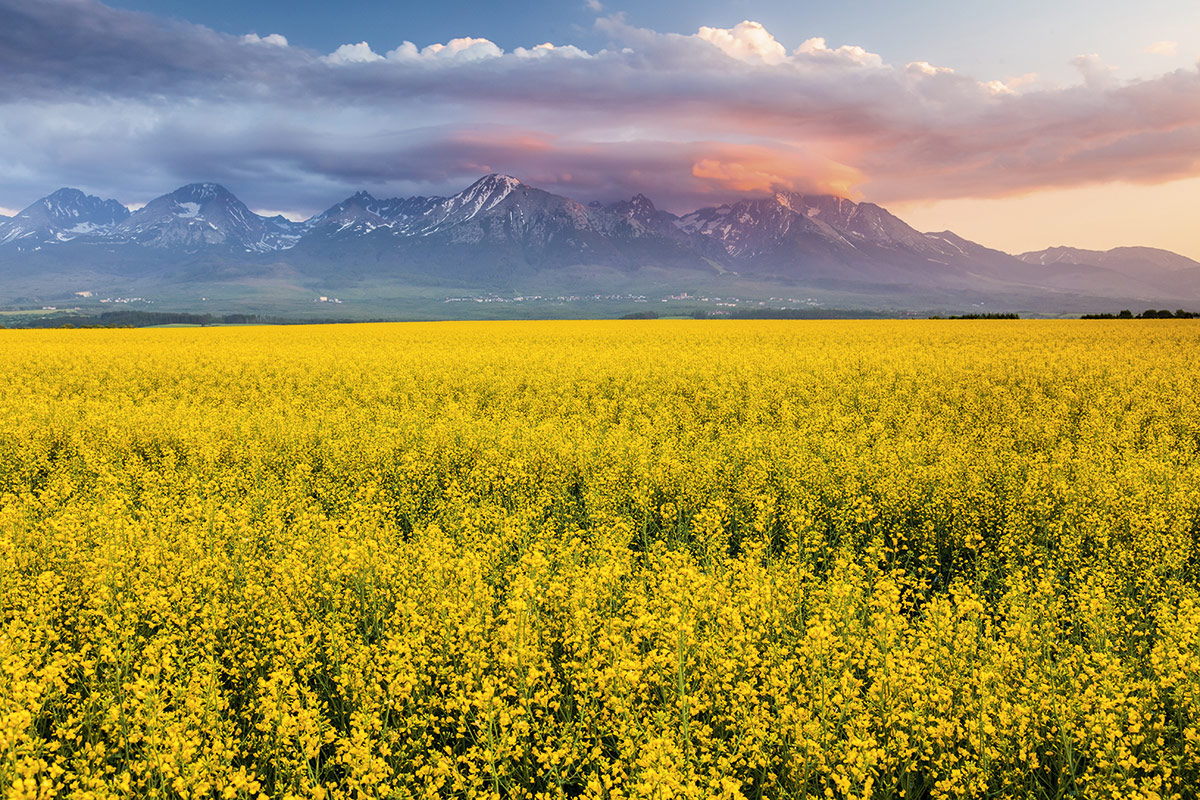
We associate spring with colour: fresh greens, bright wildflowers, fields of yellow oilseed rape and so on. Sometimes these colours look a little washed out in a photograph, as they can be dulled by haze in the air or glare on the surface of the flowers. A polarising filter cuts out polarised light, reducing surface reflections and glare. It therefore has the effect of cutting through haze and restoring natural colour saturation. Using a polariser is easy: just rotate the filter while looking through the viewfinder until you see the effect you want.
5. Shoot bluebell woods with backlighting
When we think of spring, we often think of bluebells. They look their best in mature woodland, so try to find a thick carpet on the forest floor without too much clutter. If you shoot them backlit at the beginning or end of the day, shadows from the tree trunks will race towards the camera, creating a sense of drama, and the flowers and foliage will be given a saturation boost.
Partially screening the sun behind trunks helps to reduce problems with contrast and flare, and if you choose a small aperture, such as f/16 or f/22, diffraction can create a ‘starburst effect’.

Mark Bauer
6. Shoot woodland on overcast days
Overcast skies are not the landscape photographer’s favourite conditions, but they are very good for shooting in woodland. The level of contrast is low and manageable, and as a result the colours of the foliage and plants are enriched, which can be enhanced by the use of a polariser. By contrast, although dappled lighting looks attractive to the eye, the contrast often exceeds the dynamic range of the camera’s sensor, which means it doesn’t photograph well.
7. Use longer lenses to compress carpets of flowers
When you see a large carpet of flowers, the natural tendency is to get in close with a wideangle lens. However, this approach doesn’t always do the scene justice as it can exaggerate the gaps between the flowers. Instead, try shooting from further back with a longer lens, which will have the effect of compressing the gaps and making the flowers look densely packed.
Colin Roberts

A specialist in landscapes and nature, Colin Roberts turned professional in 2005. He has received a number of awards for his nature images, including International Garden Photographer of the Year and the Royal Horticultural Society’s Photographer of the Year. To see more of his images visit his website at www.colinrobertsphotography.com
8. Capture the transforming landscape
Spring is a season of transition and a great time to explore the countryside as trees come into leaf, fields turn green and hedgerows thicken. Many landscapes look their best at this time of year when foliage is fresh and pristine, and the harsh woody outlines of trees become softened by lush spring growth.

Colin Roberts
Make the most of footpaths and byways to access the more unusual viewpoints, and look beyond embankments and tall hedges to find views that would otherwise be missed. The real atmosphere of spring is often seen at dawn, when a touch of brilliant light shows the landscape awakening – in more ways than one.
9. Visit beechwoods
Beech is one of our most photogenic native trees, and its appearance in spring is no exception. Its newly unfolded leaves create a translucent canopy of vivid green, making deciduous woods look stunning at this time of year. The leaves emerge from April onwards, so be sure to take advantage of the spectacle while it lasts. Within a few weeks the leaves mature and the pale colour darkens and loses its brilliance.
Shoot in soft, overcast light for best results and choose calm conditions, because even the slightest breath of wind can cause foliage to blur. In terms of composition, one option is to use a wide lens and shoot directly upwards for a dramatic view of the tree trunks converging skywards.
Alternatively, try moving in close to frame a small cluster of leaves, softly backlit to show their fine detail.
10. Capture colour on the clifftops
Spring flowers aren’t restricted to woodlands and hedgerows – the coast sees some fine displays too. Among others, pink sea thrift and white scurvy grass are found along many parts of the British coastline. Growing in tight clusters, usually along clifftops and headlands, they make excellent foreground subjects that add colour and interest to wider shots of the coast.

Colin Roberts
Sea pinks look particularly impressive when caught in the golden rays of a rising or setting sun. They can also be seen sprouting from rocky crevices, where they make an eye-catching focal point and a strong natural contrast with the stony environment. Both species look pristine when they emerge in April and May, with the best of their colour over by summer.
11. Search for tree seedlings
Among the flurry of spring growth, keep a watch for tree seedlings emerging from the forest floor. They are always something to marvel at, especially when seen growing beneath the towering structure of a mature tree. As a foreground subject they put the woody landscape into context, or make a fascinating study in their own right. But look carefully because their first leaves are often very different from those of the parent trees – for example, beech seedlings emerge with a semi-circular leaf, while those of sycamore produce tapered leaves.
12. Visit parks and gardens
Whether formal or semi-wild, parklands and gardens are a notable and accessible source for spring subjects. For blossoms, early flowers or trees coming into leaf, there are few other locations that offer so much variety in one setting. Good structural features like trees, fountains or topiary add scope for composition, while good lines of sight are often crucial for showing depth – so look for pathways, avenues, stone steps or boardwalks.
The versatility of zoom lenses makes them an ideal option for smaller gardens where space is confined and plant beds often restrict your movement. Hone in on seasonal details like fern fronds unfurling, or the colourful reflections of waterside blossoms.
13. Plan ahead
Forward planning will ensure you’re prepared this eventful and inspiring season.
To me, spring means the British landscape at its best – I never go abroad in April or May for fear of missing it. So start by making a hit-list of locations for spring landscapes, wildflowers and trees based on your local knowledge and a bit of online research. It’s worth remembering that all prolific spring flowers are perennial, meaning they live for many years, so you can rely on them being in the same place year in, year out.
Also bear in mind crop rotations. If you have a location in mind for oilseed rape, for example, you’re unlikely to see it in the same field more than once in three years – sometimes longer. And don’t forget the change to British Summer Time (29 March this year), which briefly makes those early starts a bit easier as sunrise will be an hour earlier.
Niall Benvie

Niall Benvie has worked in environmental communications for 22 years as a photographer, writer, designer and guide. He is co-founder of the international Meet Your Neighbours initiative and lives in Angus with his family. www.niallbenvie.com
14. The lowdown
There are many good reasons for shooting wildlife from a low angle. Aesthetic: when you portray the animal from its own perspective rather than a human one, a quality of intimacy is introduced. Technical: long telephotos are supported on a tripod at only one point. There’s a lot of overhang fore and aft, and once the shutter speed drops below 1/60sec camera shake creeps in, no matter how hefty the tripod.

Niall Benvie
Putting the camera and lens on a beanbag on the ground offers the best stability. As an extra benefit, the background just behind your subject that would be rendered quite sharp from a high viewpoint is hidden and only the distant, very blurry background can be seen.
An angle finder makes viewing more comfortable if your camera doesn’t have an articulated rear screen.
15. What to shoot when it’s wet and windy
Spring is noted for its showers, often accompanied by strong winds. If it is wet and windy, fit a macro lens (or close-focusing zoom) and look at mosses and lichens. Regardless of the weather, you can make intriguing close-ups of these colourful subjects that are actually enhanced by a spring shower. And even in a gale, they won’t move around.
Since you are often working at quite a high magnification, find where your camera’s mirror lock-up function is and use it, along with an electronic release.
It really makes a big difference to sharpness, especially with longer lenses. Normally you’ll want to render as much detail as possible, so identify the principal plane through the subject and shoot parallel to that to make the most of the limited depth of field.

Niall Benvie
16. Colourful backgrounds
Viewers may do a double-take when their expectations of what is ‘normal’ in a photograph are challenged. We expect to see the subject in the light, the background in shade, the subject colourful and the background muted. If you reverse these relationships you’re sure to catch the viewer’s eye.
Among nature photographers, this style came out of Scandinavia in the late 1980s and typically features plants in shade photographed against a hillside, or a lake reflecting early morning or late evening light.
The success of these pictures relies on preventing the subject from becoming a silhouette (so the sunlight on the background must be weak), to set up tension between the ‘cool’ subject and the ‘warm’ background. And because you need to isolate only a small part of the background, your longest telephoto, perhaps with an extension tube, is your best ally.

Niall Benvie
17. Elevated sites
What raised beds are to gardeners, elevated sites are to nature photographers. They make the process of getting the low-angle perspective more comfortable and therefore more productive. Many birds stubbornly refuse to leave the ground to feed on a bird table, so you’ve got to make your own bit of ground (perhaps by cutting some turfs), putting the food on it and raising them to your shooting level.
If you’re building a pond to photograph drinking birds, it’s essential that you can shoot at water level from an adjacent hide, so make sure the pool is high enough off the ground. Subjects on elevated spots also make it easier to shoot towards the zenith where the sky’s blue is richest. And if you’re photographing wildlife from your vehicle, a roadside bank puts it at eye-level.
5 tips on photographing spring birds
Jeremy Walker

Jeremy Walker is an award-winning photographer specialising in high-quality landscape and location photography around the world, for use by advertising, design and corporate clients. www.jeremywalker.co.uk
18. Use colour
It’s spring, so there should be plenty of colour around, but avoid the trap of just shooting an individual plant or flower. Look for blocks of colour that either work with each other or use colour that clashes and has impact. Good locations for this type of image will be the commercial bulb growers in Norfolk, Lincolnshire and Cornwall. Or, of course, the famous bulb fields in the Netherlands.

Jeremy Walker
19. Shooting with a reflector
Bright sunlight can often be too contrasty, especially with small, fragile and delicate plants. A reflector can bounce soft light back into the subject from the opposite side to where the sun is shining, to lift the shadow detail and reduce the contrast. However, you should do this with a soft white type of reflector and not a silver one, which would be too hard.
Alternatively, if you have a white/semi translucent type of reflector, you could hold it above the subject and effectively cast a soft shadow over the whole subject to reduce contrast, using the reflector like a softbox in a studio.
20. Using a windbreak
Remember the windbreak you have in the garage that you use for two weeks in the summer every year? Why not use it to protect the plants you are shooting from the wind? The slightest breeze can disturb a plant, and if you are using a macro lens, for which depth of field can be very limited, the slightest wobble will cause you to lose your shot.
Of course, it doesn’t have to be a beach windbreak, as anything large enough to protect your subject will work. Just make sure it doesn’t get into the shot.
21. Slow shutter speeds for blur and motion
It is very tempting when shooting plants and close-ups to forget creativity in the pursuit of the ‘record shot’. In trying to squeeze out every last detail we put aside our artistic vision in the pursuit of sharpness and detail, so go the opposite way and use a slow shutter speed to achieve some blur and motion.

Jeremy Walker
If it is a breezy day, don’t dismiss the idea of getting some shots – think instead about flowers with long stems, such as daffodils, that will sway in the breeze and create interesting shapes and colour. Experiment with shutter speeds of around 1/4sec or slower. A tripod will be essential, though.
22. Patterns, shapes and textures
Shooting images in spring is not just about close-ups of flowers and recording colourful landscapes. Look for abstract images, detail shots and scenes with bags of texture. Look beyond the normal and check out the patterns in fresh leaves and petals, shoot shapes and textures and see how the light interacts with the structure of the plants. A macro or close-up lens is an essential tool for this type of work.
23. Use a Lensbaby for a soft, ethereal look
An interesting and alternative way of looking at the world is by bolting a Lensbaby onto your camera. With different accessories you can create a range of effects, from controlling the depth of focus to softening the image and having the colours go very pale and pastel-like. There are a range of Lensbaby accessories, so a little experimentation may be necessary.

Jeremy Walker
24. Get a waterproof picnic blanket
Available from any good hardware store, a waterproof blanket will keep you from getting muddy and wet when working down low. I’ve lost count the number of times I have come away from shooting with dirty knees or have had to put my bag down on wet grass or mud, so a blanket (or a large refuse sack) is a much better alternative.
25. Look for quirky angles
Try to avoid shooting everything at eye-level, looking down on your subject. Instead, look for quirky and odd alternatives. Directly overhead is a good starting point, or try a worm’s-eye view. For every angle you shoot from, think of the opposite point of view.
If your camera has a tilting, rotating LCD screen, it is easy to place your camera on the ground and point the screen up so that you are still able to see the image. Autofocus and a cable or remote release are essential for this approach.
Mark Littlejohn

Mark Littlejohn is an award-winning landscape photographer based in the Lake District. Winner of the Take a view UK Landscape Photographer of the Year 2014, he specialises in atmospheric early morning conditions. www.markljphotography.co.uk
26. Capture mist
In spring, mist is very common near water due to cold and warm air colliding. Shooting in misty conditions can be wonderfully atmospheric, but the key is to find the edge of the mist. Early low light coming through mist can give you a wonderful soft diffused light and also provide a bit of contrast. Work quickly as the best light will only last a short time. If you can keep your shutter speed up, then keep moving and shoot handheld. If shooting near water, wellies are a must, and neoprene versions will warm your feet in cold conditions.

Mark Littlejohn
27. Use a wider aperture
If shooting in mist, don’t be afraid to use a larger aperture than normal. The mist will soften the outlines of anything further back in the scene and the use of a larger aperture will accentuate this and heighten the feeling of depth in your image. It will also heighten the sharpness in your foreground. The background will be soft, both from the mist and the larger aperture, but the viewer will not know if this is from processing, mist or whatever. Making the imagination work is key to an atmospheric image.
28. Lambing
Watching new-born lambs gambolling around a field can be very enjoyable. Clearly, the last thing you want to do is scare them away, so take a longer lens, kneel down and keep still. They will either forget you are there or will come across for a closer look. If you normally take your dog with you, it’s best to leave it behind on this shoot. If the ewes see the dog they will shepherd their youngsters away, even if your dog is well trained and on a lead.
Tips for Photographing spring lambs
29. Get there early
When shooting a spring dawn, make sure you get to your chosen location an hour before sunrise is due. On some mornings with little cloud, you can be treated to the most amazing graduations in colour up to 45 minutes before dawn. You also need to plan your composition to ensure you make the best use of the early light and colour. If there are any steep drops or climbs near your chosen location, make sure to visit beforehand and get the lie of the land. Do not visit for the first time in darkness. A good-quality head torch is vital in these conditions.
30. Avoid harsh light
Each year, make a note of where bluebells, daffodils and wildflowers grow. In that way, you can plan out which areas are best to visit at the beginning and end of each day, when the composition will match with the right light. Use an app such as the Photographer’s Ephemeris to work this out.
If you are shooting wildflowers, you don’t want to photograph them in harsh light in the middle of the day, as it’s hard to control the highlights and the saturation.

Mark Littlejohn
31. Layered clothing
Lightweight, layered clothing with a waterproof outer layer will be sufficient for most spring days, and if you are wearing layers it is easier to remove one to cool down, as opposed to wearing thick jerseys or down jackets.
32. Try something different
Fresh snowdrops, daffodils and bluebells covered in dew and glistening in the early light can make fabulous subjects for macro shots, but don’t be afraid to get up close and personal with a wideangle lens as well. Most wideangle optics can focus quite closely and have an extensive depth of field, and it can be fun trying something different. I have a 24mm f/1.4 lens and shooting flowers close-up at a large aperture can be great fun.

Mark Littlejohn
33. Keep an open mind
Early light in springtime with all the new growth can be a magical experience. Don’t just think about the one ‘big’ shot. Keep an open mind and look all around you. It might be that it’s the first light hitting a stand of silver birch behind you that’s the shot of the day. By keeping an open mind about what you want to shoot, it opens your mind to the beauty all around you.

Mark Littlejohn
Further reading:
Get better nature shots this spring
Top tips for shooting insects this spring
Top tip for shooting wildlife this spring


[ad_2]