[ad_1]
UP NEXT
A viral TikTok video showing the moment a solo traveler asked a man to take a picture of her in front of an erupting volcano has gained attention for all the wrong reasons.
Katie, 25, from London, shared the photos a well-meaning photographer gave her while she was on vacation, which didn’t turn out exactly the way she was expecting. The TikTok about the mishap has over 2.4 million views so far.
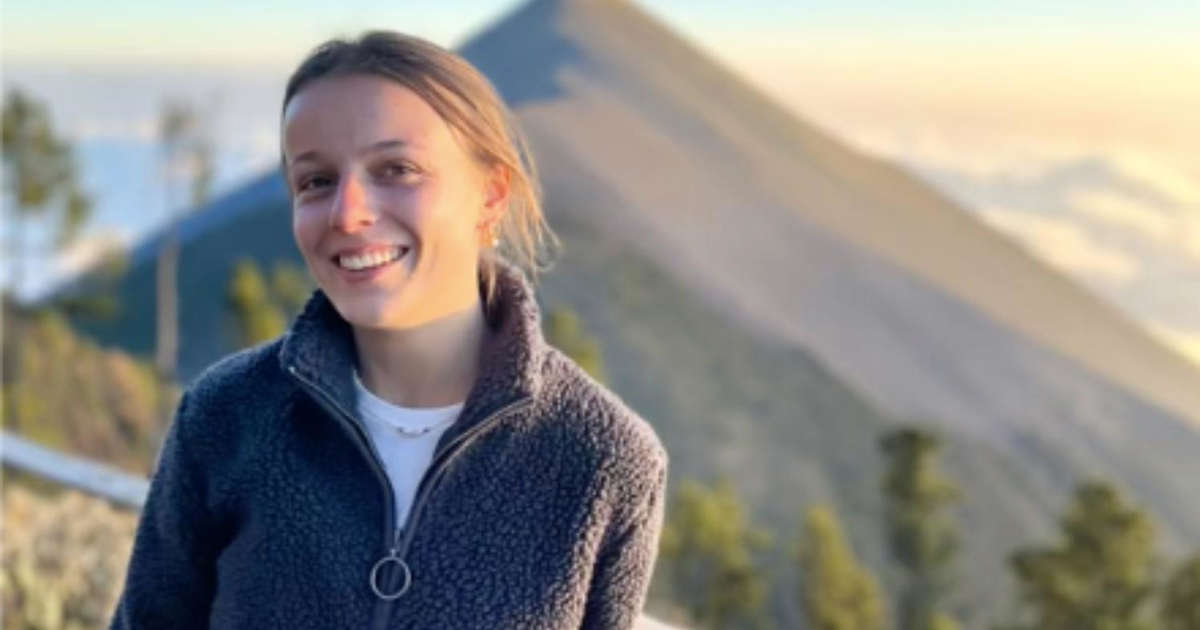
Katie headed to Guatemala at the beginning of March during a weeks-long vacation, where she made the trip to see the Fuego Volcano, located near the Acatenango Volcano. The Acatenango stands at 13,041 feet tall and is just 1.5 miles from the Fuego Volcano, which has been erupting since 2002.
“There was a group of 20 of us spending the night together at base camp,” Katie told Newsweek. “We hiked Acatenango Volcano as a group trip organized by our hostel.”
At the top, she asked a man on her trip to take a picture of her in front of the incredible erupting scene. The video overlay text read: “POV: You go solo travelling and ask a man to take a photo of you and a literal erupting volcano.”
But when she shows the picture, it was taken in portrait mode—completely blocking out the erupting volcano in the background.
“The photo inspired my video along with videos from other creators along the lines of ‘taking my untrained boyfriend on holiday’ where they show all the bad photos taken,” Katie explained. “This is how I knew others would relate, it was intended to be lighthearted, funny and relatable.”
In hundreds of comments TikTok users shared their tips for getting a picture taken: “Always ask for a video,” suggested one commenter. “Stand and smile and screenshot later.”
“You can edit the settings to reduce the blur,” suggested another.
© @backpackingbabble/TikTok
Katie asked a man in her group on her solo travels to take a picture of her in front of the erupting volcano—but she didn’t expect the result. @backpackingbabble/TikTok

“My TikTok channel is intended to create relatable content that makes people laugh, along with travel tips, hostel tours and vlogs to inspire new travelers to take the leap and give solo travel a go,” said Katie.
Women are most likely to travel solo, and many enjoy their dream vacations by taking the plunge and heading to far-off locations alone.
Sharing the lighthearted moment she saw the portrait-mode photo, Katie explained that she thought it was hilarious: “I was shocked when I found that he had switched the settings to portrait mode, but found it really funny,” she said. “He said he thought I would look nice, which was sweet.”
Some commenters on the TikTok video said that the traveler was being unfair to the mystery photographer, but she clarified that there was no bad blood about the pictures.
“There were a few negative comments suggesting that I ‘shamed a stranger.’ To clarify, we hiked the volcano together for the entire day and had made friends,” Katie said. “We then spent time together in two more destinations in Guatemala and I had asked about putting it on TikTok at the time. I know plenty of fantastic photographers of all genders.”
Related Articles
Start your unlimited Newsweek trial
[ad_2]