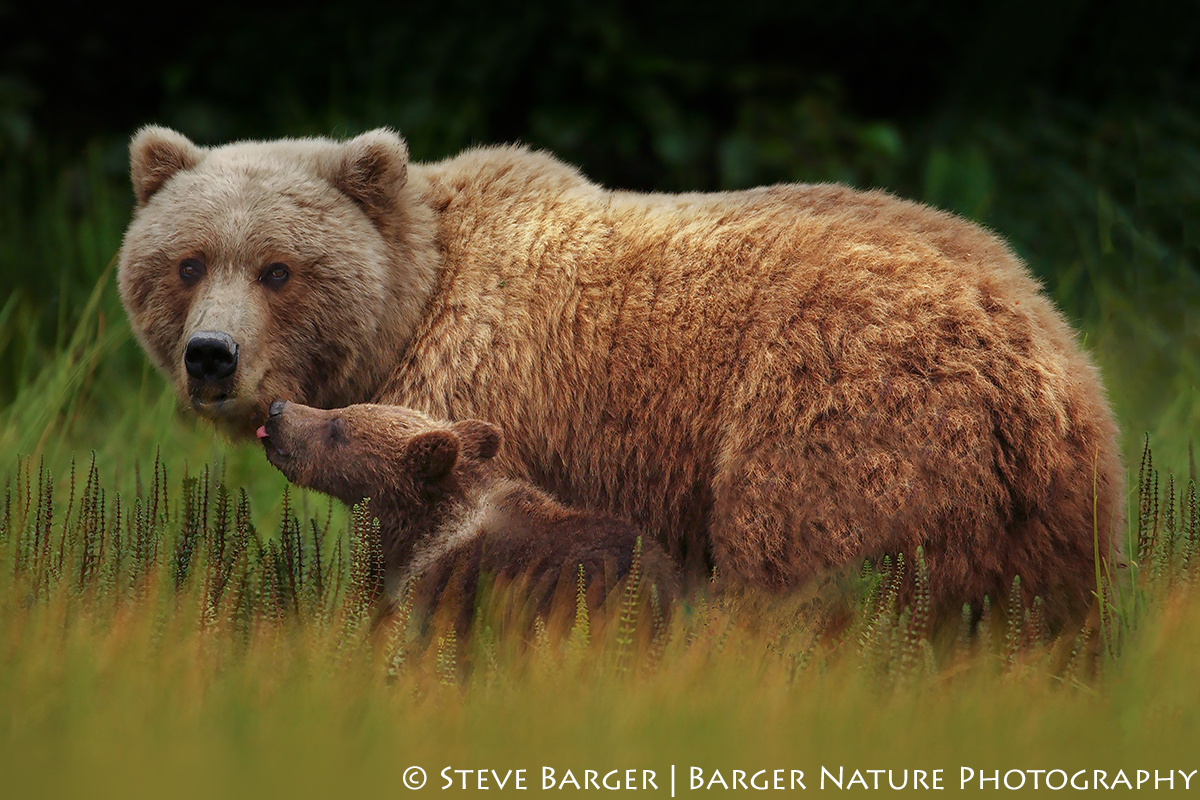
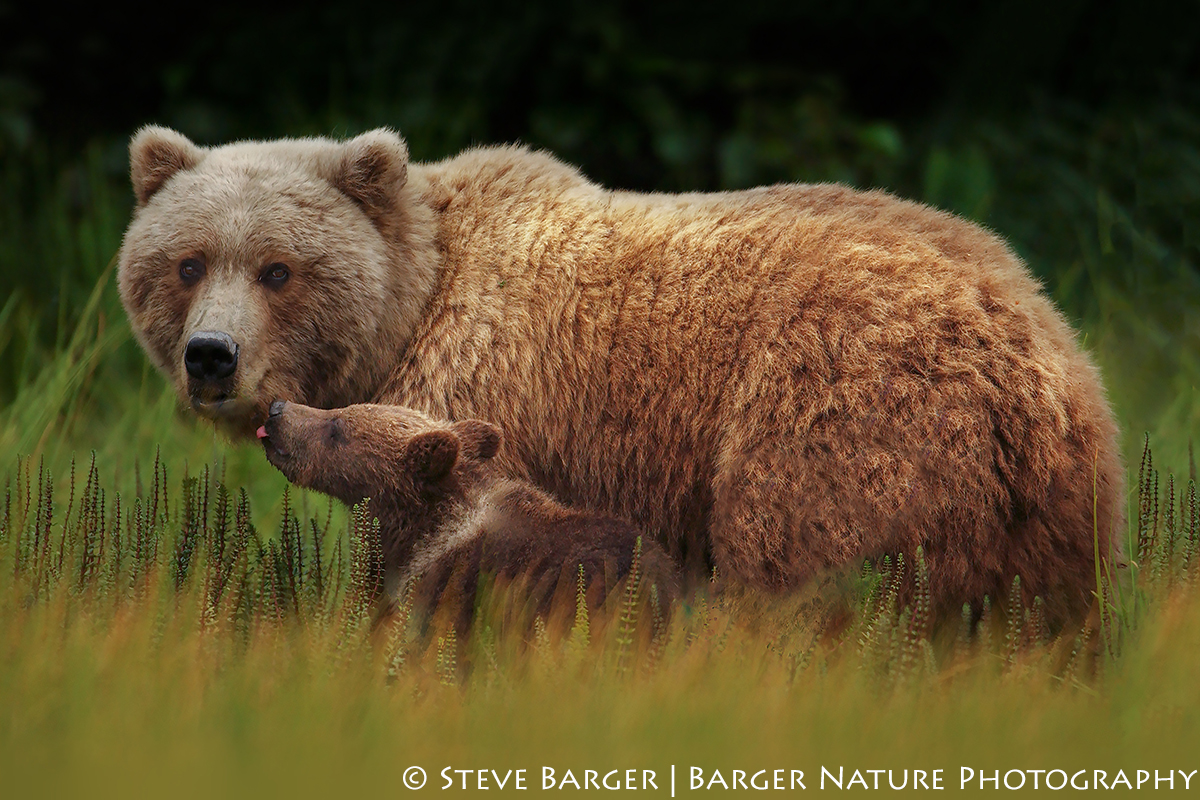
A tender moment between grizzly bear mother and her cub-of-the-year in Lake Clark National Park Alaska. I had spent several days observing this mother and her cub from a distance before they felt comfortable with my presence and moved closer for me to take image. Even at that, I was still 75 yards from them requiring the reach of a 1000mm lens to get the shot.
Spring in Lake Clark National Park is synonymous with coastal brown bear mothers and their cubs. Lake Clark is a remote national park located along the western coast of Alaska’s Cook Inlet, which can only be accessed by either boat or plane. There are no roads connecting Lake Clark with the rest of Alaska. Due to its location, Lake Clark provides an abundant supply of food for wildlife such as the brown or grizzly bear, Ursus arctos horribilis.
Most of us are familiar with grizzly bears that inhabit areas in the interior of North America such as Yellowstone National Park. These bears have a distinctive shoulder hump, long curved claws, and a wide face with a dish-faced profile. Their fur has a grizzled appearance, hence the name grizzly bear. These bears, when they inhabit the coastal areas, such as Lake Clark National Park, are referred to as coastal brown bears, colloquial nomenclature for a brown bear that lives in the coastal regions of southern Alaska. These bears are a population of the mainland brown or grizzly sub-species. They are quite large in size with weights ranging between 700 and 1100 pounds.
The Lake Clark area has an abundant supply of food for these bears. At low tide, some bears hunt for clams along the shore. The tall grassy areas between the shoreline of Cook Inlet and the forest also provide a source of food including small rodents and the grass itself. The bears gorge themselves with salmon in the fall as the salmon swim up the numerous streams to spawn.
The image in this post was taken in the spring. This mother bear had recently left her den in the forest behind her for the grassy area along the shoreline where the food supply is not only plentiful, but it is easier for her to protect her young cub. Cubs learn by watching and repeating the actions of their mother. A good portion of their communication is done by touching. For example, if a cub is hungry and wants to nurse, it will touch its mother’s face with its nose.
I had spent several days watching, at a safe distance, this mother and cub grazing in the grasses. I was careful to give them plenty of space so as not to stress them. They were very relaxed with my presence knowing that I did not pose a threat. On this particular day, both mother and cub were walking on a trail a hundred feet in front of me. The cub had been exploring the grasses and had fallen behind. Suddenly, realizing this he began to run toward her. At this moment, I realized that something special was about to happen. As the cub approached her, I followed the cub’s approach through the camera viewfinder. When the cub was beside her, she turned to look at the cub. At this point, the cub was close enough that they touched faces and the cub gave her a kiss and I took this image.
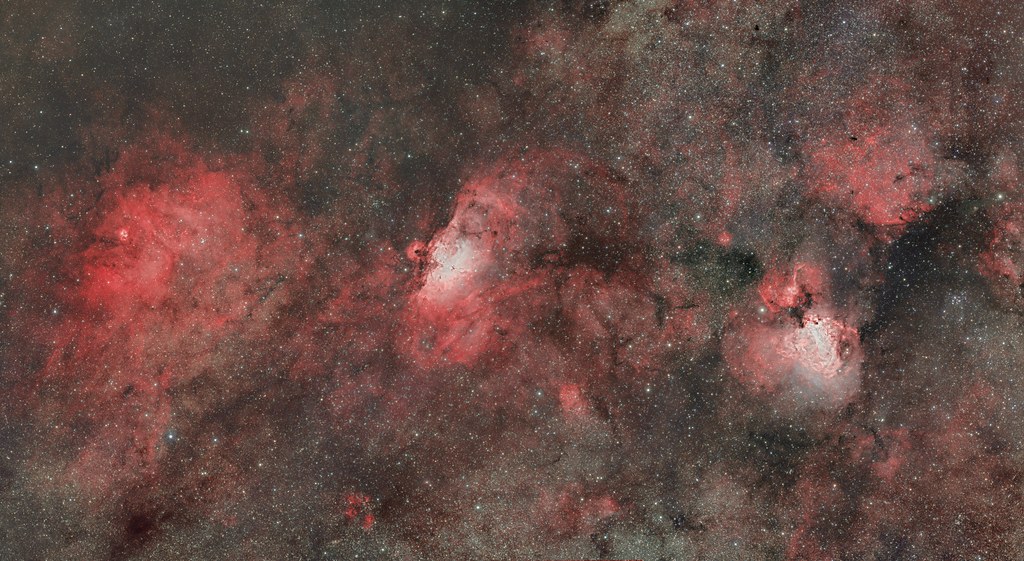
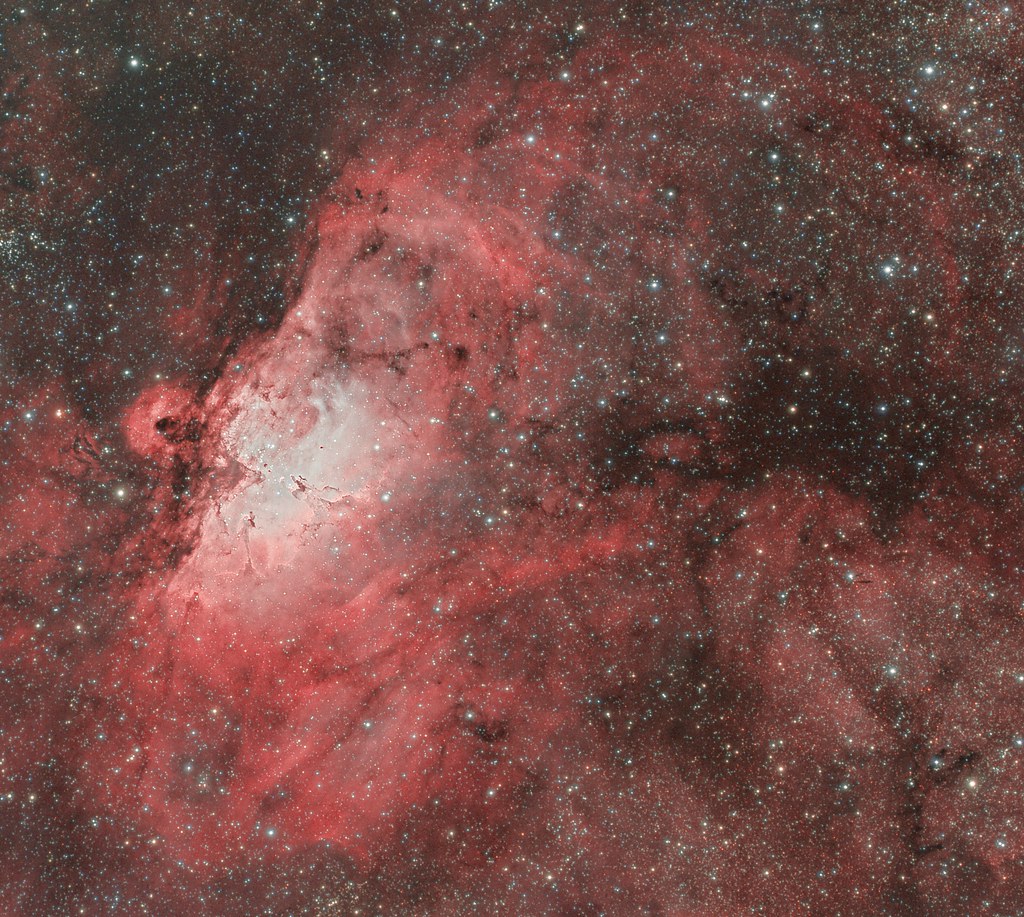
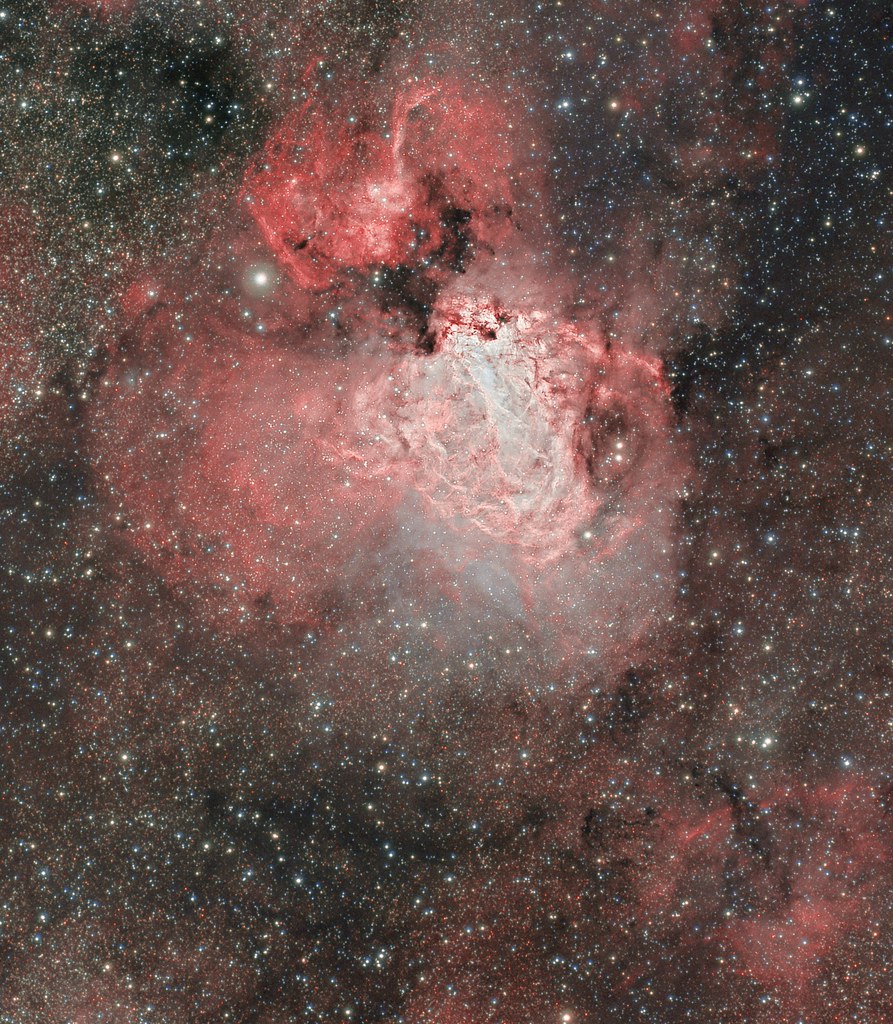
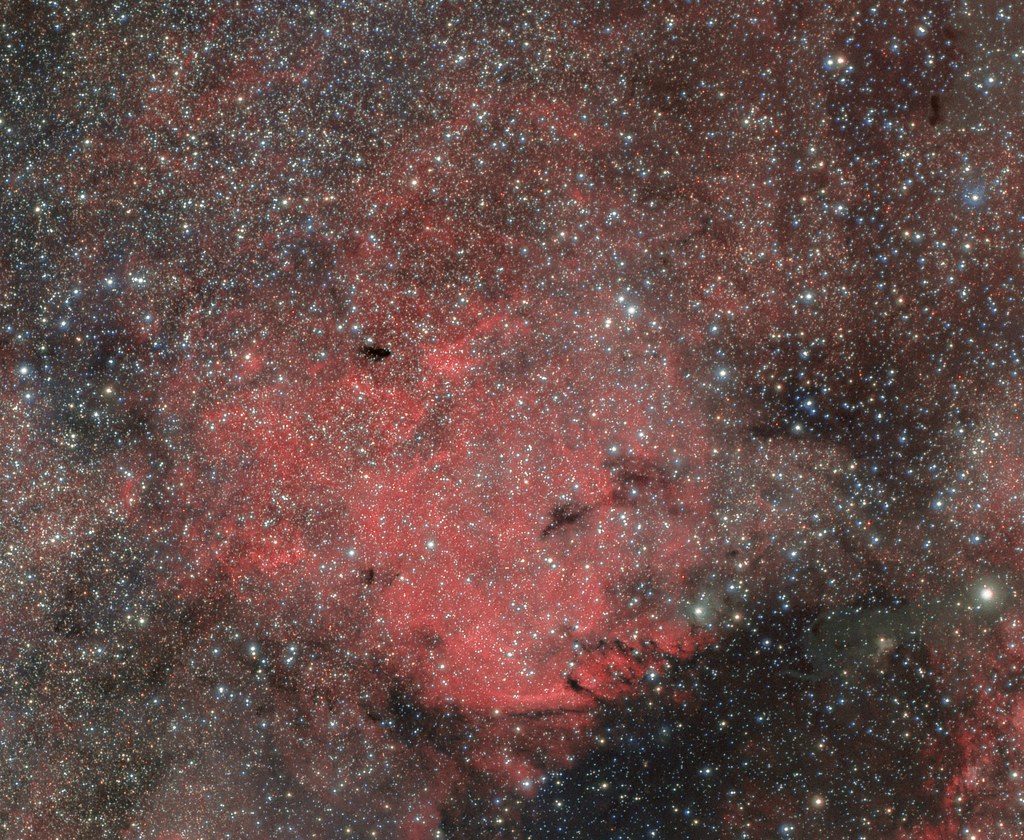
This is a 3 panel wide field mosaic of NGC6604, M16 and M17 in H-alpha, OIII and RGB. Also in the same field of view are M18 and IC4701, along with a view more open star clusters and nebulas. It was my main project on my astrotrip to Namibia this year and I spent the first 5 nights collecting the data for this. The end result is a highly detailed image of 20378 x 11160 pixels which contains a lot of very interesting objects and detailed features.
Click to view the full resolution version of the image
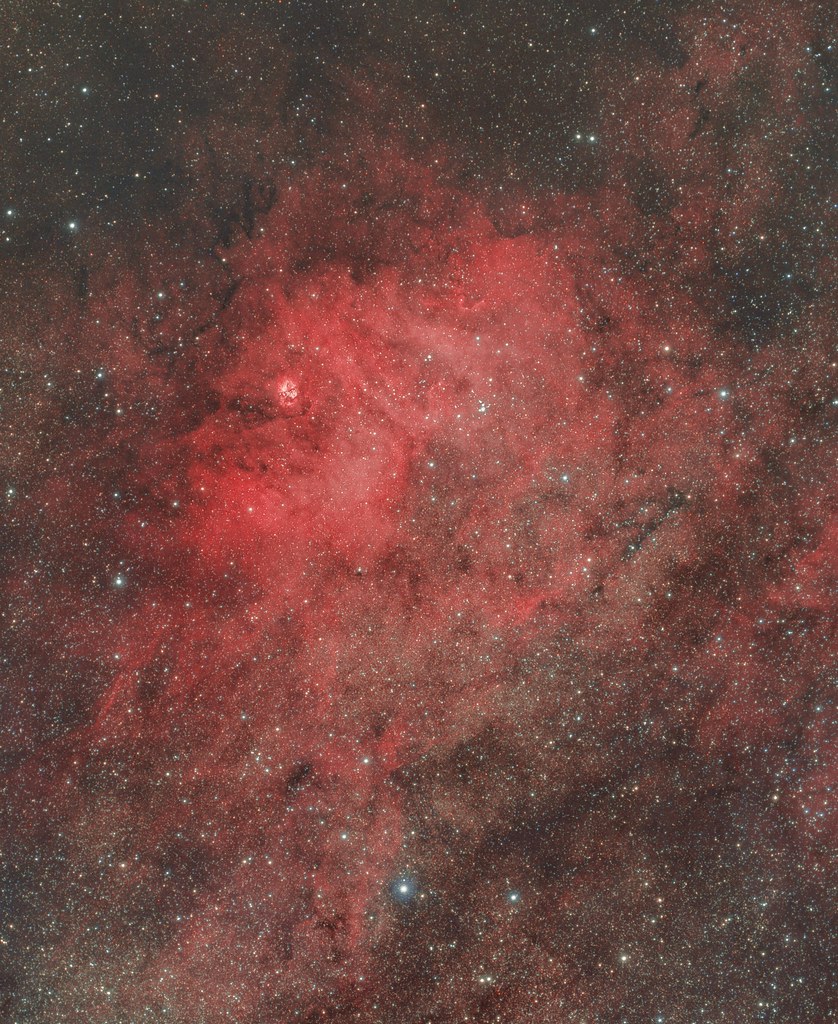
NGC6604 and Sh2-54 NGC 6604 is an open star cluster in the constellation Serpens. The associated nebula is a cloud of glowing hydrogen gas which known as SH2-54.
M16 The Eagle Nebula, also known as the Star Queen Nebula, IC4703 and NGC6611 is a very famous emission nebula surrounding a young open star cluster. It became famous because of the iconic Hubble image of the so called ‘Pillars of Creation’ which is a region of gass where intense star formation is happening.
When you look in more detail into the center of the nebula, at the region around the Pilars of Creation you can discover more interesting features. Just at the base of the Pilars of Creation you can see Herbig-Haro object 216. (the more pinkish feature that is just beneath the 2nd pilar) Within M16 you can also see some beautiful Bok Globules that really seem to be ‘floating’ there.
M17 The Omega Nebula or Swan Nebula is another famous HII region. This one lies in the constellation of Sagittarius at a distance of around 5,000 light-years from earth. M17 is actually considered to be one fo the brightest and most massive star-forming regions of our galaxy. Open star cluster NGC 6618 lies embedded in the nebulosity and is heating up the gases of the nebula.
M17 shows some very interesting features in it’s nebulosity. There seems to be a ‘blow out’ to the left where you can see 3 shockwaves in the gass if you look careful. Furthermore the OIII part is extending quite far to the lower left. Further down in the lower left corner there are a few very thin OIII ‘whisps’ (which remind me of veil nebula). I found out that there seems to be a Supernova Remnant behind M17, so this could be filaments belonging to that structure. It is called G16.05-0.57. The HII region next to that however, seems to also be associated with a SNR, G015.1-01.6 so this could also be from that source. At least it’s quite clear that it is a SNR.
IC4701 Above M17 and M18 you can see another emission nebula which is IC4701. This fov also contains some interesting (not so) dark nebulas.
Throughout the whole field of view you can find more very interesting HII regions and dark clouds
Processing I calibrated the RGB data in Astro Pixel Processor and NB data in PixInsight. Mosaic registration of all the panels for all channels was done using Astro Pixel Processor. I then took these results and processed them in PixInsight. There I used a combination of PixelMath and LRGBCombination on the non-linear Ha and OIII frames to create a ‘natural’ bi-color for which I used a max(Ha, OIII) for the luminance. I then used a max from Ha, OIII and the CIE-L component of the real RGB image as Luminance for the SHO-AIP script. I used the real RGB, Ha, OIII and the resulting Luminance in this script to get a natural HaOIIIRGB image. As a final step I used a Luminance mask to combine the bi-color image with the HaOIIIRGB image. In all this I did of course all kinds of processing to get the frames in the right state to use in the different channel combination methods. One thing worth noting is that you should be very careful (or just avoid) using LinearFit to level images before combination. In this case this resulted in very unnatural cores every time I did so. Also, one can argue it doesn’t make sense in some cases to assume a same level of signal in different channels. Manual HistogramTransformation and other processes give you far greater control over the result in every step.
Acquisition details Image taken with monochrome Nikon D600 on a APM107/700 with Riccardi reducer and modified Nikon D600 on a TS Quadruplet 480/80, mounted on Fornax 51 and guided with MGEN.
Panel I – NGC6604 Ha 29x12min ISO400 OIII 13x12min ISO400 RGB 27x12min ISO400
Panel II – M16 Ha 24x12min ISO400 OIII 16x12min ISO400 RGB 23x12min ISO400
Panel III – M17 Ha 25x12min ISO400 OIII 16x12min ISO400 RGB 35x12min ISO400
Taking photos is one of the best ways to preserve memories. You can capture special moments using a camera and keep them for a long time. In addition, you can use various pieces of equipment to take photos, like your smartphone, a film camera, or a polaroid. So, it’s easy and accessible to take pictures.
If you prefer photos with a classic look, vintage polaroid camera’s are perfect for you. It’s a photography device that prints the image as soon as you print it. If you’re unfamiliar with this type of camera, you may not know how to operate it.
To help you out, this post will discuss how polaroids work and how to take the best photos with them. Keep on reading to learn more.
How A Polaroid Camera Works
A polaroid camera requires a particular film to print images. You must load a negative film pack inside the equipment to take pictures. The film is light-sensitive, so it reacts to the light of the subject you’re capturing.
Once you snap a photo, the camera lens will direct all the light toward the film in one direction. A chemical reaction will then occur on the surface of the silver compounds on the film. Afterward, the camera will eject the picture while the image you took starts to become visible. After the film sets, the negative will turn from gray to a colored picture.
How To Take The Best Photos With Polaroid Cameras
Since polaroid cameras print your picture after you take it, you have limited means to edit or retake an image you don’t like. Below are a number of tips you may follow to take the best photos with polaroids:
1) Know Your Lighting
The output of a polaroid camera is quite different from other photography equipment. For one, it may look grainier than the ones from more advanced tools like a DSLR camera. Also, its settings may be more limited than other tools. This means you have fewer options to manipulate your picture. For instance, you may be unable to change the color of your subjects or adjust the lighting on the photo.
So, if you want to take great images using a polaroid camera, you must pay attention to your lighting. Sometimes, you can use the camera’s flash to illuminate your subject. But your picture may look too dark in low-light locations despite using it. Hence, you should find a light source whenever you want to capture images.
For example, you can pose your subject near a window or a light to ensure they would appear clearly on your polaroid. You should avoid blocking the illumination to avoid casting a shadow on your subject too. Alternatively, you can opt to take pictures during the day to ensure the result won’t look dim.
Overall, understanding how lighting works can significantly improve your polaroid shots. Practicing and learning how to use it to your advantage is helpful.
2) Pay Attention To Subject Composition
Your subject can influence how your photos turn out. If they’re not framed well, you may end up with underwhelming results. Henceforth, if you wish to take the best photos, you can learn how to compose your subject and environment.
For instance, if you’re taking a person’s portrait, you can make their background more dynamic by moving objects around. You may ask them to move around to find the best angle. And you can try changing your poses if you’re taking a self-portrait or for any other purpose.
On the flip side, you can adjust the placement of different objects when taking still pictures to produce dynamic results. Before taking the shot, you must check whether everything is inside the camera frame. If you hastily capture an image without checking the viewfinder, the picture may look like it was cut out or incomplete.
You can take pictures from a farther angle if you’re trying to capture multiple subjects. Doing so will increase your depth of field and allow you to experiment with your photo composition.
3) Choose The Right Film
The quality of your polaroid film can also influence how your photos will turn out. Case in point, an expired one may add light leaks to your pictures. The colors on expired film may not appear as bright as new rolls.
Thus, if you want to take impressive analog images, you should use a good film. Nowadays, you can purchase various ones that produce different results. For instance, if you want to take pictures that have a vintage feel, you can use a black-and-white film roll. On the other hand, if you want images showing bright colors, you can opt for newer polaroid films.
You must store your film correctly, as external factors like heat can affect how your outputs turn out. For example, sun exposure may wash out the colors or make your pictures look more yellow. To avoid this, you can store unused films in a dark and cool place.
Final Thoughts
Polaroid photography adds a nostalgic feel to your pictures. You can keep your photographs for a long time since using a polaroid camera prints your images immediately. If you wish to take dynamic pictures, it’s helpful to learn lighting tricks and compose your subjects well. This way, you can ensure your output will look impressive.
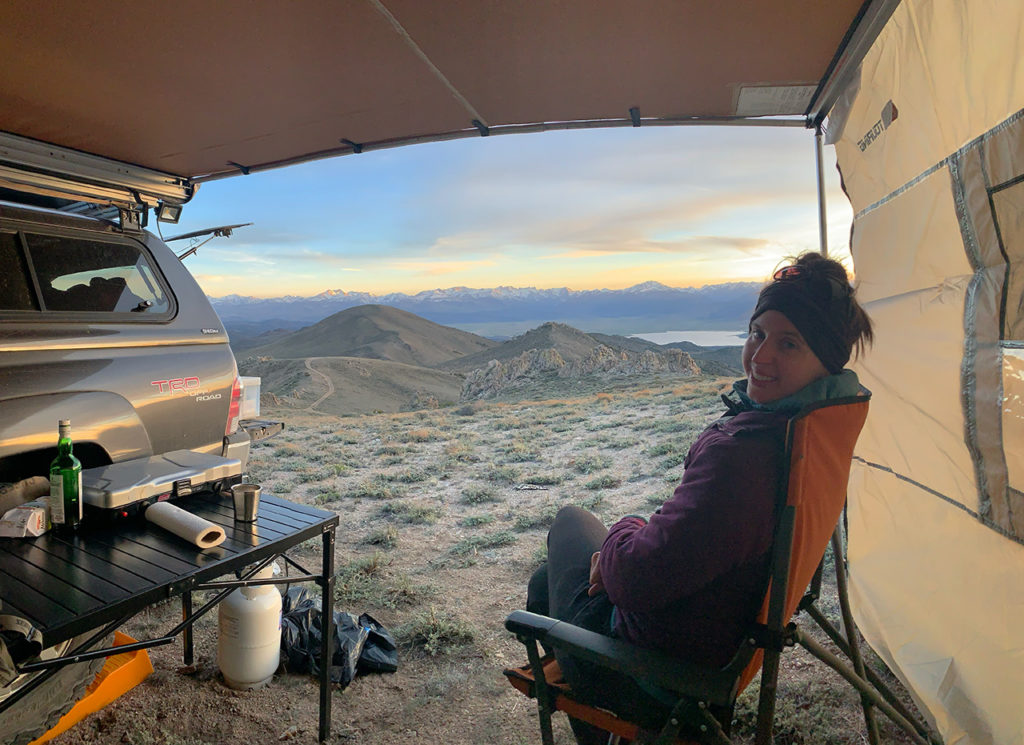
Though it has been a stressful, strange, scary, and confusing time, some things never change: the peace and quiet of the wilderness. Fortunately, social distancing is no problem in the Nevada wilderness, and Aubrey and I have had a chance to get out and explore our new(ish) home state through a few trips over the past 2 months.
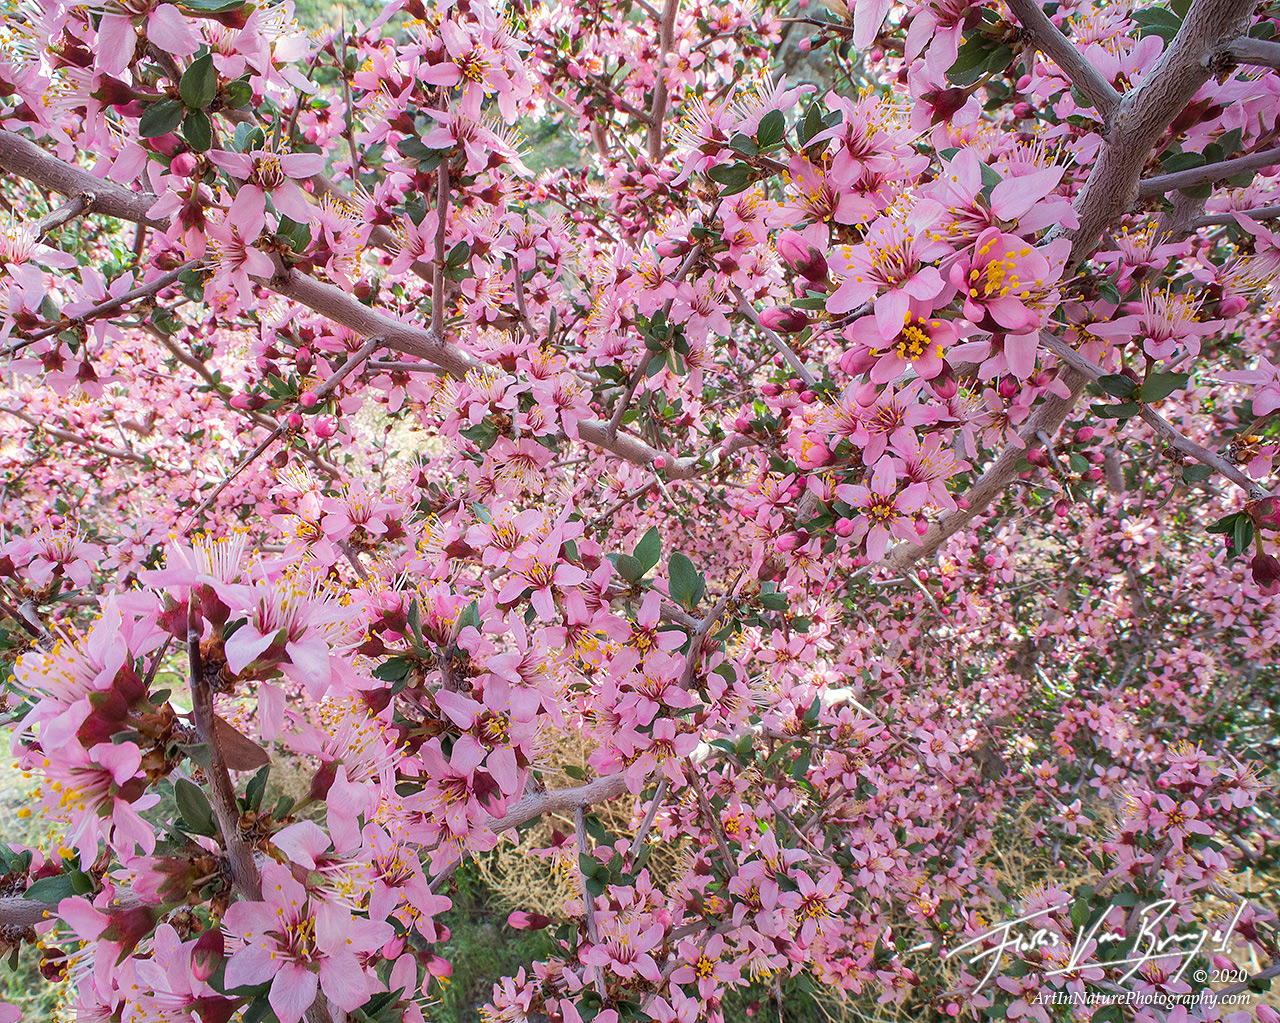
Not far south of us are the Pine Nut Mountains, a large expanse of rugged terrain festooned with lumpy granite boulders and, as you might hope, pinyon pines. Earlier in May we explored a small portion of the area, perfectly timed (by chance) with the peak bloom of the desert peach. These shrubs are covered in lovely flowers ranging from cream colored to bright pink. Apparently, in wet years, the fruits are like miniature fuzzy peaches, and delicious according to the Cahuilla.. I look forward to trying them someday!
Blooming desert peach (Prunus andersonii) along the foothills of the Pine Nut Mountains in Nevada.
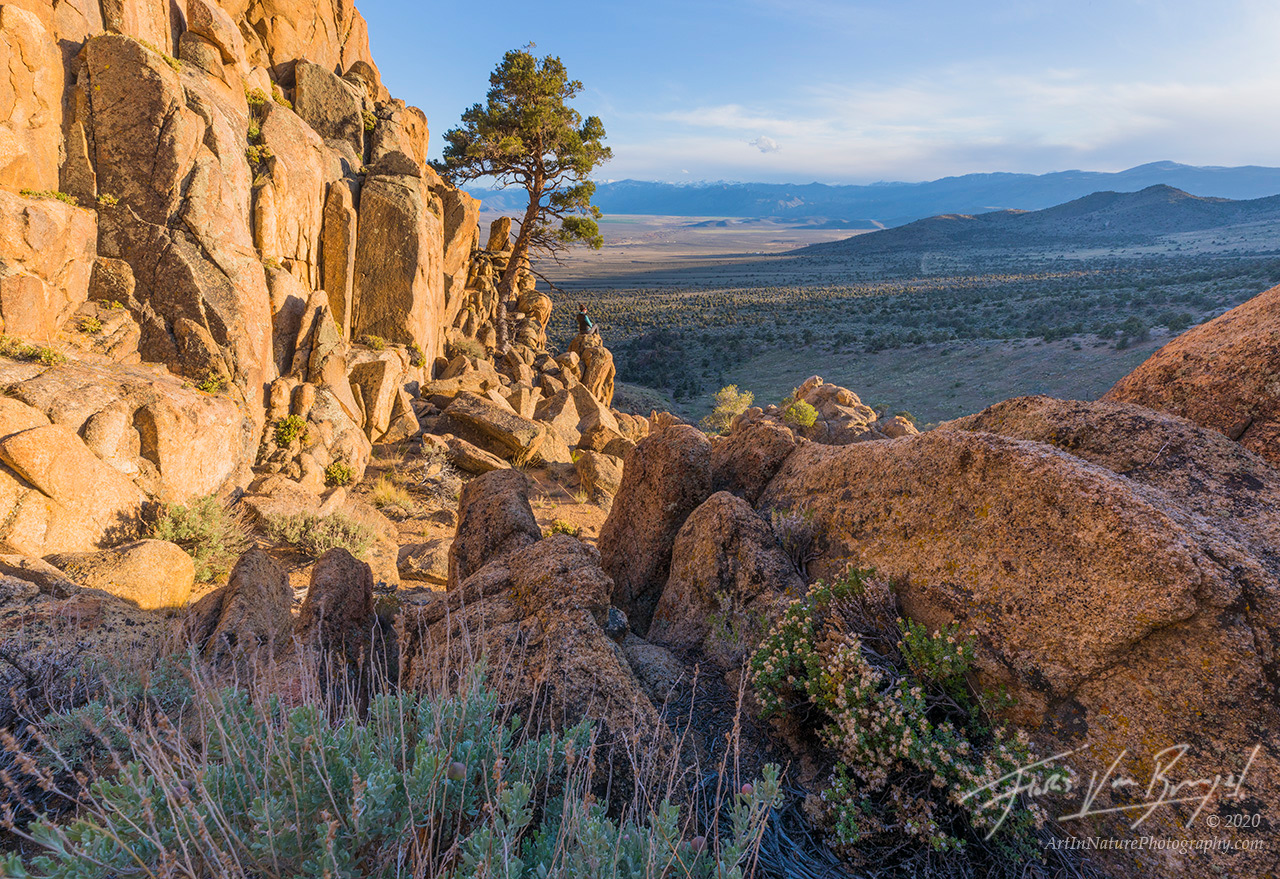
Granite boulders, pinyon pines, sage brush, endless sunshine, and big views characterize Nevada’s Pine Nut Mountains.
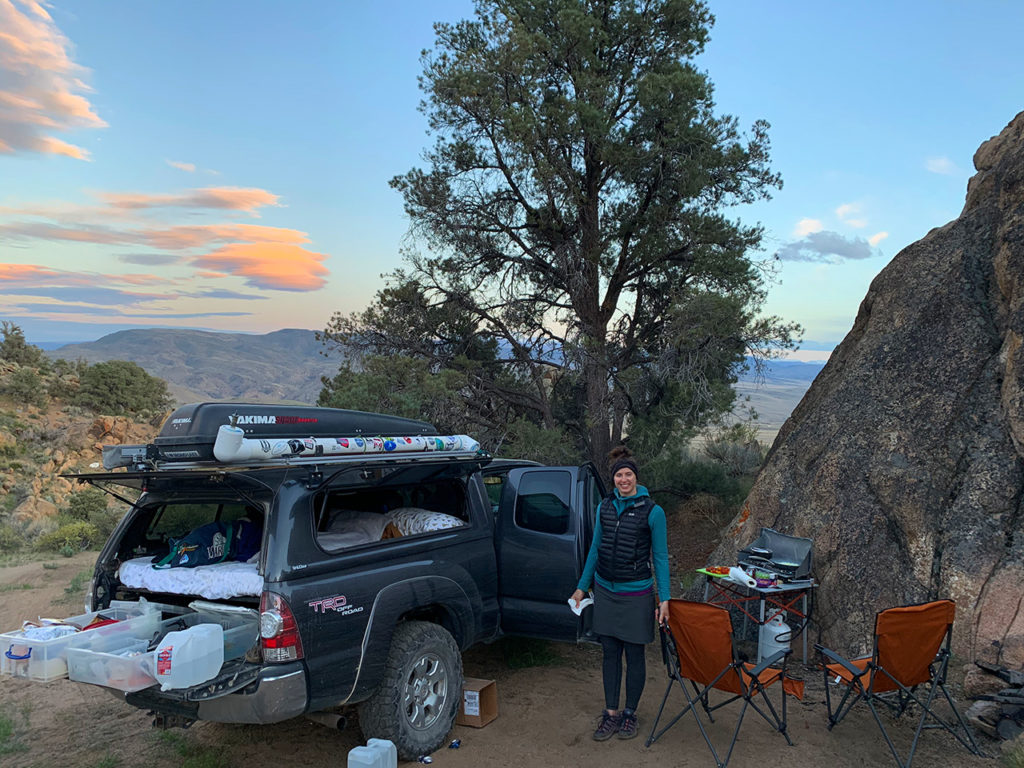
Pine nut camp.
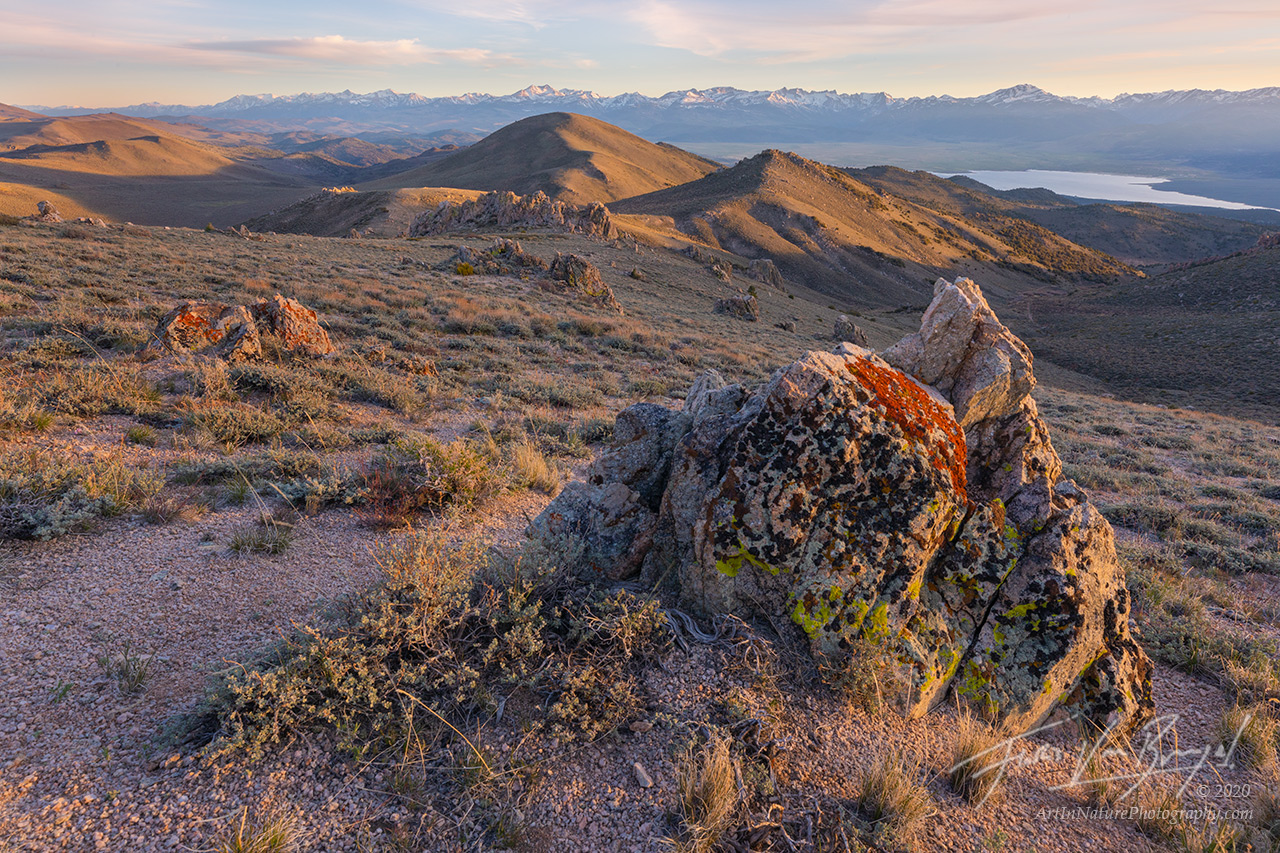
For our next trip, we explored the mountains east of Bridgeport, known primarily for gold mining in the early 1900’s. As with the pine nuts, small to medium granite lumps gave the otherwise mostly barren mountains a charming character. For years I’ve been search for rocks that seem to be miniature mountain peaks, and here I finally found one. Technically these scenes are from California, but just 2 miles or so from the border, so let’s just pretend it’s Nevada.
Wide open spaces, the smell of sage, and small granite boulders that want to be gigantic mountains, with views of the Sierra Nevada crest.
Desert evenings.
The final adventure I have to share is from Northeast Nevada, in the Ruby Mountains. While you would be correct in thinking most of the state is arid sage-land, I can now confirm that there are in fact pockets of lush greenery! But the pockets are small. Much of the Ruby Mountains share the same landscape to our previous destinations, with misshapen granite lumps, and mountain mahogany trees near the hill tops. These shrubby trees are, like the desert peach, in the rose family, and often take on shapes reminiscent of the African savannah.
After exploring the boulder landscape for two days Aubrey and I did a short little overnight out of Lamoille Canyon, the crown jewel of the Rubies. The flowers were just starting to bloom, and up above treeline, the snow had clearly just melted a week or two ago and the corn lilies were putting on quite a show.
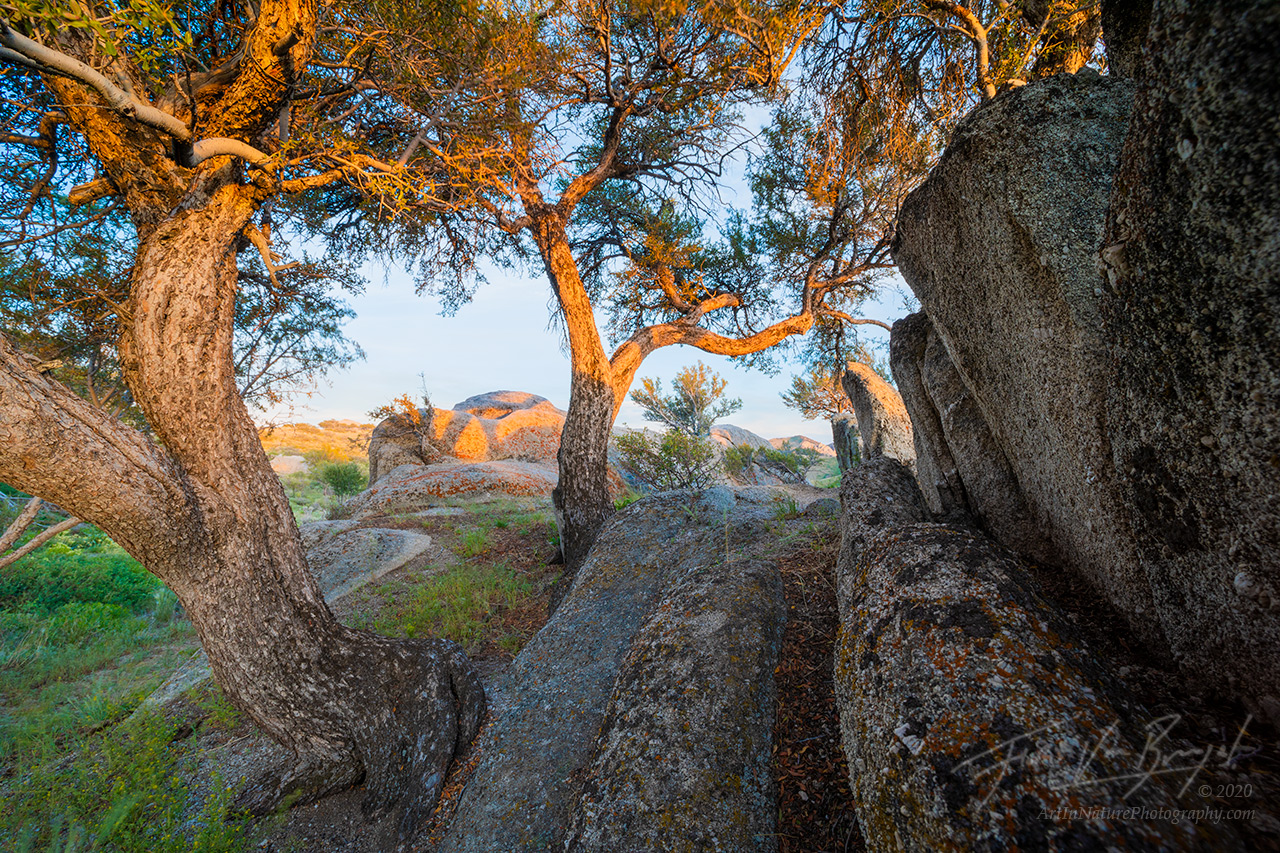
Mountain Mahogany trees dance in the dwindling sunshine of Nevada’s Ruby Mountains. These shrubby trees bring to mind scenes from the African savannah, and seem to grow where nothing else possible could.
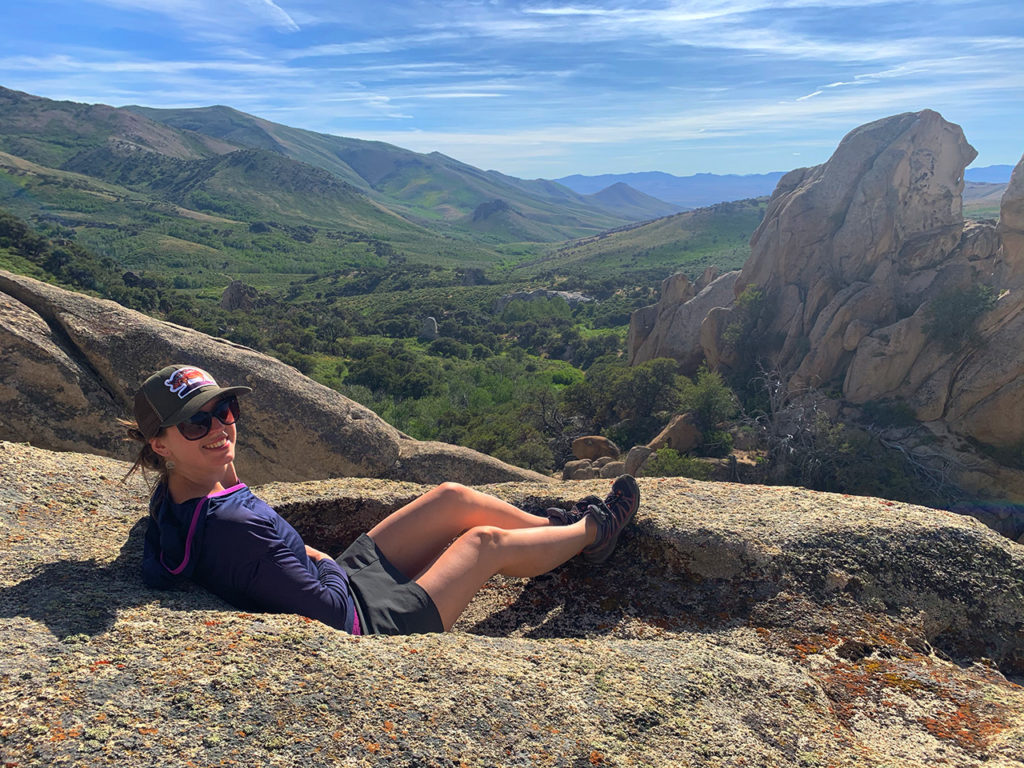
Aubrey resting in a pothole.
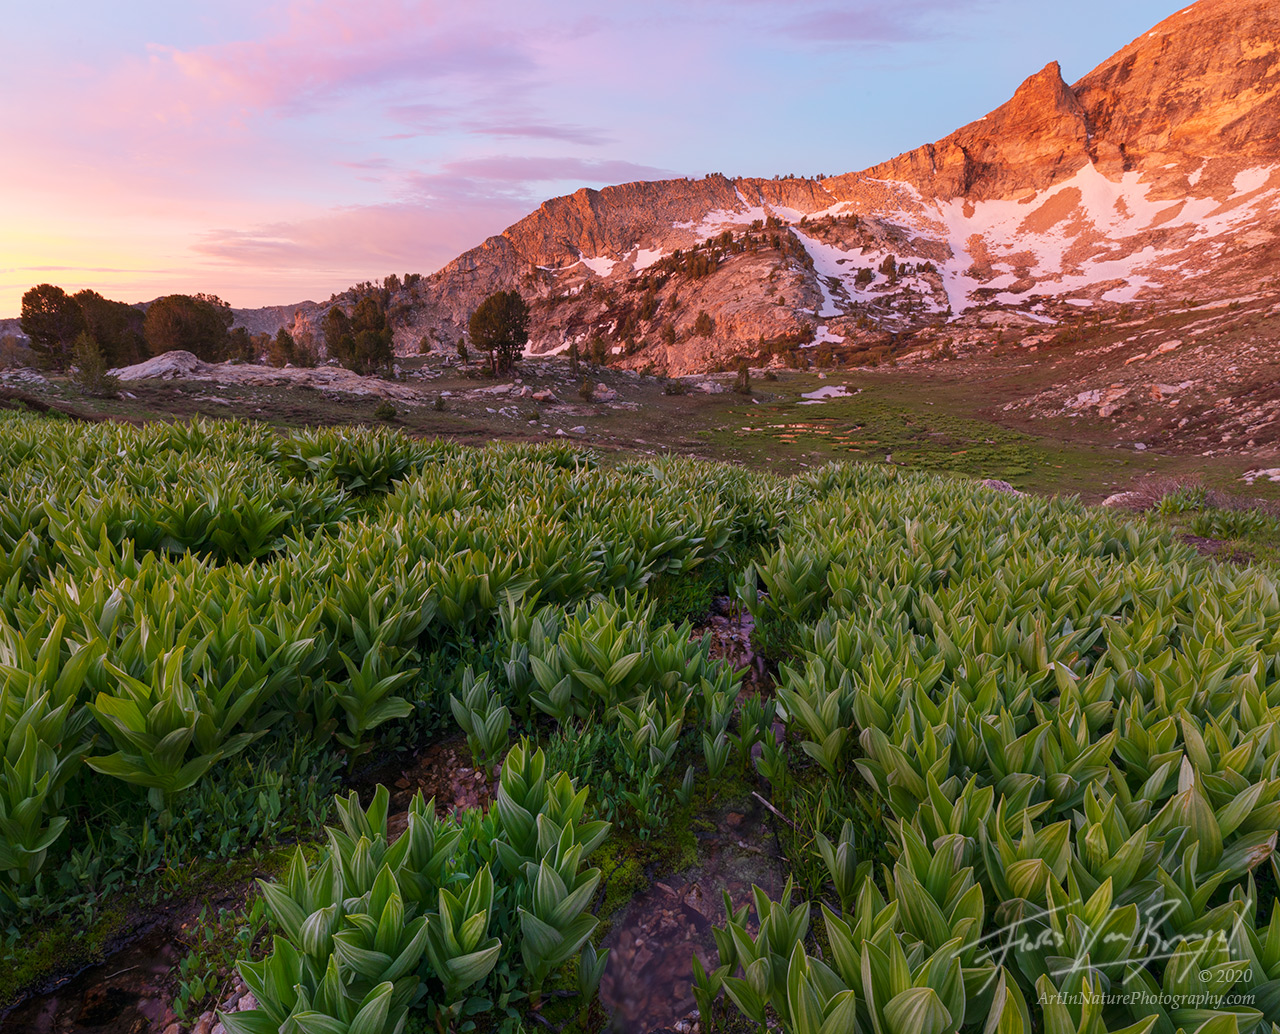
Endless fields of emerald green corn lilies burst into life after the winter snow melts. Although the Ruby Mountains were named after garnets found by early explorers, I like to pretend the vivid red sunrise light helped inspire them a little, too.
Puede parecer algo trivial si eres un observador astronómico experimentado y conoces el cielo mejor que tu casa pero para el recién llegado es una pregunta básica que todos nos hemos hecho alguna vez ¿Cómo encontrar el norte?
La respuesta más obvia es ¡Pues con una brújula! Pero ¿Y si no llevamos una brújula encima? o ¿Y si la brújula funciona mal? En algunas ocasiones una brújula puede funcionar mal debido a que nos encontremos cerca de un yacimiento de hierro o magnetita, por ejemplo. Además, una brújula solo nos indica la situación del norte magnético, no geográfico. Esto sucede también con las brújulas que incorporan nuestros teléfonos móviles.
En observación astronómica, sobre todo nos interesa conocer el norte geográfico si estamos usando una montura ecuatorial y estamos en el hemisferio norte (los habitantes del hemisferio austral necesitan localizar el sur geográfico). Por eso a continuación te daremos algunos trucos para encontrar el norte geográfico sin la ayuda de una brújula.
Para usar correctamente un telescopio con montura ecuatorial es necesario orientarlo al norte.
Cómo encontrar el norte con las estrellas
Para encontrar el norte de noche podemos guiarnos por las estrellas si el cielo está despejado. La forma más fácil es buscar la estrella polar (Polaris). Esta estrella está muy cerca del polo norte celeste (PNC) aunque no se encuentra exactamente en él (está a unos 0,7 grados de distancia).
Para localizar Polaris la forma más sencilla es guiarnos por la Osa Mayor, quizá la constelación más reconocible del cielo por su forma de cazo. Si trazamos una línea recta desde las estrelas Dubhe y Merak que son las que están más alejadas «del mango del cazo» y seguimos 5 veces la distancia que separa a éstas llegaremos a una estrella a simple vista más o menos solitaria que forma parte de la constelación de la Osa Menor (también con forma de cazo pero más pequeño). Esa estrella es Polaris.
Al contrario de lo que mucha gente piensa, la estrella polar no es la más brillante del cielo ni mucho menos.
En ciertas épocas del año, como por ejemplo en invierno, es posible que nos cueste encontrar la Osa Mayor porque esté muy baja en el cielo. En ese caso podemos ayudarnos de la constelación de Casiopea que tiene forma de letra «M» o «W». Ayudándonos de las tres estrellas centrales si seguimos la dirección de la intersección imaginaria de éstas en la parte cóncava también llegaremos a Polaris.
Si no vemos el norte porque hay nubes pero seguimos viendo otras zonas del cielo con estrellas todavía es posible orientarnos si conocemos las constelaciones y sabemos la hora a la que nos encontramos. Otra opción es guiarnos por el brillo de la Luna que siempre se encontrará cerca de la línea de la eclíptica y que siempre va de este a oeste pasando por el sur en su culminación si nos encontramos en el hemisferio norte.
Además, teniendo en cuenta que en cuarto creciente tiene forma de «D», sus cuernos apuntan al Este mientras que en fase de cuarto menguante, con forma de «C», los cuernos apuntan al Oeste.
En Invierno también podremos encontrar el sur ayudándonos por la constelación de Orión. Si trazamos una línea recta entre las estrellas Betelgeuse y Rigel y extendemos su distancia hacia el horizonte encontraremos el sur geográfico.
Una línea recta imaginaria desde Betelgeuse a Rigel nos lleva al Sur.
Cómo encontrar el norte sin brújula de día
De día ya no vemos las estrellas, o mejor dicho, solo vemos una, nuestro Sol. Él nos puede ayudar a orientarnos ya que a medio día se encontrará culminando hacia el sur (recordad que siempre hablamos en relación a observadores del hemisferio norte).
El Sol sale aproximadamente por el este y se oculta por el oeste, más o menos. Decimos más o menos porque depende de la época del año (en verano la eclíptica diurna está más alta) y también depende de la latitud a la que nos encontremos. Teniendo en cuenta estos datos también podemos orientarnos más o menos hacia en norte tomando el Sol como referencia.
Si disponemos de bastante tiempo podemos estudiar el avance de las sombras proyectadas por el Sol para marcar una línea en su recorrido que nos indicarán el sentido Este-Oeste. Una vez trazada la línea sabemos que la perpendicular es Norte-Sur.
Otro truco si nos encontramos en la naturaleza es observar hacia dónde crece el musgo. En estructuras verticales como árboles éste suele crecer hacia el norte en zonas húmedas.
Encontrar el norte con un reloj y el Sol
Esto es bastante curioso pero muy práctico. El método es más o menos preciso dependiendo de la época del año y nuestra latitud. Si disponemos de un reloj de agujas y apuntamos la manecilla de las horas hacia el Sol el punto intermedio entre la manecilla de las horas y la posición de las 12 en la esfera indica el sur, por lo tanto el lado contrario de esa bisectriz indica el norte. Recordad usar la hora solar para este método, en España sería 1 hora menos en invierno y 2 en verano.
Perth aviation photographer Richard Kreider has taken a stunning image of a Qantas 787 after lift-off from Perth on its non-stop journey to London.
The Qantas 787, VH-ZND “Emily” operated QF9 from Perth to London on October 29.
Born at a US Air Force base in France during the Cold War years, Mr Kreider jokes that his first breath probably had a liberal dose of fumes from aircraft engines.
And that exposure continued, living under the flight path to Heathrow in his teenage years and he joined the Air Training Corps.
Cathay Pacific A350 lands through fog at Perth Airport. Credit: RICHARD KREIDER
Aviation lives alongside his passion for soccer — he is a member of the Football Hall of Fame WA and part of the FFA National Panel of Football Historians.
Mr Kreider says that night flight photography is a real adventure.
“It’s the thrill of the chase and the accounting for the contrasting weather conditions such as rain and fog,” he says.
Emirates 777 about to land in Perth as an almost full moon seemingly looks on. Credit: Richard Kreider
Resolving the technical issues of correct lighting, focus and framing are testing factors of this challenging photography.
“When all of these factors align and a great shot is achieved, then getting up at 2am is worthwhile,” he says.
The results are more than worthwhile, with many of Mr Kreider’s night pictures being used across the globe.
Some of Mr Kreider’s most popular images are of an Emirates Boeing 777 framed by the moon, a Virgin Australia Regional Airlines Fokker 100 landing in rain and a Cathay Pacific Airways A350-900 landing in fog.
Perth Airport is also helping aviation enthusiasts with more viewing areas planned in conjunction with the building on the new parallel runway expected later this decade.
As the evenings start beginning much earlier, there’s never been a better time to perfect your night landscape photography skills. While the night sky can play havoc with your camera settings, it also provides a real opportunity to produce some great (and spooky!) shots. Check out our guide below to find out how to take landscape photos at night:
Night landscape photography: What know before you go!
As with all paths of photography, half the battle of getting things right is good forward planning. Things to consider before setting out on a night shoot might include the following:
Check the moon cycle
The moon will have a dramatic effect on our images. A full moon will cut exposure times and make the sky appear more of a blue colour, almost like it’s daytime; however, it will also reduce the number of visible stars. The moon cycle along with the moonrise and set times can easily be found for most locations on the Internet.
Check the weather
Keep an eye on the forecast. Clear skies work well for star trails, but don’t ignore cloudy or partly cloudy nights. The conditions to avoid are mist, fog or rain as the water droplets can settle on the lens surface during long exposures and are almost impossible to detect in the dark.
Light pollution
While light pollution can mean it’s harder to see as many stars, it can also add some much-needed colour to a sky. Light pollution will have the most dramatic effect on a sky when there is a new moon or the moon is yet to rise.
Take a spare torch
I often work in remote locations so I always carry a spare torch with me to find my way back to the car, particularly as my main rechargeable torch often runs out of power. I find a spare wind-up torch works well, as you are then not reliant on battery power.
Charge batteries
Long exposures can quickly drain camera batteries so make sure they are fully charged and that you have a spare.
Night landscape photography: On the night
Step 1. Choose your composition
Arrive at your location while it’s still fairly light to help you easily compose your images. When setting up your camera make sure that your tripod is on secure ground and that it’s not going to move during the long exposure.
Step 2. Shoot RAW
By shooting your images in the Raw format you will be able to apply slight changes to your images at the processing stage. Small adjustments to white balance, exposure and noise can all be applied when converting the Raw files.
Step 3. Set up your camera
Attach your cable release, set your camera to bulb mode and select your aperture. Finally, focus the lens on your subject, and once this is completed remember to switch to manual focusing so that the lens doesn’t start to hunt once it’s dark.
Step 4. Take a test shot
Once it’s dark lock open the camera’s shutter using your remote release. Begin illuminating your subject by flash or torch light. Remember to take a note of the total exposure time and roughly the amount of light applied to your subject.
Step 5. Review your test shot
Review your test shot and work out what areas need more or less light, as getting the correct exposure involves a little bit of trial and error. Once you have decided on what exposure changes to make, simply re-take the shot and keep reviewing the images until you get a result you are happy with.
Night landscape photography: tips to help you take better night photos
Focus using a torch
To aid with focusing in the dark, shine a powerful torch on your chosen subject. Once your camera gets a focus lock, switch your lens to manual focus so that it doesn’t hunt when you press the shutter button.
Compose using high ISO
To compose your night landscape photography shots in the dark, change the ISO setting to your most sensitive available then take a test exposure and recompose as required. Remember to lower your ISO setting back to 100-200 once you’re done.
North star
Take a compass with you and work out the position of the North Star. As the Earth rotates the North Star will appear to stay fixed and the rest of the stars will appear to rotate around it.
Two’s company
Night photography can be quite spooky so having a friend with you will keep you company and make you feel safe.
Dress warm
It can get very cold at night particularly when standing around waiting for long exposures, so warm clothing is essential.
Noise reduction
If your camera has a noise reduction facility, turn it on for your final shot of the evening. Once the main exposure is completed you can pack away your camera while it’s still exposing for the dark frame. When you arrive home it’s exciting to view the completed image for the first time.
Further reading:
Fright night: ghost camera takes spooky London photowalk
Complete guide to outdoor light in photography
Art Wolfe on his approach to night photography
Liam Wong shares new book of cinematic cities at night
How to photograph low light urban landscapes
Follow AP on Facebook, Twitter, Instagram, and YouTube.
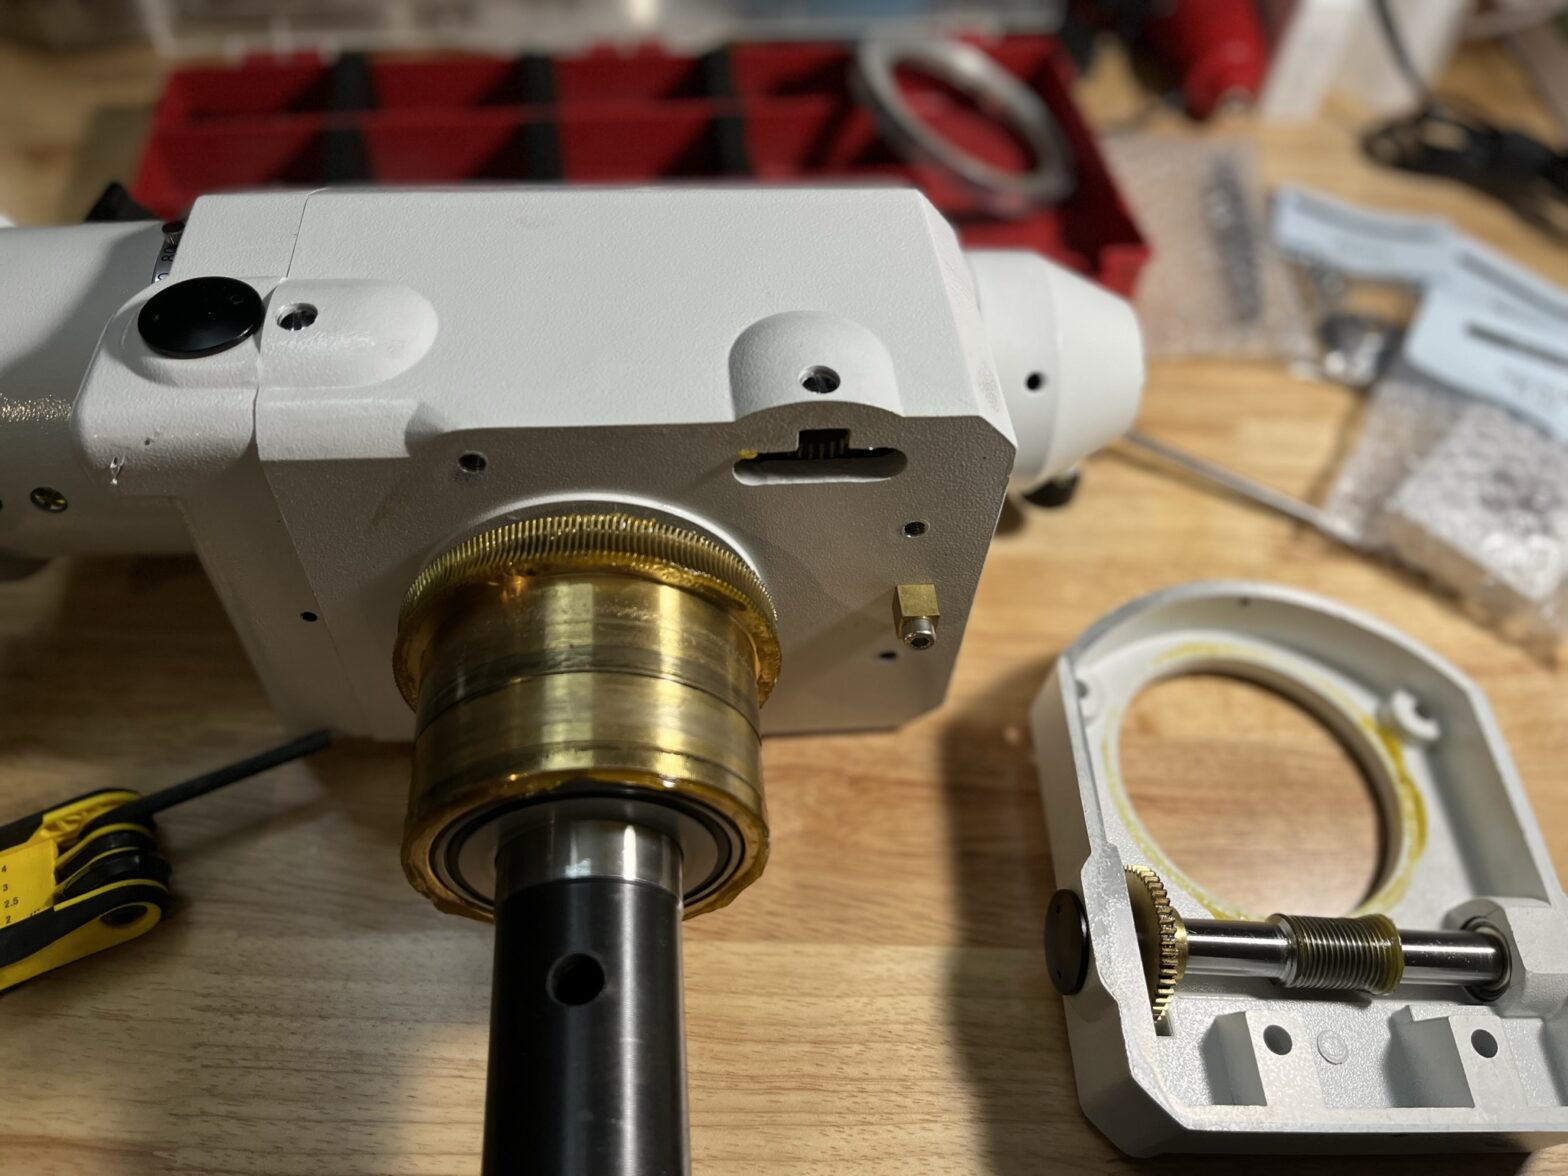
And so I’ve decided now to open up the mount and begin the process. I really helps a lot watching a few YouTube videos and reading Rowan Astronomy‘s instructions thoroughly.
There are a few minor steps that would easily make me damage my mount. Below are a few photos attached from the very first steps of taking the mount apart.
In the Twin Cities arts community, Petronella “Nell” J. Ytsma’s name is as synonymous with her epic Agent Orange project as it is with taking pictures of other artists’ work.
“Whether it was Agent Orange or in her personal work … if she was living it, breathing it, a lot of people liked to talk about it, and she could see it in a way that we often don’t see in today’s world,” said her husband, Mark Sauer. “She was compassionate. She was considerate. She was concerned — her moral comfort compass never deviated.”
Her dedication to social activism was evident in her work, from protesting the Vietnam War in her youth to visiting Vietnam and documenting the effects of Agent Orange using a Hasselblad camera for her “Legacy” series. She also took pictures of the Park Square Theater’s early years of productions as well as various political events.
Ytsma, who stood nearly 6 feet talland was a regular swimmer, had just returned home from a workout Sept. 2 when she unexpectedly died of natural causes. She was 73.
Born in Haarlem, Netherlands, in 1948, at 7 years old she immigrated with her family to a Dutch colony in Grand Rapids, Mich. She was in social work until it burnt her out, and off she moved to Minneapolis in 1979to pursue photography. She already had friends here, so it was a soft landing and a fast beginning.
She made a living as a photographer, and though she was a staff photographer at Mia for eight yearsand at the Park Square Theater, and did some university photo instruction, she was known for documenting other artists’ work.
“Everybody I knew who won a Bush Award or a McKnight Fellowship, she photographed them,” said artist Dan Bruggeman, whose work she photographed for decades. “It was a combination of the quality of the work but also that the presentation was always so excellent.”
She met Sauer in 1981 when she happened to be documenting his friend Jody Isaacson’s senior show at the Minneapolis Institute of Art. They married in 1992 and lived on the second floor of a former fire station in St. Paul. Sauer’s boat repair shop, St. Paul Shipwrights, and her studio are on the ground floor.
Ytsma’s has been included in exhibitions at St. Catherine University in St. Paul, Dubuque Museum of Fine Art, Augsburg College, and abroad in Berlin, to name a few. She was the recipient of a Percent for Arts grant from the Minnesota State Arts Board, and a CUE Award, among others.
Kathy Daniels, former director and curator of the St. Catherine University art gallery, curated Nell’s “Legacy” project and also organized a symposium around it. The two first met in 1993 when Ytsma was in a group show, “Women and Land,” at St. Catherine University and became fast friends.
“She spent a long time there and made friends and got into little villages and people’s homes,” said artist Tim Harding. “She was just deeply moved by the whole experience and she talked about it, you know, whenever you bring it up, she would not hold back.”
She also worked closely with people who were dying during the AIDS crisis. She would often invite the dying into her home and care for them, at a time when their families abandoned them.
“The kindness demonstrated by something like that affected I think everybody but especially, you know, I can only speak for me,” said Bruggerman, “But I thought, ‘I should emulate that.’ She was inspiring.”
Along with her husband Ytsma is survived by siblings Edward Ytsma of Shrevport La., Joyce Huizinga of Tuskaloosa Ala., Willamina Godec of Cleveland, Cathy Mahynski of Grand Rapids, Mich., and Theodore Ytsma of Seattle, Wash.
A public memorial is set for 1 p.m. Saturday at the Weisman Art Museum, 333 E. River Parkway, Minneapolis.
The American love of mountains is inextricably tied to the long history of mountaineering in Europe. While the U.S. would later be responsible for the resurgence of the sport in the 1960s, the original golden age of alpine mountain climbing comes, fittingly, from the Alps–the wonderland of glacial massifs spreading from Switzerland across Germany, Austria, Italy, and France. As the first major waves of settlers crossed the Rockies during the Gold Rush, British and Swiss climbers, with their French guides, were setting a new standard in adventure and popularizing a lifestyle and aesthetic which would echo across time and all subsequent feats of natural exploration.
To put it more succinctly, from the moment the American populace encountered the majestic ranges of the west, they conjured up images of the twisted peaks of the Grandes Jorasses and the Matterhorn, emerald sanctuaries of flowered meadow, weather-worn redoubt chateaus, and the thrilling plunge of a snowy downhill slope.
Thus, when you find yourself driving through the evergreen ridges of the eastern Cascades, it should come as no surprise to find a Bavarian hamlet nestled among the cedars and firs. This is Leavenworth, one of the better-kept secrets of Washington State for both lovers of nature and those with a passion for culture.
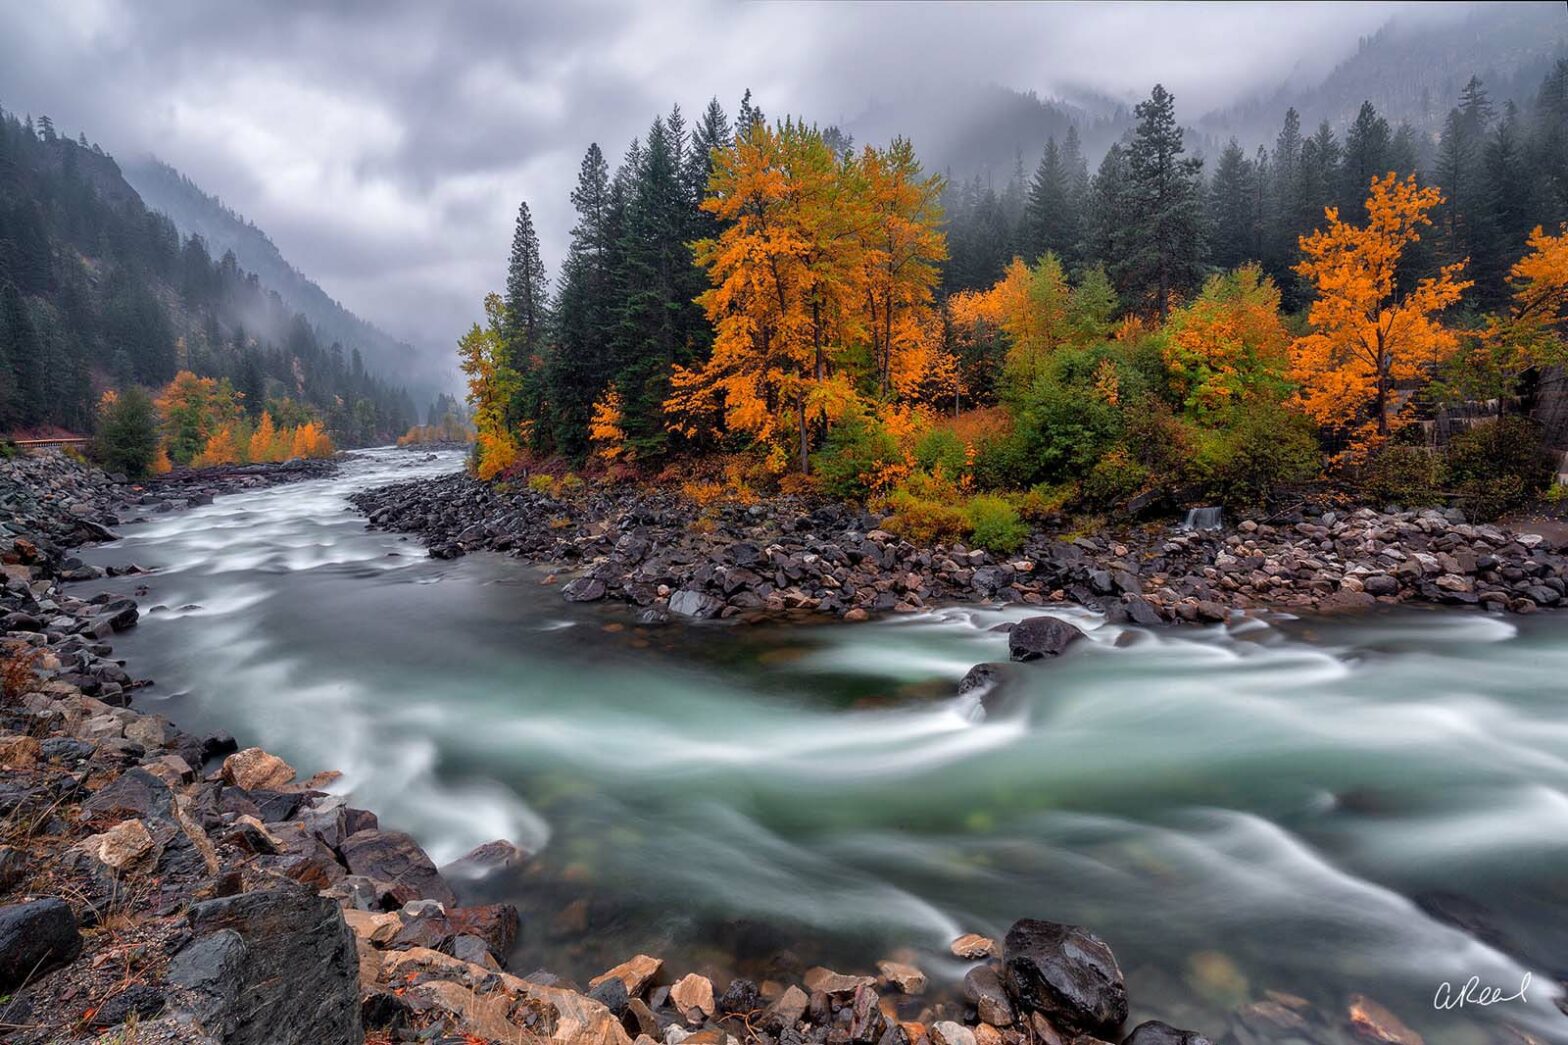
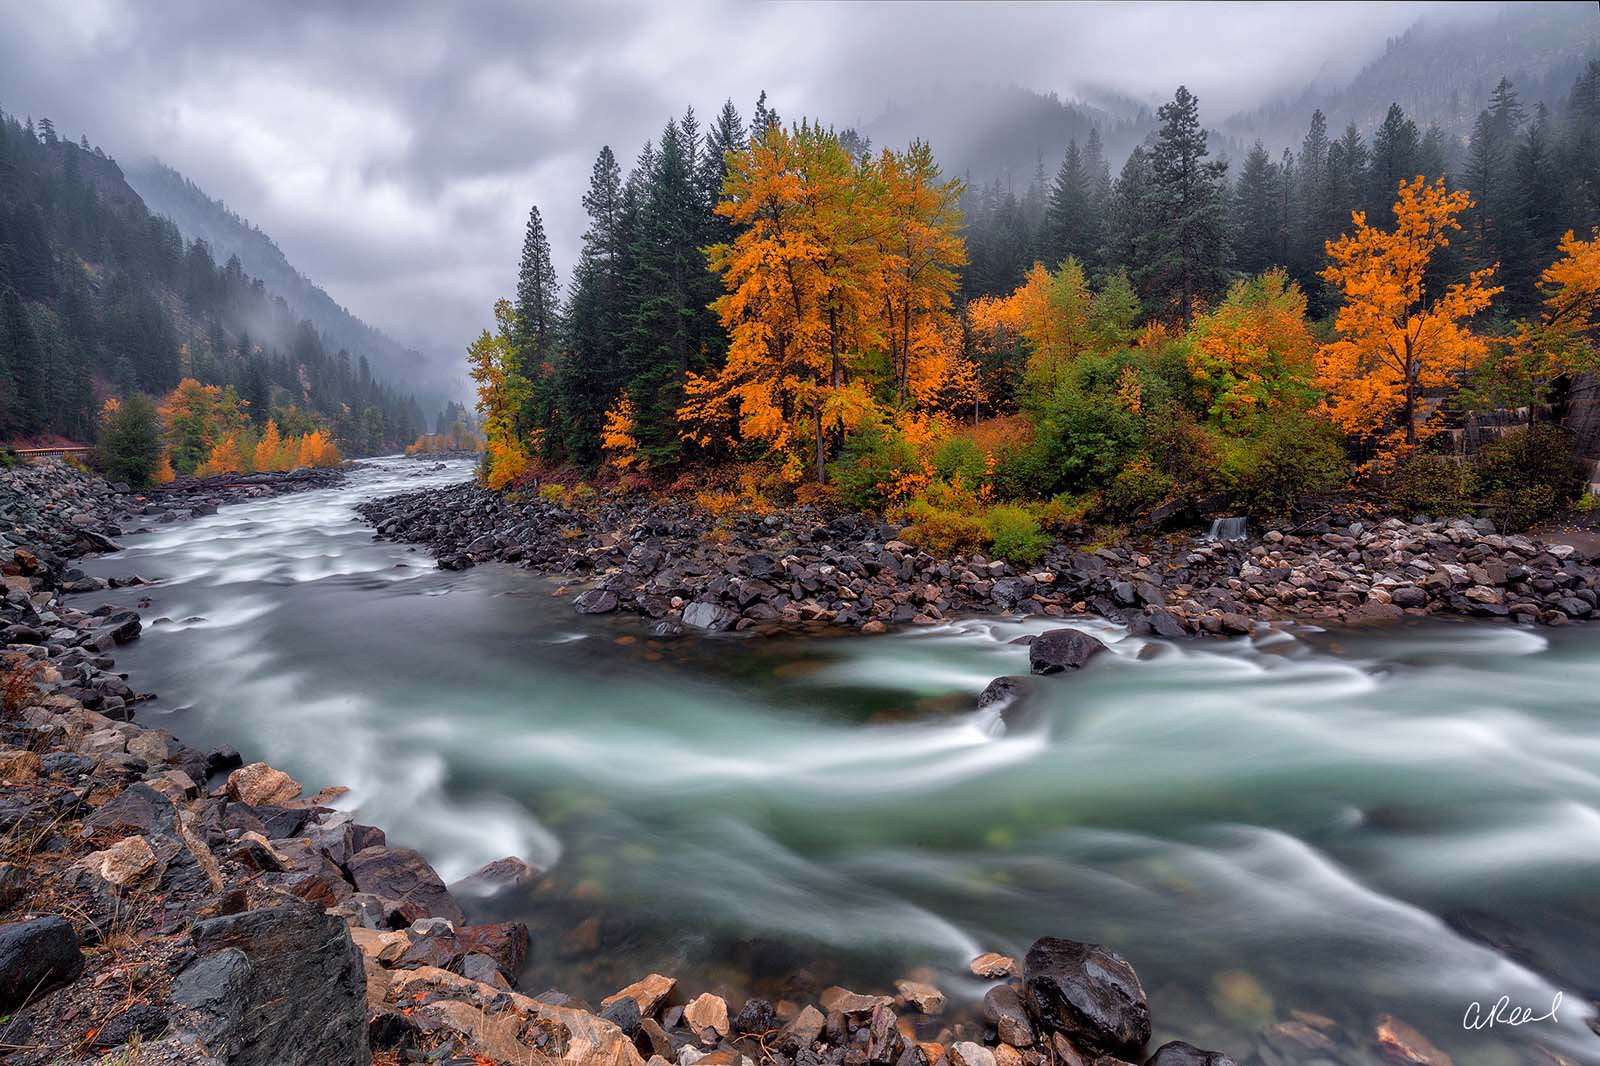
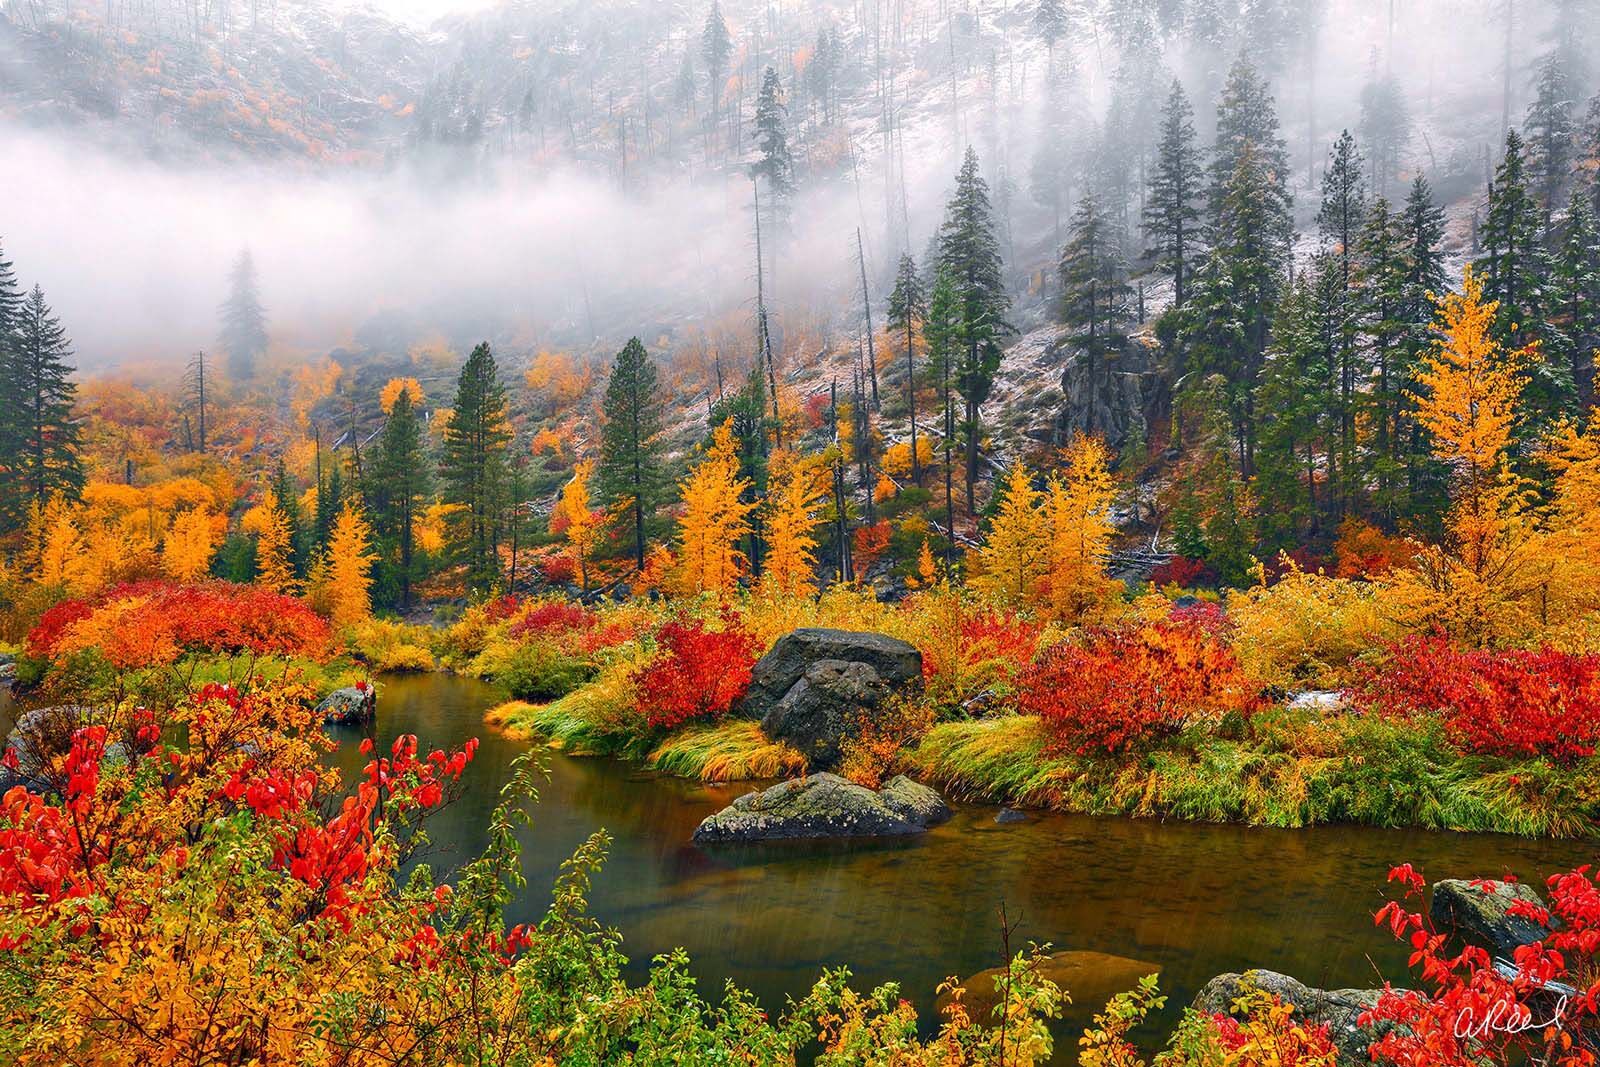
A gentle breath of veiled sunlight caresses the rocky banks of a clear river as it makes its way through a deep mountain valley. The faint chill of autumn on the way inspires embers of bright foliage along the banks and up on the hillsides. Fine Art Limited Edition of 50.
Leavenworth Washington Nature Photography
For nature photographers, the areas to the South & West of Leavenworth are a visual playground year round. This is especially true in the autumn months when Tumwater Canyon and the entire area from Stevens Pass through the town of Leavenworth explodes with autumn brilliance. My home is just a short two hour drive from Leavenworth, allowing me to visit many times each year.
Just outside of Tumwater Canyon, Icicle Creek and the entrance to the Enchantments, Lake Wenatchee State Park and countless other visual sights beg you to pull the car over and grab a few photos or take a walk along the Wenatchee River as it slowly meanders through the canyon.
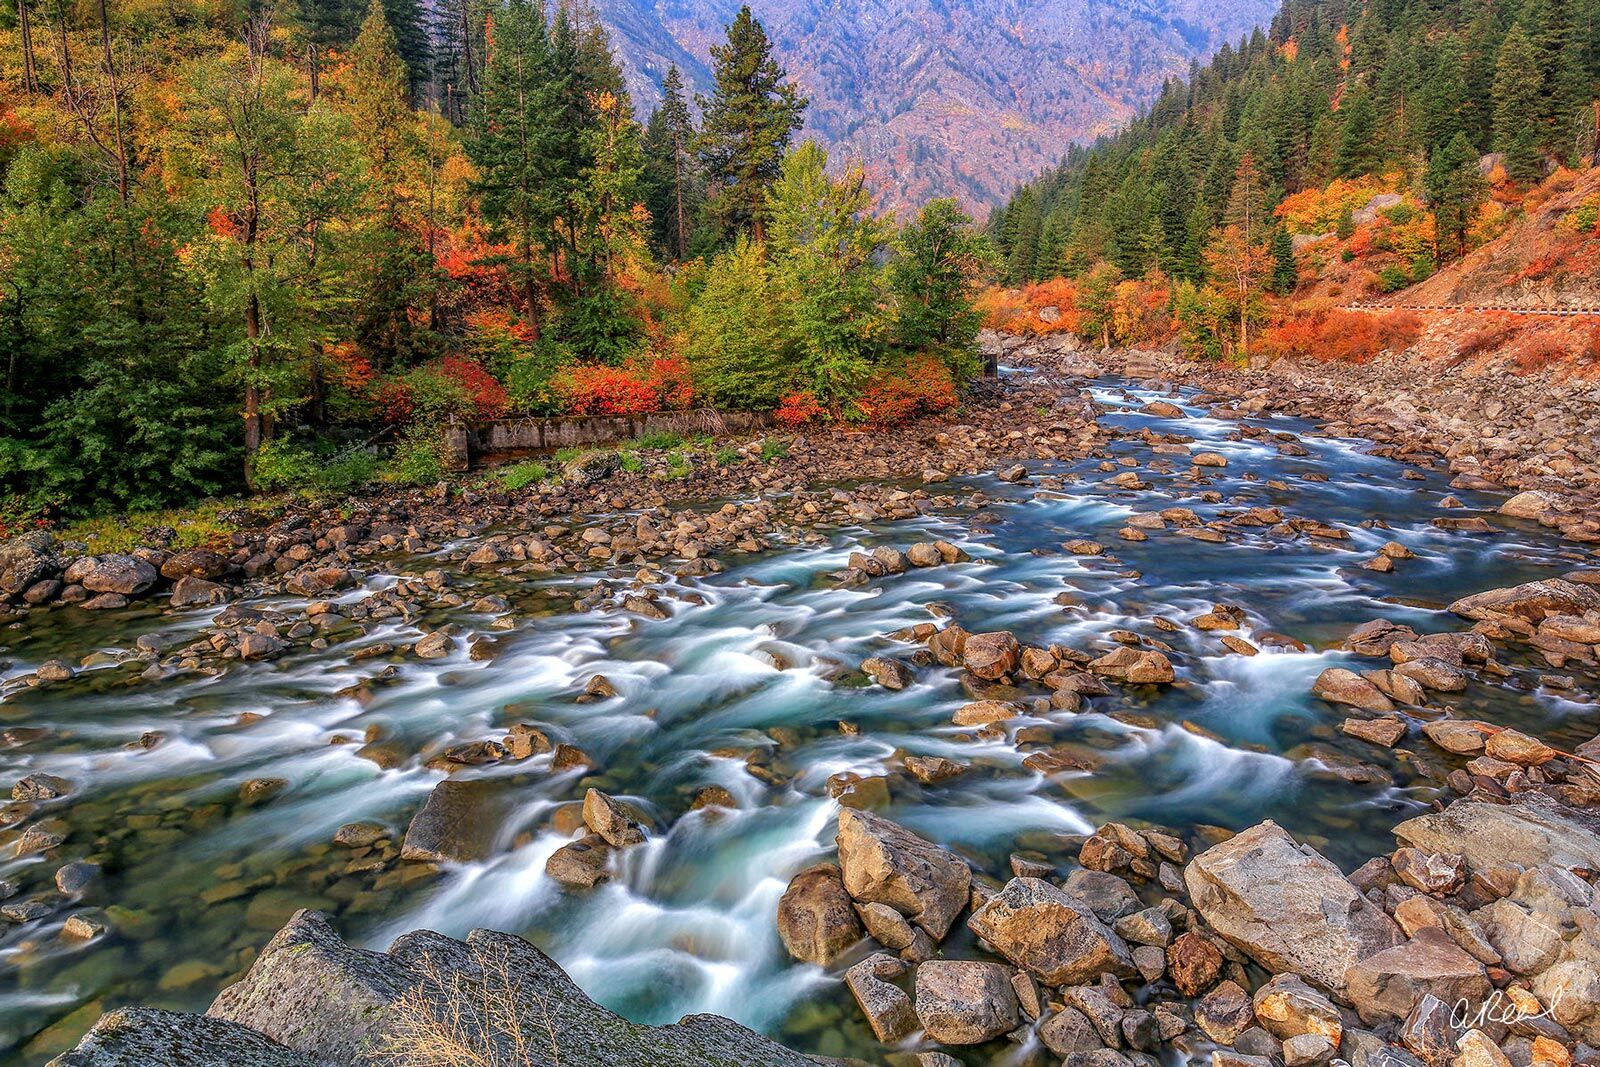
A rush of clear water races down from the forbidden peaks of a range of misty mountains. Along the rocky banks, flashes of gold announce the arrival of autumn to the high places. Fine Art Limited Edition of 50.
History of Leavenworth Washington
Leavenworth is a central European mountain town in every sense (other than location), yet its charming appearance belies an unexpected history.
The Chinook, Yakima, and Wenatchee peoples called the tranquil vale on the Wenatchee River their home until the coming of white settlers in 1892. These groups arrived with the coming of the Great Northern Railway which aimed to connect Seattle with St. Paul, Minnesota. With a fast and reliable conduit to one of the largest timber industries in the country at the time, logging quickly became the major industry of the fledgling community. By the early 1900s, it was home to the second-largest sawmill in the world.
Fortunes changed, however, when the Great Northern was diverted to pass through the larger town of Wenatchee to the east in 1925. The logging and sawmill operations foundered, and even the less transport-reliant industries like fur trading and gold mining either dried up or fell on hard times as well. For three decades, the town limped along, constantly on the brink of becoming a ghost town.
Then, in the early 1960s, town leaders formed the LIFE (Leavenworth Improvement for Everyone) committee in an attempt to escape the quagmire. The town had seen brief success during the depression with the introduction of a small local ski slope, and it was to tourism that the committee now looked again. In the mid-60s, members Ted Price and Bob Rodgers hit upon the idea of transforming Leavenworth into a theme-town, fashioned after the mountain villages of Bavaria, in the northern reaches of the Alps. Inspiration and guidance for the idea was furnished by the town of Solvang, a Danish enclave nestled among the foothills of the Santa Ynez Mountains northwest of Santa Barbara which had also seen major success as a tourist destination.
The ensuing remodel, which saw most of the town reconstructed in a south-German style, was an expensive gamble, but a resounding success. Combined with recreations of traditional German festivals and cuisine, and the addition of new ski resorts on the surrounding slopes, Leavenworth became a must-see attraction for anyone passing through the Cascades.
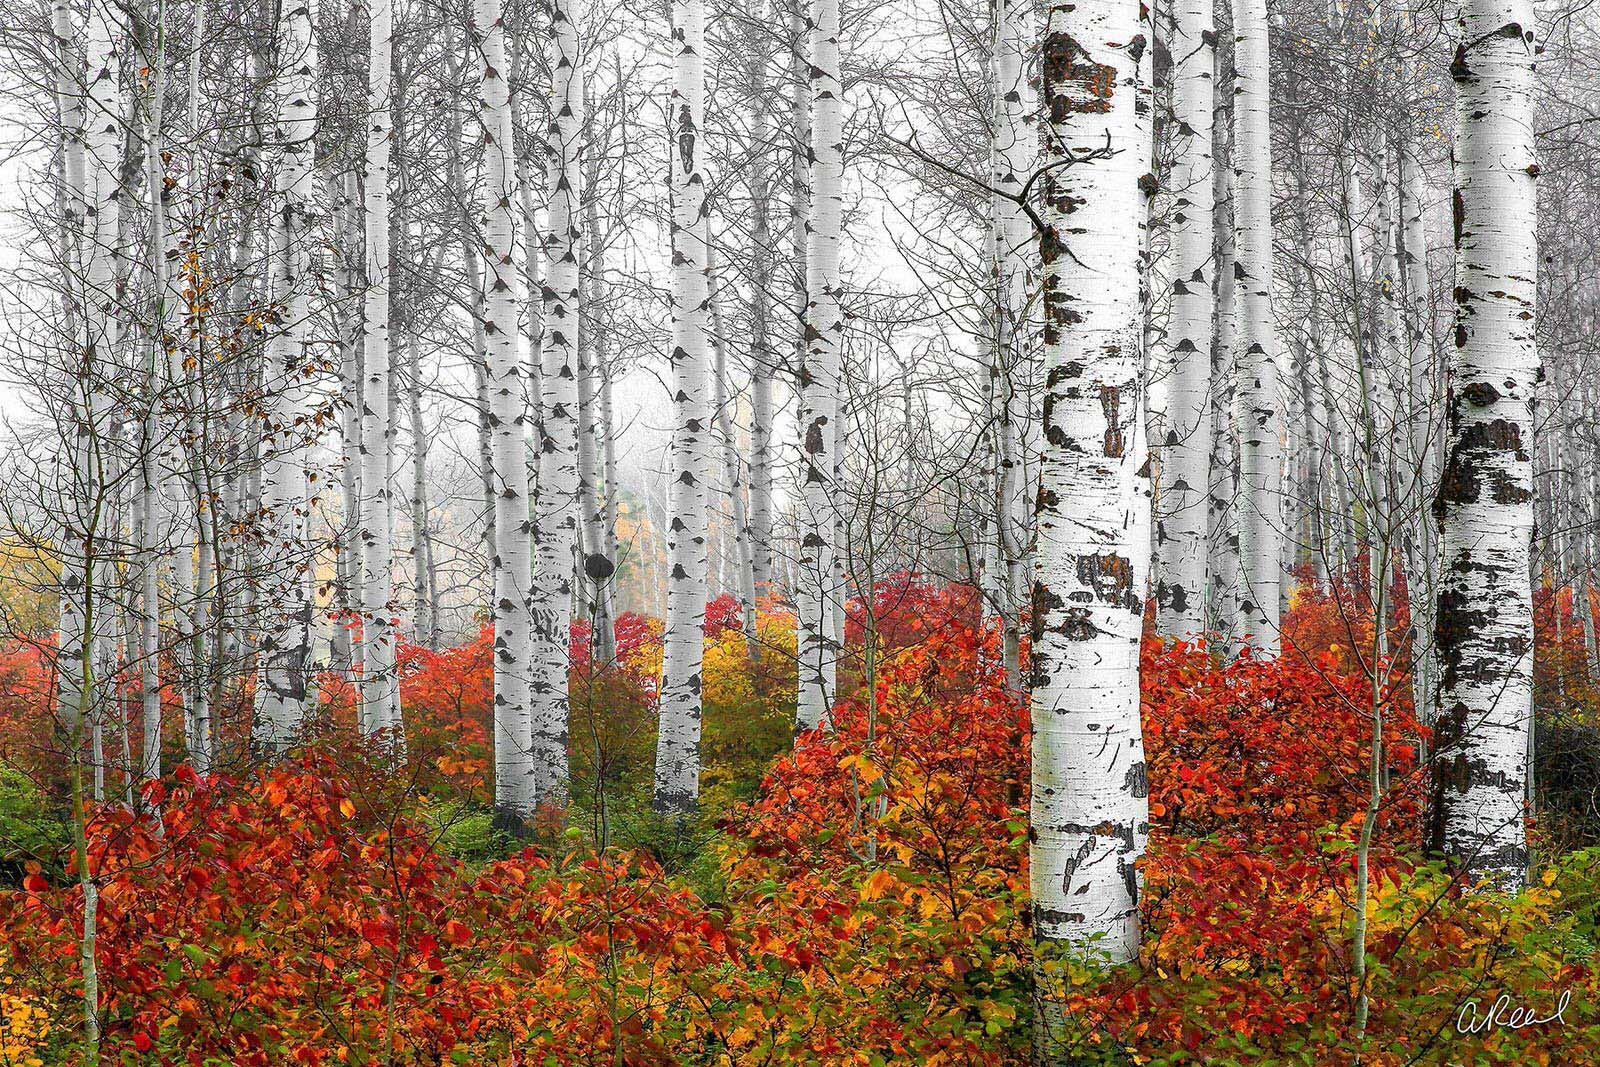
A tangled web of skeletal branches lace together the ashen trunks of a grove of aspen near Leavenworth, Washington. Unfazed as yet by the chill of winter, the fiery hues of the autumn undergrowth bleed through a hush of fog. Fine Art Limited Edition of 100.
Leavenworth Culture
Organized along an alpine Bavarian theme, the appearance and culture of the town closely resemble that of a traditional 19th century German village.
The architecture of the town is mostly comprised of black-and-white half-timbered structures which will most readily be identified with Tudor and Tudor-Revival style buildings, but which have also been a staple of German architecture since the Middle Ages. Gothic fonts and woodblock graphics adorn many of the shops and restaurants, further conveying the feel of an old-world hamlet.
The food to be found in Leavenworth also largely conforms to traditional German cuisine. With brathauses and biergartens scattered along the main street, visitors can sample popular German sausage and wash it down with a stein of cold gold lager.
To complete the experience, a number of festivals are held each year, some with German roots, and some unique to Leavenworth. Of those which are novel inventions, the Autumn Leaf Festival celebrates the vibrant colors of the surrounding Cascade foothills. Tourists can enjoy rock climbing events, rose planting, live music, and even a car show. During the Christmas Lighting Festival, the town is decked in over a million lights of all colors, with visits to Santa, ice skating, carriage rides, music, and more. In terms of traditional festivities, the biggest event is, of course, Oktoberfest. Here, every fall, guests can drink their fill of hearty German beer while enjoying classic German attire, participating in contests, listening to music, and much more. Not to be dismissed or forgotten, however, there is also Maifest, the annual spring festival which includes Maipole dancing, Bavarian music, and a costumed Grand March through the town by the locals.
Despite its orchestration as a tourist attraction, the sights and scenes of Leavenworth leave nothing to be desired, as faithful and immersive as a visit to the old country itself.
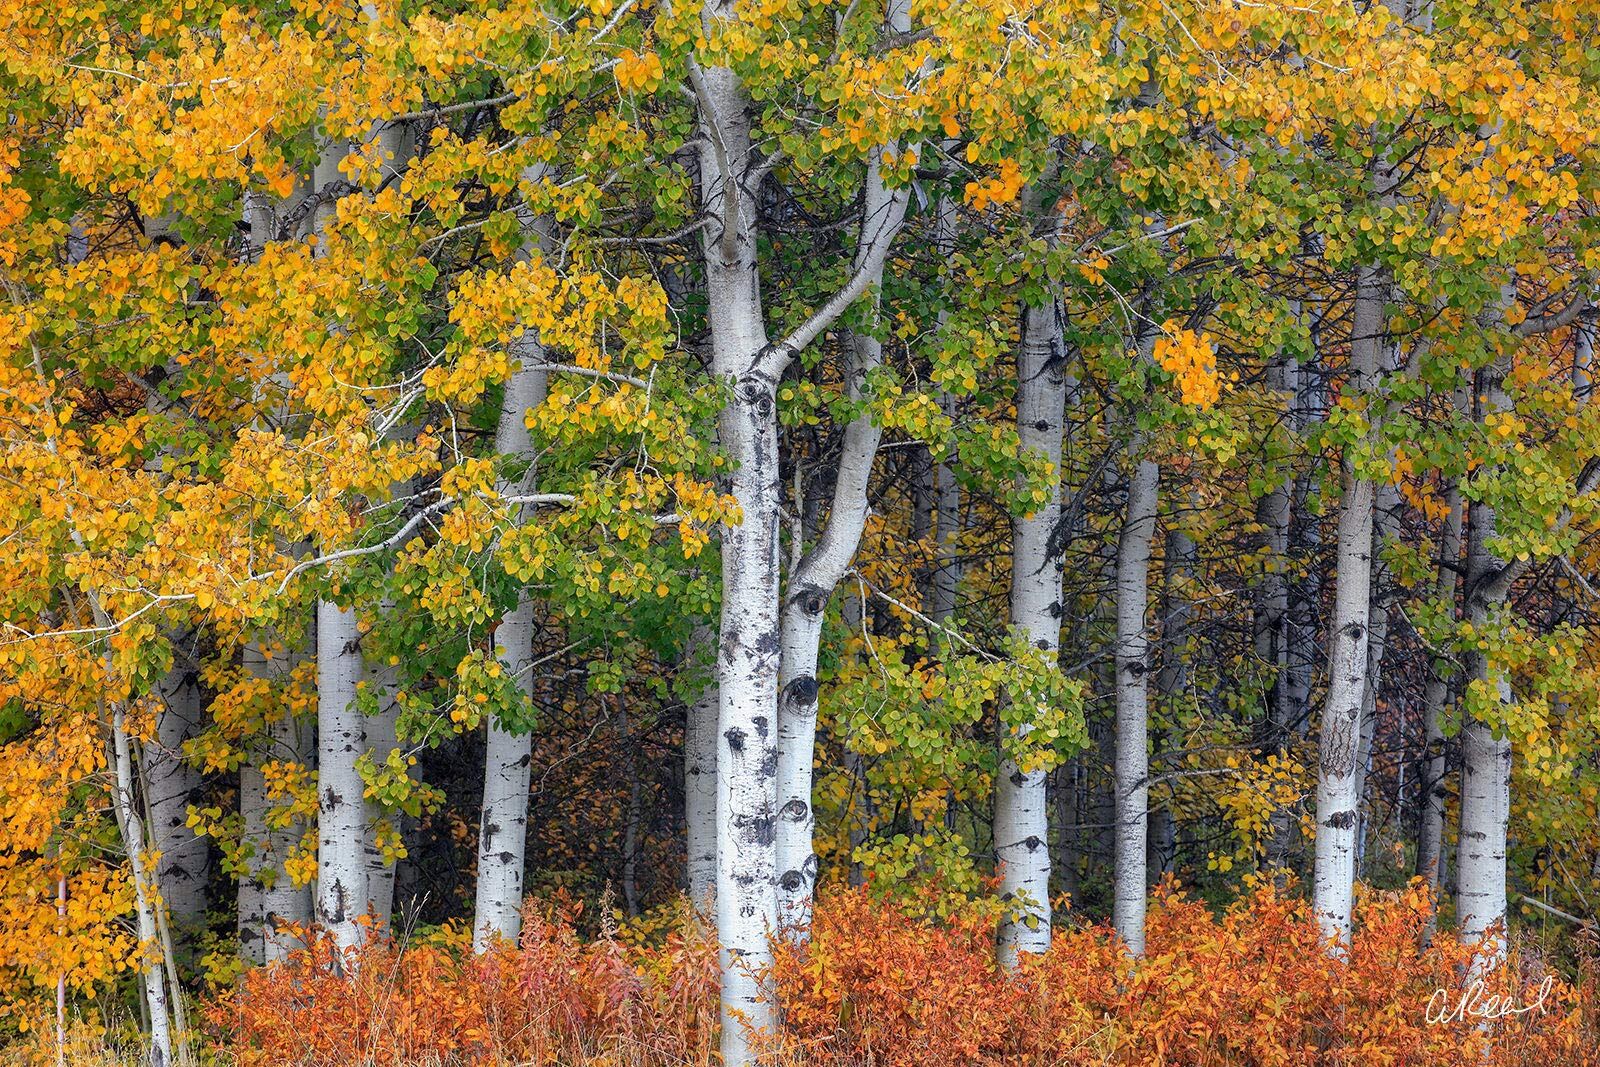
A dense stand of quaking aspen sits on the edge of a meadow near Leavenworth, Washington. A brilliant canary yellow spreads through the boughs–a sure sign of cooler weather to come. Fine Art Limited Edition of 50.
Winter Sports
Of course, no reproduction of an alpine village would be complete without some offering of winter sport. Though not in league with the snowy meccas of Zermatt or Aspen, Leavenworth offers a number of lodges and slopes for skiers and snowboarders when the days get short and chill. Mission Ridge Resort and the Leavenworth Winter Sports Club are the best ways to get out on the slopes, and Steven’s Pass is the most popular destination for people of all ages and skill levels.
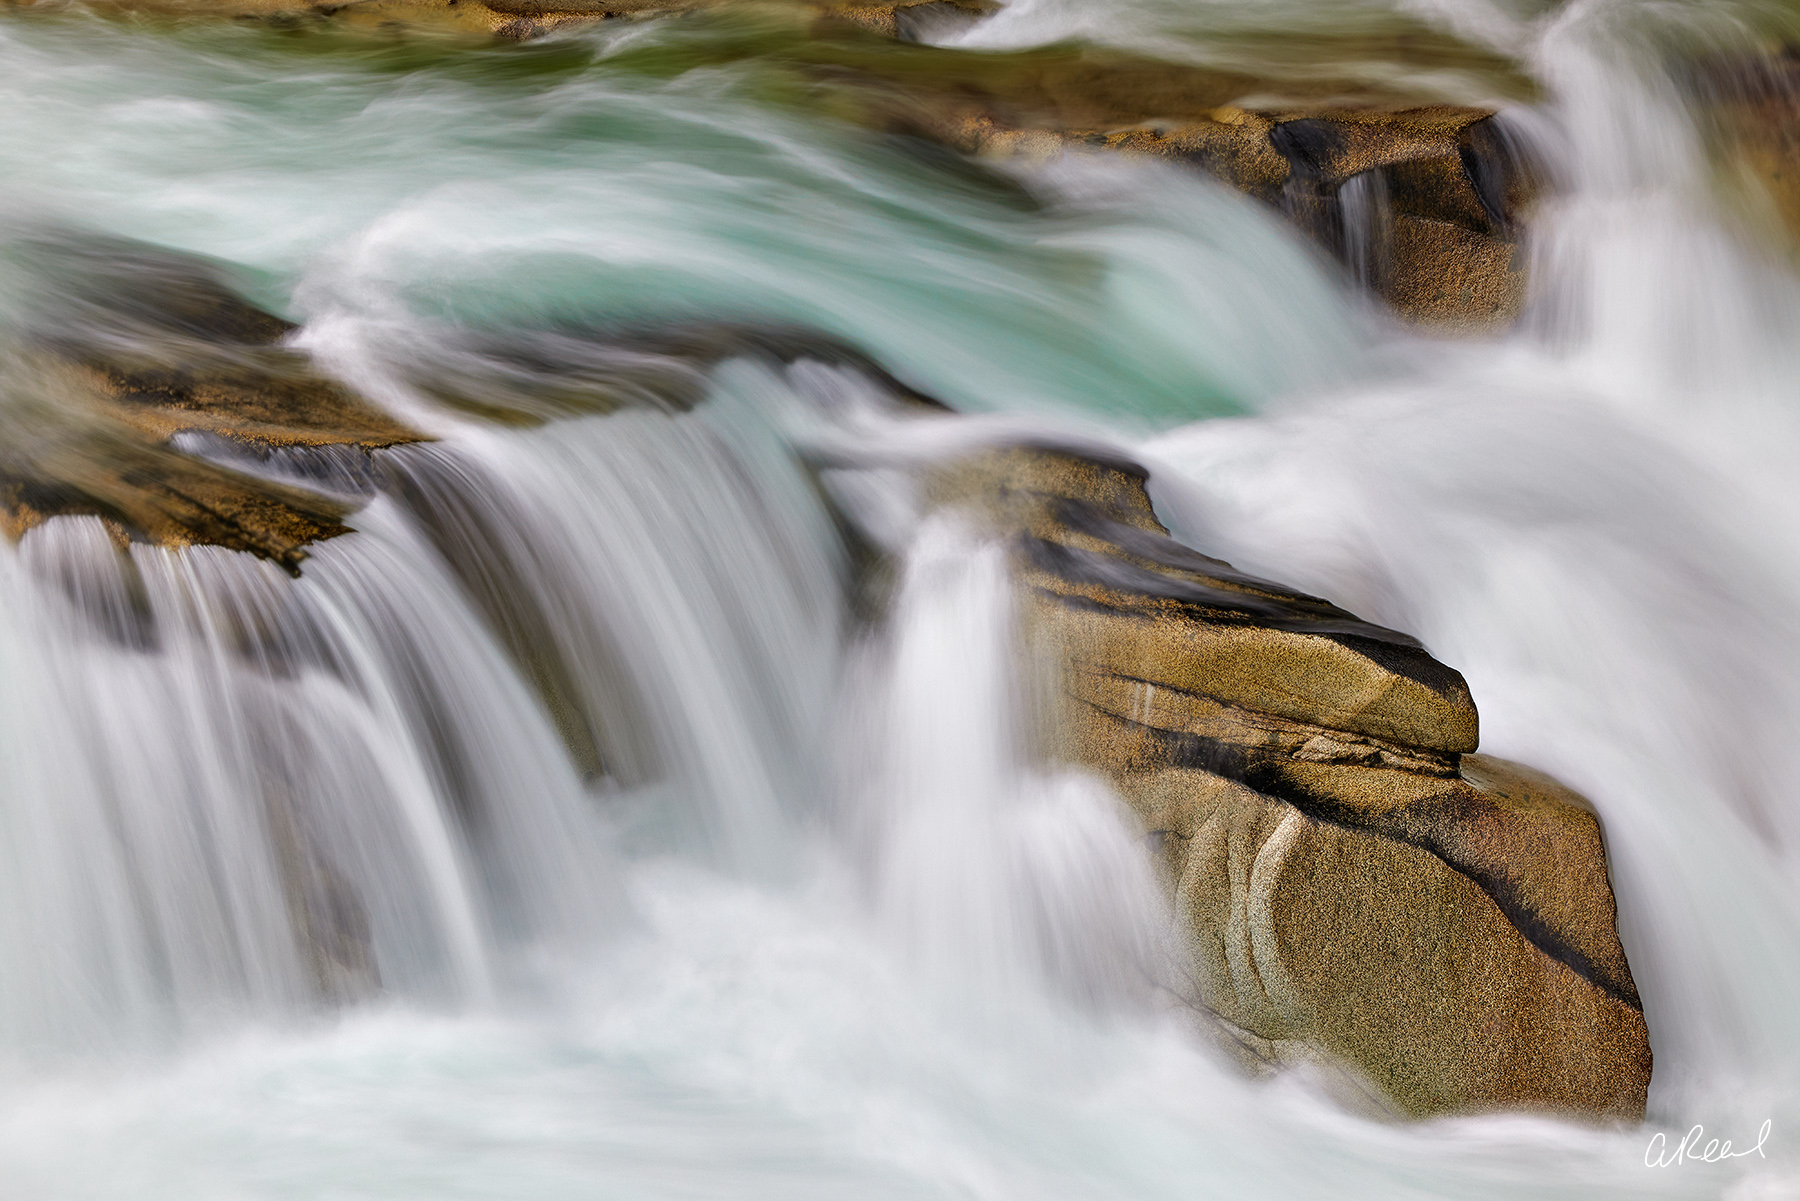
Torrents of troubled whitewater rush across the silken surface of a stony rapid as the wide ribbon of a mountain river is funneled through a spell of shallows. Golden boulders, adorned in dark bands of algae, jut from the sparkling veil. Fine Art Limited Edition of 50.
The Natural Wonder of Leavenworth Washington
The true beauty of the surrounding Cascades, however, can only truly be witnessed in summer. Here, the similarity of the country to the high Alpine wilds of Europe reaches its peak, and in many ways even surpasses it in terms of natural beauty. The jewel of the region, and perhaps of the entire Cascade range, from California to British Columbia, is the Enchantments. Not ten miles from Leavenworth, nestled among a formidable fortress of high rocky crags and glaciers is a collection of sapphire pools arrayed just beneath the clouds. Each year, a special lottery is held by the National Forest Service to allot backpacking permits to those wishing to visit the area. Only twenty-four people are allowed in the entire region per day to preserve the stunning yet fragile scenery.
Yet, the Enchantments are only one small sector of the sprawling Cascades, and every corner of its snow capped peaks and hidden valleys is filled with beauty and wonder. Skiing, hiking, fishing, rafting, and mountain biking are all within reach. Leavenworth offers a perfect base camp for exploring this wilderness, and a welcoming respite from the rigors of the United States’ own unique brand of alpine adventuring.
_________________________________
Leavenworth is an unorthodox experiment, but one which has become a marvelous success. Nowhere else in the country are the festive traditions of a Teutonic past so gracefully interwoven with a landscape of tranquil wilderness. It’s a strange combination, but one with great historic precedent, and any trip to the little hamlet in the hills will be an experience long cherished and fondly remembered.
Flurries of ruby and gold crowd the banks of a tranquil stream in the heart of autumn in the mountains. A frosty shroud of fog obscures the forbidden scarps higher up in the alpine vale. Fine Art Limited Edition of 200.